Sleeping on the job is the best reward
Issue 69 : Nov/Dec 2009
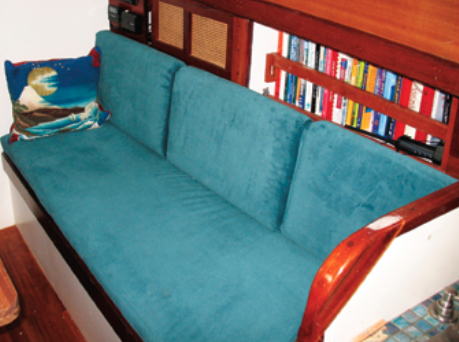
After a day of sailing in the Pacific Northwest’s heavy mists, I love rocking to sleep in a warm berth as Sirena rides to anchor. But for the last few years, I was the one tossing and turning as I tried to find a comfortable position. Like all weekend warriors, I preferred to blame my morning backache on my bunk instead of my years. The clerk at the local upholstery shop supported my thesis that bad foam was the culprit, especially since the cushions had been on the boat since 1979. Maybe it was time for some new ones.
I left the shop with 20 yards of fabric and enough foam to fill the back of the Explorer. A few days later, foam and fabric were once again stuffed into the SUV, this time as cushions for the saloon and V-berth. Although I’d never built boat cushions before, they fit perfectly because I applied a few essential secrets of working with foam.
What worries most people about making boat cushions is getting a good fit, especially since the spaces to be cushioned are typically confined on three or four sides. A cushion that sloshes around in its berth is simply “not yacht,” but by following a few tricks of the trade, anyone with basic sewing skills can make a well-fitting cushion.
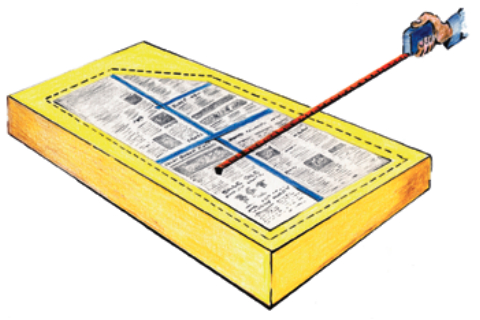
Step 1: Taking measurements
Measure the length and width of the space you want to cushion, then draw it to exact scale on a piece of newsprint. If the cushion is an odd shape, make sure you have the angles right. Now add 1 full inch to the total length and 1 full inch to the total width of the cushion by tracing around your draft template with a 1⁄2-inch margin. For example, if the spot measures 24 x 36 inches, your foam pattern will measure 25 x 37 inches. The extra inch will ensure that the foam will be slightly compressed within the cover and will therefore fill the cover out completely. Cut out this oversized pattern and take it to the foam shop.
Step 2: Cutting the foam
For settees and sleeping berths, I recommend a good quality 4-inch foam. For backrests, 2 inches of lighter foam is sufficient.
The supplier of the foam will usually cut it for you with an electric knife. If you end up doing it yourself, use your template to trace the outline of the cushion on the foam with a marker. Then, using an electric carving knife or a serrated bread knife, slice through the foam with long, smooth strokes. Don’t worry if the cut is not exactly smooth — concentrate on keeping the cut straight.
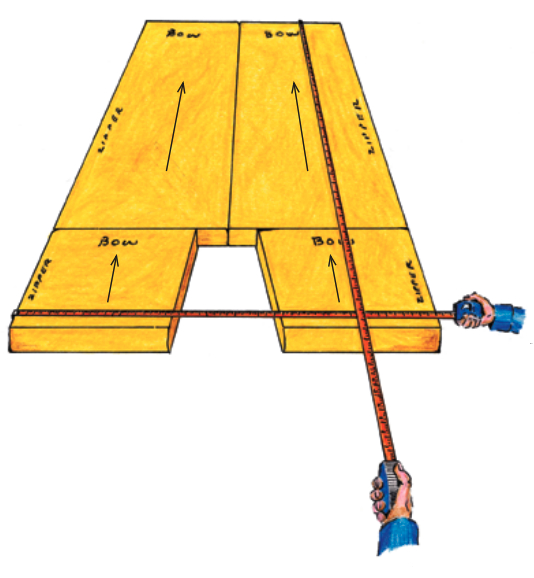
Take your uncovered foam pads to the boat and check the fit. They should fit tightly, perhaps even bowing up a bit because of the extra inch in length and width. With the pads in place, draw an arrow parallel to the fore-and-aft axis of the boat on the top of each pad with the arrow oriented toward the bow. Mark on the foam the side where the zipper will be — usually the least visible side. The arrows will help you lay out your fabric.
Step 3: Buying fabric
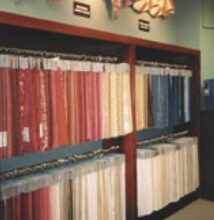
Boat upholstery should be functional and aesthetically pleasing. I prefer fabric that can be machine-washed. This eliminates olefin blends and fabrics with rubberized backings that add shape to loose weaves like the famous orange plaids found on so many good old boats. Fabric with a tight weave holds its shape and the seams will not pull out or unravel. Nylon, cotton, acrylic, polyester, and their blends usually hold up well and feel good on your skin. (For more on boating fabrics, see “The right interior fabric” in Good Old Boat, July 2004.)
Most shops will provide a small sample you can test in the washer. Many fabrics that say “dry-clean only” or “solvent-clean only” are, in fact, quite washable. Sirena’s cushions are made from a poly/nylon micro-suede that was labeled “dry-clean only.” However, the small sample I brought home for a trial wash came through the test with flying colors. It washes well, refuses stains, and looks as good as new even after many months on board.
To estimate yardage, lay the foam cushions out with all the arrows pointing the same direction. Arrange the cushions so the combined width does not exceed the width of the fabric you have chosen. Most upholstery fabric comes in 45-, 54-, or 60-inch widths. The overall length will give you the amount of fabric you will need to cover the tops of the cushions. If you plan to cover the bottoms with the same fabric, you will need twice that amount.
For the sides of each cushion, you will need two additional strips of fabric cut lengthwise, called “boxing.” For 4-inch foam, one boxing strip should be 6 inches wide and as long as the side of the cushion where you will put the zipper plus an additional 6 inches. The other strip should be 4 1⁄2 inches wide and as long as the other three sides of the cushion combined plus 6 inches. You can piece that very long strip together from your fabric leftovers if you want, but be sure to plan the seams for the corners of the cushion.
Note that the boxing strips for the sides of the cushion should be cut a total of 1⁄2 inch wider than the thickness of the foam. So for 4-inch foam, the boxing should be 4 1⁄2 inches wide. When you take your 1⁄2-inch seam allowance on each edge of the boxing, the finished width of the boxing will be 1⁄2 inch narrower than the foam. The result will be a slight crowning to the cushion, which is visually pleasing and physically comfortable. The boxing strip for the zipper installation is wider because you’ll use an inch of width with the zipper installation.
Everything else
You’ll also need to buy zipper pulls and continuous zipper stock, which is simply twill tape with zipper teeth that you buy by the inch, foot, or yard. Buy zipper stock the length of the cushion plus 6 inches and one zipper pull per cushion. The provider of these products should supply directions for making finished zippers from zipper tape and pulls. To avoid rust-stained cushions, buy zippers with plastic teeth (rather than metal ones).
Finally, don’t forget upholstery thread. It’s stronger and will keep the cushion seams from pulling out or breaking over time. These specialized supplies are available from Sailrite and also from many fabric stores.
It’s wise to buy an extra yard or two of fabric. You may want some throw cushions or you may make a mistake in cutting. You can save money by using a less expensive fabric, such as canvas, on the bottoms if the cushions will not be reversible. If you are using cotton fabric, preshrink it by running it through the washing machine and dryer before cutting.
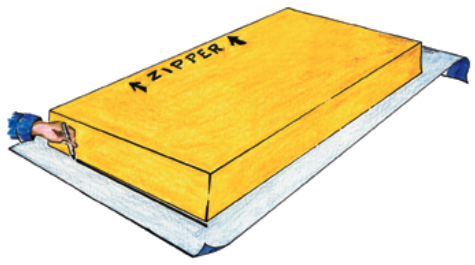
Step 4: Cut out the fabric
Lay the fabric out on a long counter with the wrong side facing up. Using the foam fillers as your patterns, place them on the fabric with the arrows following the lengthwise direction of the fabric. If your fabric has a nap or pattern, make sure that all the arrows are facing in the same direction. To cut the top cover pieces, lay the arrow side of the foam filler against the wrong side of the fabric and trace around the foam with a marker. Then flip the foam over so the arrow is facing up and trace around it to mark the bottom pieces for the cushion covers.
Label the pieces as you trace them. Lay out the boxing pieces for each cushion as well. Once you have all the pieces marked out on the fabric, cut them out on the traced line. DO NOT add seam allowances to the foam patterns. The foam is already cut oversize.
It’s a good idea, as you cut them out, to stack all the pieces for one cushion together with their foam. For a space that measures 24 x 36 inches, with a 4-inch cushion and a zipper along one long side, you will have a piece of foam that measures 25 x 37 inches. You also will have a fabric top and a bottom that each measure 25 x 37 inches and two pieces of boxing, one 6 x 42 inches and one 4 1⁄2 x 90 inches.
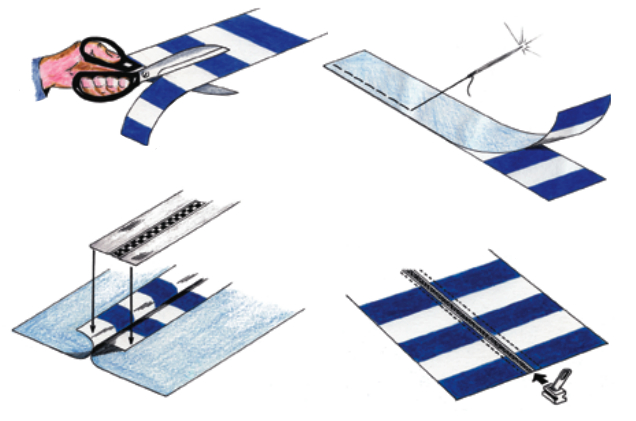
Lay the zipper right side down on the pressed-open seam and stitch it to the boxing.
Slit open the basted seam and slide the zipper pull into the zipper tape.
Step 5: Make the boxing
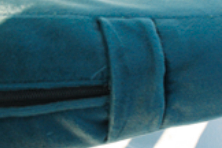
Take the wide boxing strip and cut it lengthwise in two strips that each measure 3 inches wide. Lay the two 3-inch strips together with their right sides facing inside and sew them down one long side with a 5⁄8-inch seam allowance using a long basting stitch, a temporary stitch meant to be easily removable. Press the seam open and center the zipper tape over the seam with the right side of the zipper tape face down on the pressed-open seam flaps. (The tape will be on the wrong side of the sewn-together strip of boxing.) Use a zipper foot to sew the zipper tape to the boxing through all layers.
Rip out the basting stitch in the seam so you can now see the front side of the zipper. Open the two pieces of zipper tape, insert the pull, and zip the strip closed, making sure to keep the ends even. Check the width of the finish zipper boxing and trim it to 4 1⁄2 inches if it is a bit oversize.
Now, take the other boxing strip and sew one end of it to the tail end of the zipper boxing strip (the end without the zipper pull) right sides together. Now you have one long strip of boxing that will go all around the cushion.
Step 6: Sew up the cover
Center the zipper boxing on the zipper side of the top piece, right sides together. Note that 3 inches of the zipper boxing will extend around the sides of the cushion. This is designed to make it easier to stuff the cushion. Pin the boxing all around the top cover of the cushion.
When you finish pinning, you will have some excess boxing. Cut off all but 3 inches of the excess. Unpin the boxing. Sew the two free ends together to make a continuous loop of the boxing part of the cover. The 1⁄2 -inch seam allowance will use up 1 inch of the excess you allowed. Now make a fold, 1 inch deep with the remaining two inches to cover the zipper pull and stitch that fold down across the zipper boxing.
Now pin the loop of boxing to the top fabric piece for the cover, right sides together, easing the boxing around the corners to fit. Sew the boxing to the top piece with a 1⁄2 -inch seam.
Note that with a 1⁄2 -inch seam allowance, the finished top and bottom each measure the same as the original measurement of the cushion space. The finished boxing will measure 3 1⁄2 inches, 1⁄2 inch less than the thickness of the foam at the sides.
Open the zipper. You’ll be working with a semi-finished cover that is inside out. Pin the bottom to the boxing, right sides together, being careful to align the top corners and bottom corners. Sew the bottom fabric piece to the boxing with a 1⁄2 -inch seam allowance and turn the cushion cover right side out through the open zipper.
Step 7: Wrap and stuff the cover
Your foam will last longer and your cushions will look better if you wrap the foam in polyester batting before stuffing. Buy enough batting to wrap the foam and secure it to the foam with aerosol foam adhesive (available at upholstery stores, many craft shops, and from Sailrite). Insert the wrapped foam into the cover; the foam will compress slightly to fill out the cover once you zip it up.
Now take the finished cushion to the boat and see how snugly it fits the space!
Mary Campbell lives in Olympia, Washington. She explored the San Juans and South Puget Sound and circumnavigated Vancouver Island on Sirena, an aluminum junk schooner built in British Columbia in 1979 and lovingly restored over a four-year period. Mary recently sold Sirena and bought a good old Cascade 36.
Thank you to Sailrite Enterprises, Inc., for providing free access to back issues of Good Old Boat through intellectual property rights. Sailrite.com