Doing a brutal job without the heavy lifting
Issue 92 : Sept/Oct 2013
If you own a good old boat you’ve no doubt had the dubious joy of working on its bottom. Perhaps multiple coats of bottom paint have started to peel and need attention. Or you have damage to the keel due to an inadvertent grounding. Or possibly you’ve faced the big one: blister repair. If you’re really unlucky, all three need attention. After all, it is an old boat.
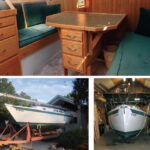
When I hauled Natasha, our 1978 Islander Bahama 30, to replace the engine, I thought it would be a good time to address the bottom. Blisters were apparent through very rough bottom paint. Years of added hard (and abrading) bottom paints had started to peel in spots. The old paint would have to be peeled off and the blisters repaired. The trouble is, I’m not in my 30s anymore and never was a weightlifter. Holding heavy tools over my head to repair the gelcoat was not going to happen, but boatyard prices were beyond my means. I had to come up with a better idea.
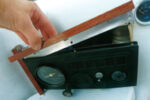
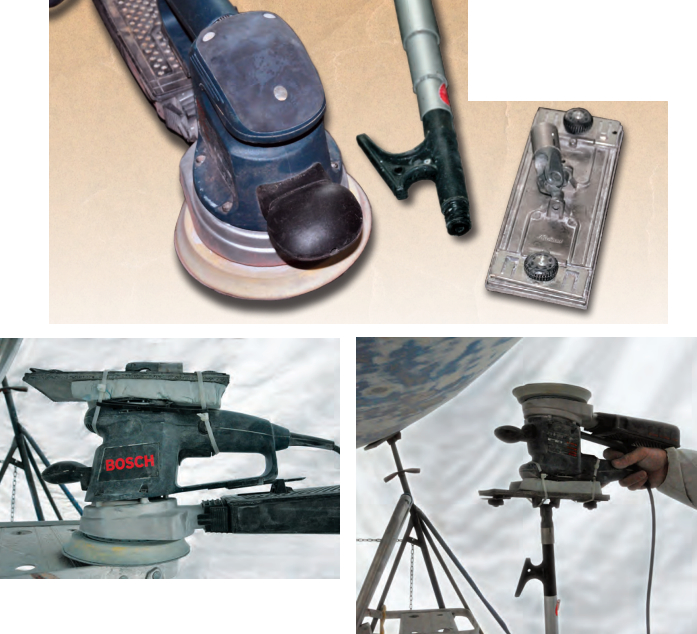
An inventory of the weaponry available to me turned up a Makita 4-inch grinder, a Milwaukee 4-inch belt sander, and a Bosch 6-inch orbital sander. I suspected the grinder and belt sander would rapidly remove more material than I wanted to with the potential of damaging the surface. The Bosch had speed control, would be less aggressive and, although slower, would leave a better finish. It was also lighter than the other machines, so it would be the tool of choice.
However, even the Bosch was more than I could hold over my head hour after hour working from 60- to 120-grit paper. It’s amazing how much area is involved in a 30-foot hull! I needed a way to support the weight of the sander without using my own strength.
Sander support system
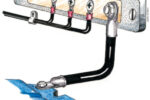
My solution included a 3-foot extending boathook pole with a threaded end, a heavy-duty metal pole sanding head with a universal swivel, a small block of rigid foam, and long nylon ties. The boathook (an adjustable sanding or painting pole would also work) needed to be short enough to fit under the hull. The pole sanding head needed to be strong enough to support the sander, so it had to be metal instead of the more common plastic.
The Bosch sander had a rounded top that was impossible to attach with any security to the flat surface of the sanding head. I carved out a hollow in the rigid foam block to fit the top of the sander so it could be supported, inverted, in the foam. I secured the sander and foam block combination to the sanding head with nylon ties. Once firmly strapped together, they formed a solid unit with very little movement between the parts.
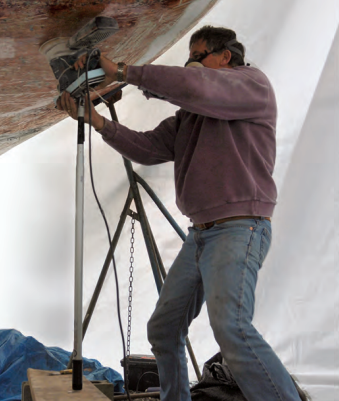
When I attached the boathook, I had an odd-looking contraption that didn’t appear to fit any function. However, once I placed the sander against the bottom of the boat with the heel of the pole on the ground, all I had to do was push the sander around, rather than hold it up while driving it around. By adjusting the pole length, I was able to compensate for differing heights under the hull. Playing with the angle between the pole and the hull allowed me to vary the pressure on the sandpaper.
To get even more sophisticated, I set a 2 x 8 between two cinder blocks and used this as the base for the pole. The flexibility of the plank made it possible to push the sander against the hull without having to worry about the angle. I could also vary the pressure against the hull by adjusting the length of the plank between the cinder blocks.
Although the job still entailed a considerable amount of work, this setup allowed me to prepare and finish the bottom myself. Boatyard prices will frighten any good old boat owner. Supplying your own labor is a great way to save money for the real essentials (like sails, electronics, and ice).
Bert Vermeer and his wife, Carey, live in a sailor’s paradise. They have been sailing the coast of British Columbia for more than 30 years. Natasha is their fourth boat (following a Balboa 20, an O’Day 25, and another Islander Bahama 30). Bert tends to rebuild his boats from the keel up. Now, as a retired police officer, he also maintains and repairs boats for a number of non-resident owners.
Thank you to Sailrite Enterprises, Inc., for providing free access to back issues of Good Old Boat through intellectual property rights. Sailrite.com