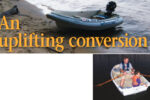
Safer egress from dinghy and water
Issue 95 : Mar/Apr 2014
A few years ago, we had friends out on our O’Day 32 Center Cockpit for a lovely warm summer daysail off San Diego’s Point Loma. The Pacific waters are cold most of the year and rarely warm up enough for swimming. My friend Paul asked if I had a boarding ladder, and I scrounged around for the old stainless-steel one I had hiding in a locker. We hung it off the starboard toerail and said, “It’ll do.” Paul strapped a line to the stern cleat and jumped in for a 5-knot tow while we were under sail. Eventually, the chill got to him and he waved for me to head the boat into the wind and stop her so he could climb aboard. Paul is a rather large man, upward of 250 pounds, very fit and healthy. We dangled in irons while he tried to board. After a considerable struggle, he was able to. Paul’s not a kid anymore, but the challenge he faced climbing back to safety caught us all off guard.
The lesson we learned that warm summer day was that our boat was ill-equipped for a man-overboard event. It surprised me that I hadn’t yet considered this scenario. I gave serious thought to what I could do to make the boat safer and more functional while also providing an easier pathway into and out of the water. We wanted to sail primarily to nearby gunkholing areas where we could anchor, a challenging proposition along California’s rocky coastline.
We needed a swim step to allow folks overboard to reboard and as a means of disembarking more easily for dinghy trips to shore. We thought a small aft-facing platform with no sharp edges and a retractable boarding ladder would expand our sailing horizons, making it possible to anchor, swim, stand, clean, and otherwise service aft regions of the boat.
Proportions and patterns
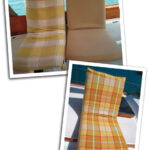
The first step toward that objective was to back the boat into the slip for measuring. We brought her in close so we could sit on the dock and get a feel for what we wanted. Using a large piece of cardboard for a pattern, we were able to trace the curvature of the transom and transfer that curvature to the shape of the small platform. We realized that we didn’t want the swim step to pose an obstacle to docking, so we made it narrower than the transom and tapered the shape. We could also see that it could not be allowed to stick out so far as to create a problem with maneuvering in tight spaces. Finally, we wanted a quality installation that was strong and clean-looking. When completed, it should look as if it had been manufactured and fitted as original equipment.
After the cardboard pattern was completed, we picked up a small piece of Masonite board and transferred the
pattern to it from the cardboard. Using a carpet blade, we cut the Masonite to size and ground and smoothed all the corners to create a perfect template for the material we would ultimately use for the swim step — StarBoard, a heavy and workable UV-resistant white plastic that’s available in sheets and with a non-skid surface. StarBoard is used for stern-rail seats and other applications that require a simple plane of durable material.
We bought a 2-foot x 4-foot, 1-inch- thick sheet of it from the local plastics distributor. I was surprised at how heavy a sheet this size was. We taped the Masonite to the StarBoard and used a Sharpie to trace the outline. (The Sharpie marks can be erased with isopropyl alcohol, if necessary, but they would be removed in the later cutting process.)
The next step was to have the StarBoard cut to the marked outline. This was handled by a friend with a good-quality jigsaw. The StarBoard cuts very easily and is very forgiving. After cutting was complete, we beveled the sharp edges with a router and curved bit. The challenge when cutting StarBoard is its tendency to melt. It’s important to apply pressure carefully when cutting or routing to avoid generating heat that melts the plastic.
We returned to the marina with the completed swim step and test-fitted it to the transom by holding it in place. StarBoard does not float, so we were very careful when handling it over water.
A sturdy installation
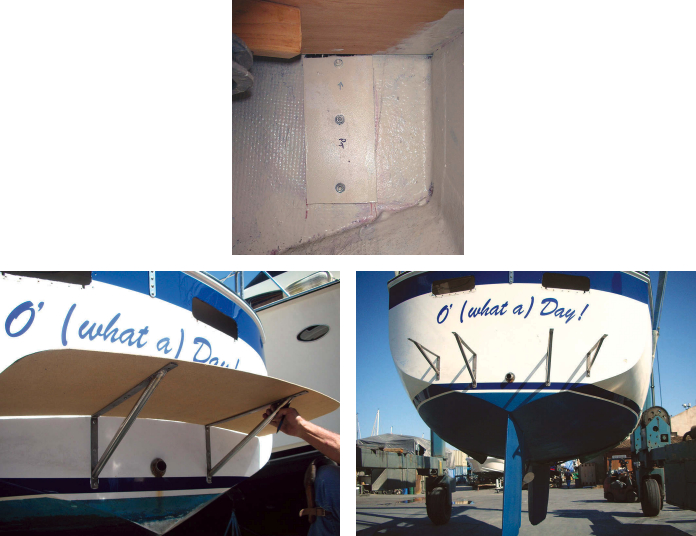
We now had to consider how to attach the platform to the vertical transom. We agreed to over-engineer this component by using large 90-degree brackets on either side of the centerline and two smaller brackets farther out. The Marinco 90-degree brackets fit the bill perfectly. Attaching the brackets with proper stainless-steel nuts and bolts would make the structure strong enough to endure almost any situation at sea or in port.
The timing of the swim step installation coincided with haulout at the local boatyard. Adding the swim step was the fun work for the haulout, the rest being the less pleasant tasks of painting the bottom and replacing through-hulls.
It was important for us to get the height off the water right — high enough to allow the dinghy to clear the step, but not so high that a swimmer could not reach it. We measured carefully and drew a horizontal line across the transom. We then drilled for the brackets and mounted them.
To create a strong bond between the bracket and the transom, we used small square plates of 3⁄8-inch StarBoard inside the transom as backing plates for each bracket. We sealed these in place with white marine silicone sealant and ratcheted the brackets to the transom until sealant squeezed out around the edges. The combination of sealant and StarBoard backing plates created a firm structural bond that allowed the bracket to become one with the hull and prevent seepage later on. This was an important consideration because the
brackets were so close to the waterline.
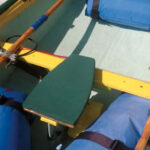
The next step was to place the StarBoard step atop the transom-mounted brackets and get a feel for how snug it should be against the transom. We decided a 1⁄8-inch space would allow water and other materials to clear the surface. We didn’t want organic material to be able to accumulate in the corner and stain the platform and the transom.
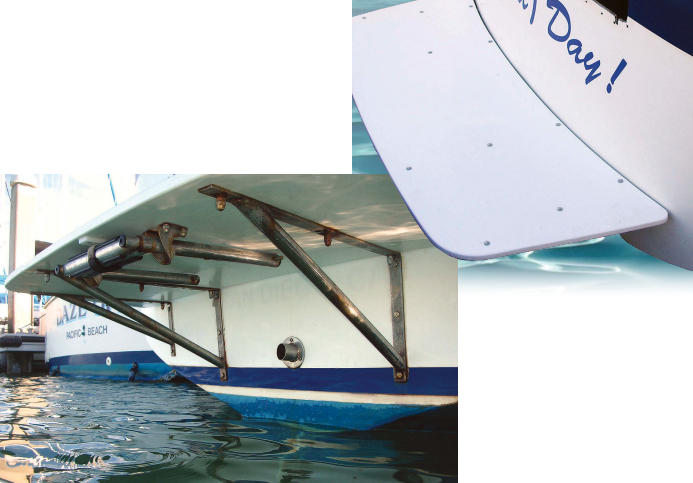
A ladder for boarding
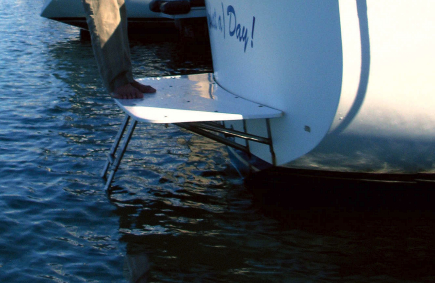
The final piece of the swim step was a proper ladder We wanted the type that fits beneath the platform rather than on top of it so people could sit comfortably on the swim step or walk on it barefoot without stubbing toes. The Garelick “Out of Sight Under Platform Telescoping Ladder” was the perfect solution. It’s not so bulky that it gets in the way and a swimmer can safely grab it from the stowed position, drop it into the water, and climb aboard. I was very lucky when one came up on eBay and I got it for a song.
The mounting nuts and bolts for all connecting points had to be well thought out and measured. We used acorn nuts under the swim step so no sharp threads could damage the inflatable dinghy or create a hazard for swimmers. We drove flathead bolts through the top of the step so we would barely feel them underfoot.
With her new swim platform and ladder, O’ (what a) Day! feels like a whole new boat to us, and better suits our boating lifestyle. It is now easier for us to get to and from the boat when we’re away from the slip, we feel safer with our step and ladder in place, and we enjoy the added versatility of boarding and departing in the dinghy.
Walter Gaines is a lifelong sailor. Originally from Lakeland, Florida, he lives in Desert Hot Springs, California, and works in the field of automotive safety cameras. He divides his spare time between restoring O’ (what a) Day!, an O’Day 32 Center Cockpit, and sailing her on San Diego Bay.
Thank you to Sailrite Enterprises, Inc., for providing free access to back issues of Good Old Boat through intellectual property rights. Sailrite.com