Contact cement is the key to speed
Issue 95 : Mar/Apr 2014
My bottom was in trouble, and I don’t mean my boat’s bottom. The daggerboard trunk on our 8-foot El Toro dinghy was doing its best to work its way into places that are better left unmentioned. The dinghy’s thwart is very narrow and the dagger-board trunk that connects to it (and supports the “overflow” of my ample and tender behind) is even narrower. I wound up with a major wedgie every time I took to the oars. Something had to be done.
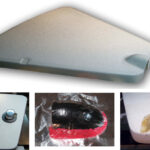
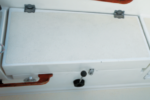
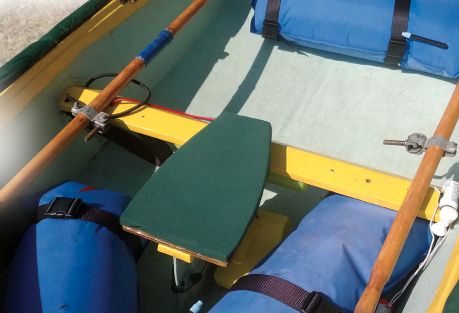
I fabricated a small rowing seat out of two pieces of 1⁄2-inch plywood. I cut the seat surface in the shape of a truncated triangle about 10 inches long by 8 inches wide and attached a vertical fin to the bottom of the seat with screws and epoxy. The fin drops into the daggerboard slot and holds the seat in place.
No more wedgies! The seat was wide enough and relatively comfortable but in need of cushioning. I had some 1-inch closed-cell foam on hand for a cockpit-cushion project. I cut off a small piece for the dinghy seat and attached it to the seat surface with 3M Dual Lock tape, an industrial hook-and-loop material. I could have glued it with contact cement, but I had a roll of the Dual Lock on hand and liked the idea of making the cushion removable.
The seat worked well with the little cushion, but raw foam should be covered. I had some Sunbrella fabric I scored at a great price a few years ago on eBay. I had already used it to replace three sail covers and to make a pop-top enclosure for Chiquita, our Venture of Newport, but I still had more than enough for the cockpit cushions and dinghy seat.
Glued, not sewn
I cut out a piece of the Sunbrella fabric about 2 inches bigger than the outline of the seat surface. I laid the Sunbrella flat on my living room floor (on top of newspaper layers to protect the wood floor) and used a disposable chip brush to paint a thick coat of liquid contact cement on the entire inside surface of the Sunbrella as well as the whole top and sides of the cushion. I also painted the glue on the bottom of the foam in a 1 1⁄2-inch swath around the perimeter. Then I waited about 20 minutes for the glue to dry.
There’s a trick to contact cement. After both surfaces have been coated, they should be allowed to dry to the touch. That is counterintuitive: how can the glue hold if it’s dry and doesn’t feel sticky? But two surfaces
coated with this glue and left to dry will bond instantly and tenaciously on contact. It’s usually a good idea to cut Sunbrella fabric with a hot knife to keep the edges from unraveling, but that was not really necessary for this project. The contact cement does an excellent job of keeping the edges from fraying.
Once the surfaces were dry, I made sure the Sunbrella was spread out perfectly flat (glue side up, of course). I then carefully laid the foam cushion in place. The canvas instantly bonded to the foam. I wrapped the excess neatly around the edges and bottom of the foam. Because the cushion was slightly rounded, I had to fold some small pleats in the fabric on the underside of the cushion to accommodate the curves. I added some glue to the pleats and folded them over to stick to the bottom out of sight. I could just as easily have cut small wedges, or darts, out of the fabric on the bottom and glued the remainder down.
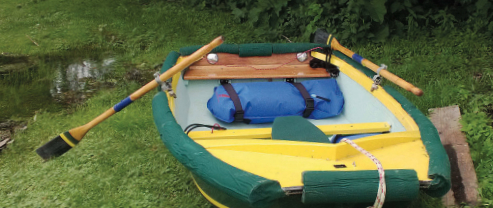
I was astounded at the results! The surface of the cushion was perfectly flat, not a wrinkle anywhere. It looks great on the dinghy and rowing out to our boat at the mooring is no longer the excruciating ordeal it had become.
Thinking bigger
I was admiring my handiwork after an afternoon excursion when I got to thinking I could use the same upholstery technique on larger projects . . . that unfinished pair of cockpit cushions, for example!
I had wanted cockpit cushions for a long time, but kept putting off making them. I had accumulated the fabric, the foam, and the thread. I had even made cardboard patterns of the cockpit seats and cut the foam to shape with an electric carving knife. And there the project stalled.
I just couldn’t bring myself to start the upholstery. I was intimidated by the seeming complexity of getting the Sunbrella cover to be a good fit around the foam.
I’m no stranger to the sewing machine. I broke down and bought a Sailrite machine a few years ago. I’ve made three sets of sailcovers for Chiquita’s jib, staysail, and main over the 36 years she has owned me. I’ve also made two complete pop-top enclosures, one cockpit enclosure, and numerous bags, covers, and so on. But I had developed a mental block about the cushions. Even after I bought the Sailrite instructional DVD about making cushions, I still lacked confidence. So I was very eager to see if my newly discovered “contact-cement method” of upholstery could produce a serviceable and decent set of cockpit cushions.
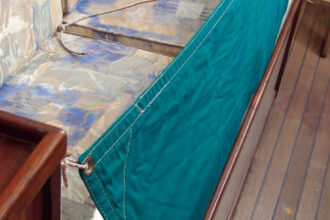
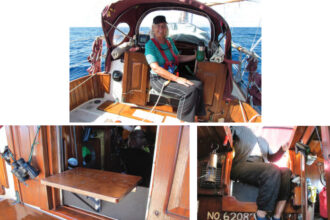
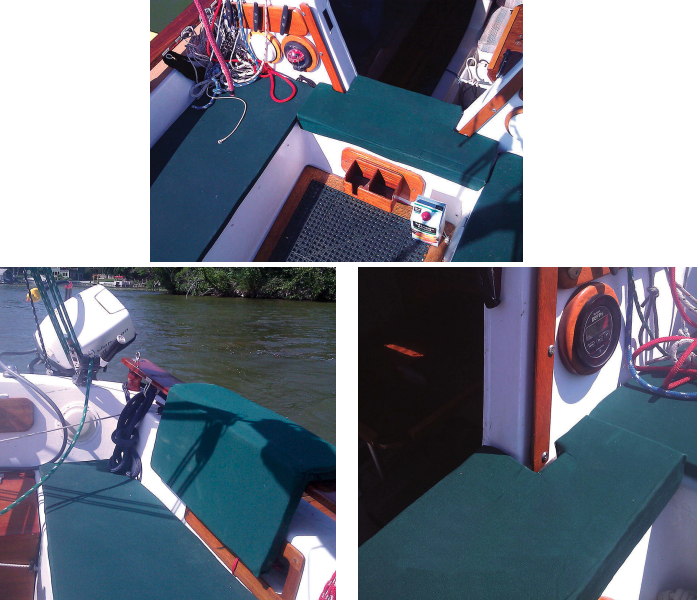
I’m happy to say they turned out even better than I had hoped, and every bit as good as the dinghy seat. I followed the same procedure and got the same results. The closed-cell foam I used is only 1 inch thick, so it’s not particularly comfortable for sleeping on. It’s even a little bit hard for long periods of sitting. But it is better than bare fiberglass seats. I chose closed-cell foam because it’s weatherproof, can be left out in all conditions, doesn’t have to dry, floats if it is blown overboard (which it has never done), and the kids can use the cushions as floats when swimming. I also wanted the cushions to be fairly hard so they would not “squish” and cause me to lose my footing when I jump from cabintop to cockpit seat, something I have to do after I release the mooring pendant from the bow every time I go out singlehanded.
Multiple Sunbrella projects
I’ve used the cushions for two seasons and they still look brand-new. I’m tempted to add another softer layer of foam to the cushions this winter. I’ve learned that gluing the fabric directly to the foam keeps it from shifting when stepped or jumped on. I’ll laminate a layer of softer 1⁄2-inch foam (from a pair of $10 sleeping pads for campers) directly to the tops of the existing cushions with contact cement. I plan to glue them right over the existing Sunbrella without removing it.
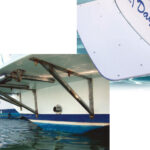
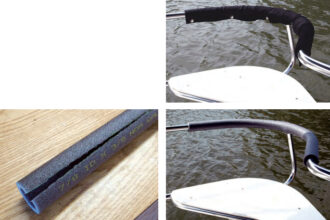
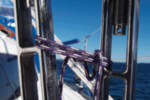
This contact-cement method for making almost-instant cushions is ideal for use on closed-cell foam and for outdoor projects. I even made a pair of J-shaped backrests that slip over the cockpit coamings. Then I used contact cement, Sunbrella, and several foam pool noodles to make a very effective soft rubrail/bumper that goes entirely around the dinghy. I want to make new cabin cushions as well, but I’m not sure this method will work with open-cell foam or with an interior fabric that’s much more porous than the outdoor Sunbrella. I’ll try using several coats of 3M spray adhesive rather than the liquid contact cement. It’s a worthy experiment.
It looks like I’ve got some projects lined up for the coming winter!
Henry Rodriguez sails Chiquita, his 1974 23-foot Venture of Newport cutter on Minnesota’s Lake Minnetonka. He has been her caretaker for more than 35 years and has repaired, replaced, or modified just about every part of her. Chiquita has taken Henry, Marie, and their two girls (now in their thirties) on adventures on both Lake Superior and Lake Michigan. Henry and Marie are now raising three grandchildren and were thrilled to take them, with Chiquita, to the Havasu Pocket Cruisers Convention in Arizona in February 2013.
Thank you to Sailrite Enterprises, Inc., for providing free access to back issues of Good Old Boat through intellectual property rights. Sailrite.com