To peel or not to peel?
Issue 97 : Jul/Aug 2014
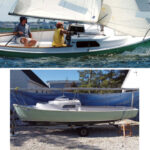
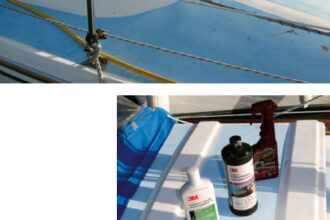
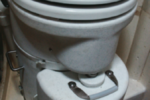
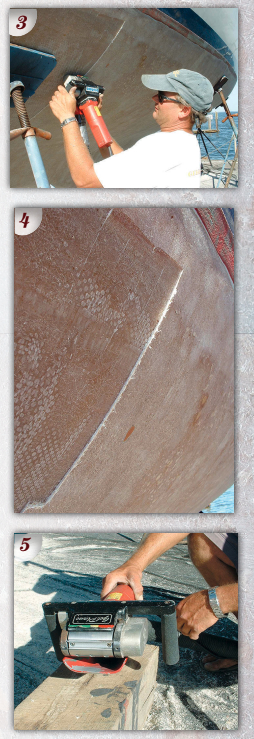
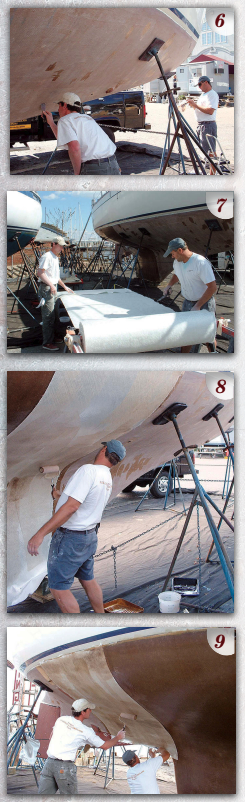
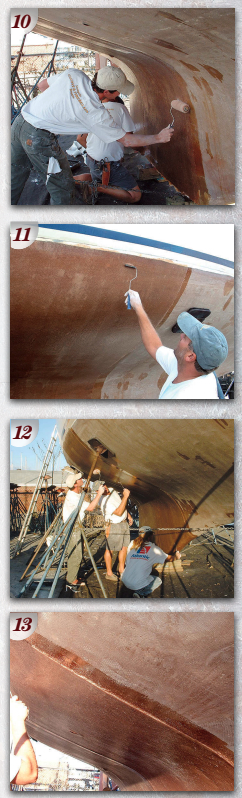
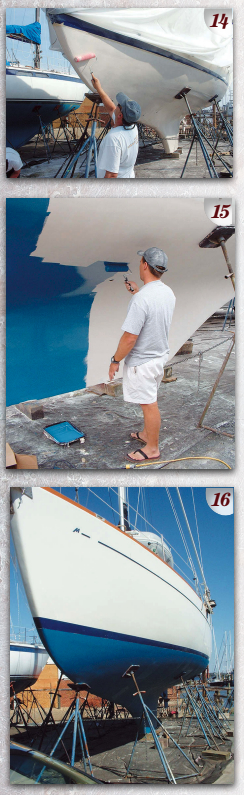
The photos on these pages illustrate a complete six-layer laminate peel and replacement using biaxial cloth and vinylester resins followed by an epoxy barrier coat. This project was completed in just a week by Todd’s friends at the Annapolis Gelcoat Company. It resulted in restoring 100 percent structural integrity to a hull that had been very badly compromised by a severe case of osmosis.
Ever since the early 1980s, when the phenomenon of fiberglass hull blistering became widely apparent, the dilemma many boat owners have had to face is “When is blistering a problem and how bad does it have to be before a repair is necessary?” Thankfully, one of the most amazing things about fiberglass boats is how easy it is to undertake extensive repairs and have the results of those repairs leave you with a hull that’s just as strong as when the boat was new, or even stronger.
One of the most common hull repairs, and certainly one of the most controversial, is blister repair. The controversy stems first because these hull repairs are often precipitated by negotiations during the sale of a boat and second from a number of misconceptions about the implications of osmosis and the resulting degradation of a laminate structure.
The condition of the bottom is frequently an issue that prevents an older fiberglass boat from selling after a survey and sea trials have been completed. If the pre-purchase survey report points toward the need to undertake a proper and potentially expensive repair to a bottom due to osmosis, this finding may be challenged by the broker, the owner, the buyer, or the contractor. The conflict is likely to center on the best way to accomplish a suitable repair. This difference of opinion can ultimately lead to compromises that result in an ineffective repair being undertaken.
A blister repair done incorrectly can result in a badly degraded or weakened hull laminate. This can cause excessive flexure of the hull, may allow the osmosis to continue to degrade the laminate and, in some cases, might actually weaken the structure of the hull even more than if it had been left alone . . . while the boat owner is under the impression he or she has “fixed” the problem. To put it another way, an improperly repaired bottom may ultimately lead what was in reality only a cosmetic repair to become a much bigger problem for the owner years later.
However, if a repair is properly accomplished, there is no reason a hull cannot recover all of its original strength and rigidity or become even better than new through the use of state-of-the-art materials and procedures that were not available when the hull was originally built.
The osmosis process
Osmosis is a term used within the marine industry to refer to the ingress of water molecules into a fiberglass laminate structure. The resulting chemical breakdown of the laminate creates a blister through a process known as hydrolysis. Blisters can form between two layers of gelcoat or between the gelcoat layer and the first layer of laminate. Blisters of this variety can, after the laminate has dried thoroughly, be dealt with by a simple cosmetic repair. Often these blisters are tiny, the size of a pencil eraser at most, and can be widespread over the wetted surface of a hull.
Left alone, however, small blisters can lead to a breakdown in the first layers of laminate. At this stage, slightly larger blisters form, up to the size of a dime or so, in the first layer of laminate.
Typically, the first layer of laminate on most hulls is chopped-strand mat. This is used because it has excellent “hiding” properties and can lessen the possibility of print-through to the gelcoat finish from subsequent layers of woven roving as the hull ages. Unfortunately, chopped-strand mat is a less-than-perfect “sponge.” If it was not well wetted out during layup, a close inspection years later may reveal that it is full of small air voids that — through osmosis — have become full of water.
Chopped-strand mat unfortunately exhibits a propensity to transmit any moisture present within its structure to the laminate below. Even at this stage, this first layer is largely non-structural and, in many cases, provided the hull was heavily built and the mat has not significantly degraded, it may be possible to remove the gelcoat, thoroughly dry out this first layer, spot-fill any blisters and voids, then simply protect it with a barrier coating and bottom paint.
Even if the first mat layer is heavily compromised but the underlying structural laminate turns out to be sound, removing this first thin mat layer and making sure that new exposed laminate is dry and fair may be enough to provide a suitable foundation on which to apply a barrier coating and bottom paint. This may be all that’s necessary for a satisfactory repair.
Deeper trouble
Sometimes, however, removing this first layer reveals a more advanced stage of osmosis: additional pockets of moisture and compromised, or hydrolyzed, laminate. In this case, provided that the damage is localized to a reasonable number of specific areas, it may be acceptable for these blisters or voids to be ground out, the proper laminate be replaced (not with body filler or epoxy putty!) and, once thoroughly dry, the bottom be barrier coated.
The bad news, particularly with vessels that have spent many decades in the water, is that removing the first layer of mat could reveal many areas of high moisture content. These have formed because air voids within the woven roving layers that were not properly wetted out during the construction process have become filled with water. In this case, a laminate profile should be taken to determine the extent of the ingress of moisture and progression of the resulting osmotic degradation.
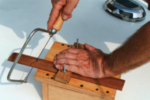
A laminate profile is accomplished by carefully grinding a small area of the bottom and removing layer after layer until good undamaged laminate is found. Once the number of layers of damaged fiberglass has been determined, a repair can begin with the removal of those layers with a fiberglass planer.
It’s a simple job to cut out and lay-up new layers of cloth to restore the hull to its original thickness and structural integrity. Using some of the new biaxial cloths and vinylester resins, followed by an epoxy barrier coating, may provide a decades-long or better-than-new repair.
Misconceptions about osmosis
We’ve all heard the boat owner in the yard claim, “My old such and such has never had a blister.” However, if you take a look at some older hulls, you’re likely to find massively crazed gelcoats that are unable to form a blister because they are thin and brittle, and underlying laminate structures so porous a blister simply cannot form.
It’s important at this point to bring up some misconceptions that continue to float around the waterfront.
Misconception #1: These old hulls were built so thick you could lose half the glass and she’d still be plenty strong. Also see Misconception #2.
Misconception #2: These old hulls had (twice, three, pick a number) times as many layers of glass as they needed. They just overbuilt them because they didn’t know how strong the stuff was.
It is true that most older fiberglass designs had fairly thick hulls, but that’s because they were often patterned after wooden boat designs. The architects and engineers had to stipulate the use of many layers of laminate so the weight distribution would be similar to that in the wooden designs they were mimicking. In order to float correctly on their lines they had to weigh as much as their wooden sister ships. Because the architects and engineers knew that the structural characteristics of the laminates were substantial, they believed the thickness of the laminates alone, combined with a few full or partial bulkheads, would provide enough rigidity. Developments such as cores, ribs, and stringers came later.
When these hulls were new, and if they had no large flat sections or unsupported panels, they could indeed be quite stiff. As time went on and the material was better understood, however, it became evident that fiberglass laminate structures, even if not compromised by osmosis, began to become “softer” and less rigid when flexed repeatedly over time. The use of cores made of balsa or foam helped control flexure considerably. Other manufacturers addressed this problem through the use of stringers and floors (transverse stiffeners) rigidly glassed into the hull structure to bring the flexible nature of fiberglass better under control.
Some manufacturers “floated” bulkheads, allowing the hulls to flex and move within a fairly wide range. The “internal grid structure” so common today was a mass-production-driven development that allowed a builder to make a hull even thinner by making the interior furniture and cabin sole supports (floors) integral to the structural stiffness of the hull.
This means that on an older hull, built with thick laminates and having no significant flat sections, the loss of structural integrity of some of the outside layers of the hull might be considered as insignificant. In many cases, if a bottom on one of these boats develops minor blistering of the outside layers of laminate, a thorough drying of the structure and spot repairs made to the areas of the hull where blisters had formed may be enough of a repair to be considered structurally sound. This is especially true when followed by a state-of-the-art barrier coating. On a more modern thinner hull or one of cored construction, however, the rigidity of the structure must be more carefully considered when making a plan for a proper osmosis repair. In many cases, a peel and relamination of the hull is the only acceptable solution.
Misconception #3: Balsa or foam cores in the hull can’t transmit water into the adjacent core, even if holed.
If the hull is a cored structure, it’s vitally important to confirm that moisture has not migrated into the core material of the hull. Despite all of the engineering papers written in the early years of cored hull construction claiming water could not intrude laterally in a cored laminate, we’ve made more observations over time. We know that if water molecules do indeed infiltrate a cored area — particularly one of organic material such as balsa — moisture can travel extensively throughout the adjacent area and may, depending on the extent or severity of the ingress, lead to a very expensive repair.
Because of this potential complication, if a cored hull is being considered for repair, in addition to performing a laminate profile, it’s wise to also take core samples in order to accurately assess the integrity of the underlying structure.
Misconception #4: Those little cracks in the gelcoat don’t mean anything.
It is true that, especially on some of the older heavily built boats, a gelcoat crack may not necessarily point to a structural weakness. However, as gelcoats age, they often shrink and produce cracks. It is vitally important with any of the newer hulls having large flat sections to take a laminate hardness profile of a hull that has extensive gelcoat cracks or crazing. If flexing is occurring, telltale cracks often show up in the area of bulkheads, stringers, or floors. On more modern boats, the internal grid structures may become separated or show spiderweb cracks in the inside surfaces where the grid unit joins the hull. All these things point to a possible softening of the laminate structure due to osmosis. In cases like this, the only way to restore structural integrity is to remove the weakened laminate and replace it.
Testing for integrity
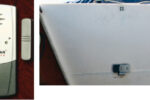
When trying to determine the structural integrity of the fiberglass laminate you have exposed for repair, a valuable tool called a Barcol meter will determine the rigidity of the laminate structure. This instrument has a tiny metal probe that’s forced against a laminate to give a reading of the laminate’s relative hardness. Readings of less than 25 on the scale of the instrument are generally considered to be too “soft.” Readings above 45 are considered to be “brittle.”
This is an oversimplification, as certain types of resins and composite structures have characteristics that
could hedge the higher “cutoff” figure, but the lower figures are of the greatest interest to note when deciding where to stop when peeling a boat for a relamination with new cloth. Even if low moisture readings are encountered after removal of a layer or two of laminate, a Barcol test should be performed.
Note that, if a boat is left to dry for a period of years in a yard following many decades of immersion and a severe case of blisters, the material may read “dry” on a moisture meter because it has lost all its resin content. Laminating on top of this heavily degraded material would be a waste of money. If financially viable, all compromised or weakened laminate should be removed when trying to restore a boat’s original integrity.
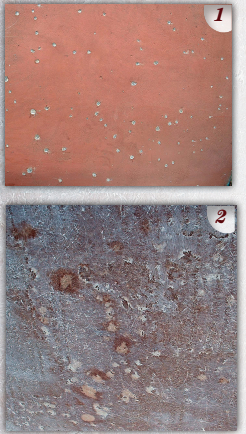
Thankfully, water absorption through the layers of an underwater surface due to osmosis is so slow it can take decades before extreme procedures are necessary. It is not unusual, when performing a laminate profile, to find that the laminate immediately under the gelcoat looks whitish and has high moisture content. A layer down from this, the laminate may be much darker and moisture content may have fallen significantly. Often, the next layer down shows readings that are all quite normal and a fairly non-invasive repair may be sufficient.
Repair options
After conferring with contractors and surveyors about the best way to undertake a proper repair, and in order to ensure the best possible outcome, it is very important to be certain that — no matter what method or to what extent the issue is addressed — the end result be a dry, hard, and fair bottom with no structural weakness. Using state-of-the-art materials may ensure a long-lasting repair. Under no circumstances should anyone be happy with simply grinding out wet blisters, filling them with putty, and slapping a barrier coating over a bottom that is not thoroughly dry and sound.
Removing and replacing fiberglass laminate is a straightforward procedure that should not be daunting or unnecessarily expensive. Many new tools are available for the removal of old laminate or gelcoat, and any of the large marine wholesalers can provide the materials needed to rebuild a hull.
If your boat has blisters, you might be lucky enough to find that it needs only a drying out, spot repairs, and a barrier coating. Less luckily, you could learn that your boat needs a full peel and relamination. In either case, however, provided you follow proper procedures and accepted up-to-date industry methods, your money will be well spent and you will be secure in the knowledge that you have restored your boat to its original structural integrity.
Todd Duff is an accredited marine surveyor and writer/photographer from the Virgin Islands. Todd and his fiancée, Gayle Suhich, are currently on a 6-month cruise in the South Pacific aboard their 50-foot Flying Dutchman cutter Small World II. The Line Islands, Cooks and Samoa, Tonga, and Fiji are on their list of destinations.
Thank you to Sailrite Enterprises, Inc., for providing free access to back issues of Good Old Boat through intellectual property rights. Sailrite.com