. . . solve line-leading issues on a multilevel deck
Issue 100: Jan/Feb 2015
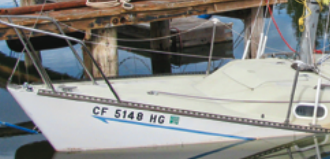
Even in our younger days, my wife and I tried to make living and working aboard our cruising boats as easy as possible. This is even more important as we grow older. To make sail handling easier on our Down East 45 brigantine schooner, Britannia, I changed all five sails to roller furling. I also wanted to route all the control lines — furling lines, sheets, and outhauls — to our center cockpit so we wouldn’t have to go forward to furl or reef in inclement weather or rough seas. This resulted in 12 lines passing along the deck into the cockpit, in two rows of six, not counting the five sheets that route to cockpit winches in the normal way.
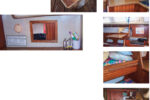
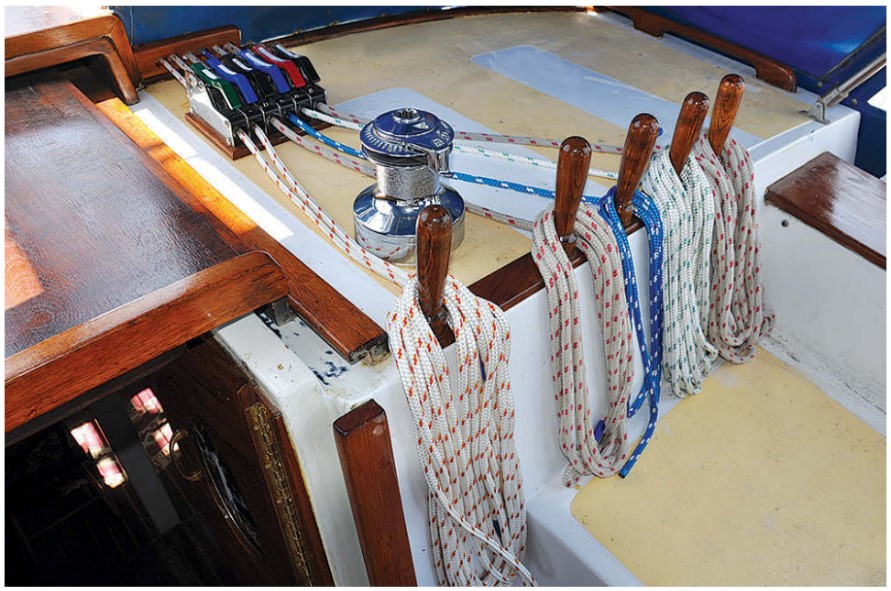
By any standard, that’s a lot of lines, but I knew how I would handle them once the lines arrived in the cockpit. I made wooden fairleads to guide them through the dodger to two banks of rope clutches with six rope clutches in each. I bought clutches with color-coded levers from Garhauer Marine and taped the names of the lines on the individual clutch levers. The lines pass into the cockpit on either side of the companionway where it’s easy to reach and operate the clutches. Then they feed to two Lewmar 30 self-tailing winches and are coiled around a row of belaying pins to prevent tangles. This is now called “the rope deck.”
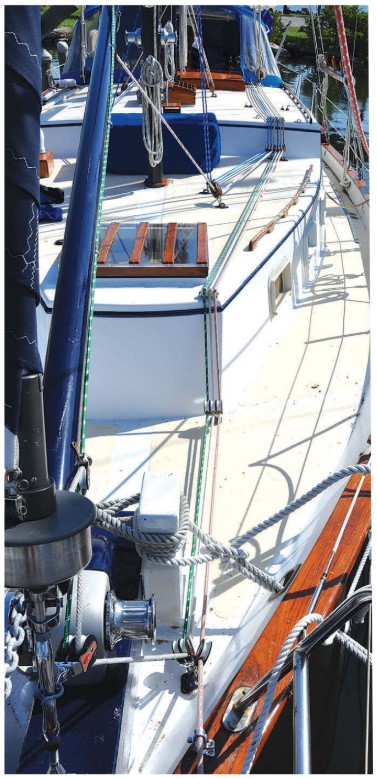
None of this was difficult to plan, and the fairleads, clutches, winches, and pinrails were not difficult to make and install, but one significant problem remained. The Down East 45 has three deck levels: the foredeck, the forward coachroof deck, and the saloon coachroof deck. To reach the cockpit, lines had to be brought up from one level to the next. The jib and forestaysail furling lines and the staysail outhaul were the longest. These had to lead down to the foredeck then over both coachroof levels to the cockpit.
Up and over
Bringing lines down from aloft and along a deck is easily done using blocks anchored to the deck along with line organizers. But routing lines up and over the edge of a coachroof requires what is commonly called an “over-the-top block.”
Over-the-top blocks are available from a few suppliers, including Garhauer and West Marine, for about $55 for a single sheave and $85 for a double. Nobody seems to make more than a double-sheave combination and if you have 12 lines, that works out to be an expensive exercise.
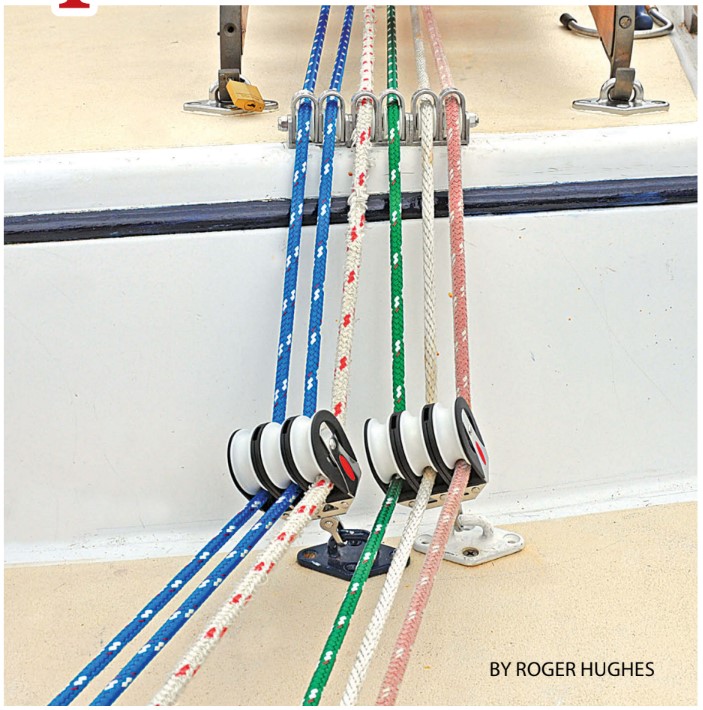
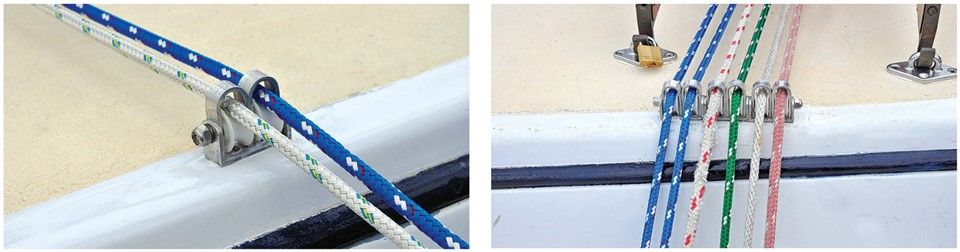
In any case, all the over-the-top blocks I could find used sheaves with diameters of 2 inches or larger. This results in the lines running about 3 inches clear of the deck and the very serious possibility of someone (me!) tripping over them. I wanted my lines as close to the deck as possible. I tried using bulls-eye fairleads with stainless-steel inserts. These are about $6 each but are only intended to deflect lines through small angles. They’re often used to route roller-furling lines from one lifeline stanchion to the next. Still, I decided to give them a try and screwed six to my deck, but the nearly 90-degree up-and-over angle resulted in a lot of friction with a good chance of rapid chafe, especially for those lines that must rise up two deck levels.
Then I discovered that Ronstan made an acetal sheave only 1 3⁄32 inch in diameter, yet wide enough to handle up to a 1⁄2-inch line, for $3.95 (part number RF128). As three of my lines are 1⁄2 inch and the rest are 3⁄8 inch, this small sheave would work with all my lines.
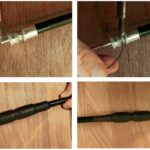
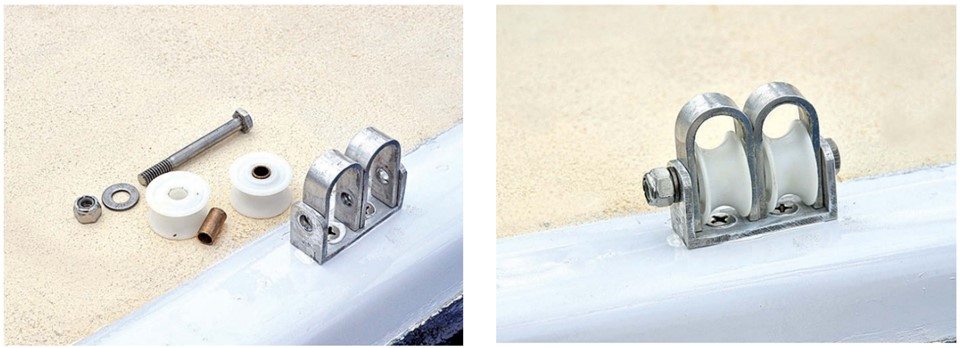
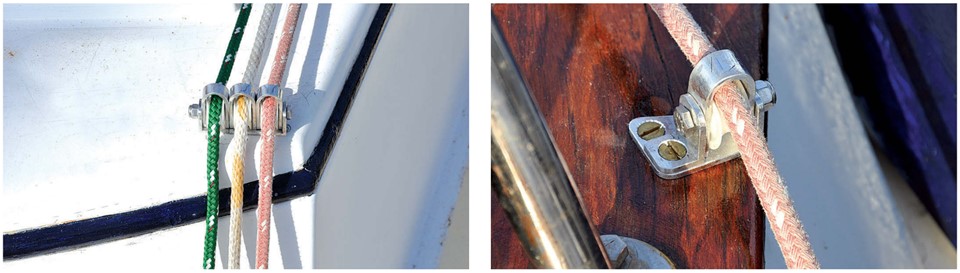
I decided to make my own over-the-top blocks. They are very simple in design. The sheaves are held in a short length of channel and arches over the sheaves prevent slack lines from jumping off.
Tools and material
I made my over-the-top blocks by hand, using hand tools that most do-it-yourself boaters probably have. It’s not rocket science, but some of the operations do require careful measurement and accurate drilling. It was not difficult to do this, and it’s gratifying to see the finished product working so well on my boat, especially considering the cost savings over commercial over-the-top blocks.
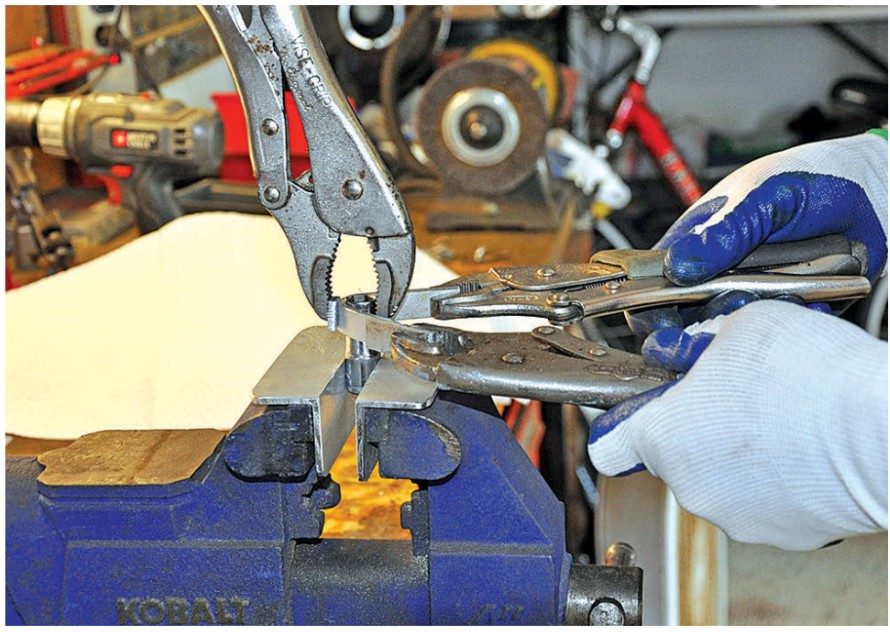
The tools I used were a caliper gauge for accurate measuring, a sharp scribe for marking, a strong vise with aluminum soft jaws, three Vise-Grips, and a 5⁄8-inch-diameter mandrel that I bent the strips around to form the arches. (In my box of 1⁄2-inch sockets, I found a socket that was exactly 5⁄8 inch diameter, but any 5⁄8-inch round stock would work.)
Using a drill press beats trying to drill holes accurately by hand. The more precise the marking and drilling, the better chance the sheaves will turn smoothly. It’s therefore worth investing in a new sharp 1⁄4-inch drill bit, preferably the type with a pilot point. These drills are easier to center by eye and they leave an almost burr-free exit hole. A countersink bit is another important tool for this work, and a deburring tool and a file are essential for cleaning up raw edges after drilling and sawing.
I would have preferred to have made the blocks of stainless steel, but cutting and accurately bending and drilling even 1⁄8-inch stainless steel was beyond my capability with the equipment I have. Instead, I used aluminum, and it proved quite satisfactory.
I made the bottom channels from a 12-inch length of 1⁄8-inch aluminum channel that’s 2 inches wide and has 1-inch-high sides. I made the line-retaining arches from a 48-inch length of 1⁄2-inch x 1⁄8-inch aluminum strip I obtained from my local aluminum supply shop for $15. I needed one row of six sheaves, a row of three, one of two, and a single, but most sailboats won’t need that many and would therefore require less material.
Aluminum can be hand-sawn easily with a hacksaw blade with 24 teeth per inch, but I also used a miter saw with a 10-inch-diameter 60-tooth carbide-tipped blade that cuts through aluminum like butter and leaves a very straight clean cut.
Making the bottom channels
The channel was wide enough to hold two sheaves and their arches. I needed five of these two-sheave blocks, so I cut five 1-inch-wide pieces of channel to form their bases.
Accuracy when drilling the holes in the uprights, or legs, of the channel for the axle was critical. It might be possible to use a hand-held electric drill, but it was much easier and more accurate with a drill press. I marked both legs of the channel 3⁄4 inch from the bottom outside of the leg and centered. I drilled a 1⁄4-inch hole at these marks from both sides of the legs. This hole position allows the sheaves to rotate clear of the bottom of the channel by 1⁄16 inch, so the lines exit the tops of the sheaves at the very lowest point, about 1 inch off the deck.
Next, I drilled and countersunk two 1⁄4-inch holes in the bottom of the channel on the centerline and 5⁄8 inch in from each side. These were for the attachment screws beneath the sheaves. As a final finish to the channels, I rounded the square sharp corners of the legs with a flat file.
Line-retaining arches
To form the arches, I cut the 1⁄2-inch aluminum strip into 5-inch lengths. This is longer than needed, but the extra length gave me leverage when bending them around the mandrel. I clamped the mandrel hard in the vise, marked the center of a strip, centered it on the socket, and clamped it to the socket with a Vise-Grip. This was to ensure that the aluminum strip would bend evenly around the mandrel in a perfect half circle — unclamped it would bow upward and not form correctly. I also cut some lengths of strip to clamp between the Vise-Grips and the material to prevent them from cutting into the aluminum and to keep the legs of the arches straight.
I then carefully pulled both legs around the mandrel. It was quite easy with Vise-Grips clamped to the legs to extend the leverage. I could only bend them so far before the Vise-Grips came together, after which point I squeezed the two sides further with just one Vise-Grip until they were parallel and formed a perfect arch. Then I sawed the legs of the arch off square, 15⁄8 inch from the top of the arch. Using a round file and sandpaper, I rounded the top inside edges of the arches a little to prevent chafe on the line. A Dremel tool with a round sanding drum would also be good for this purpose.
Each arch was now 7⁄8 inch wide, so two were a perfect snug fit in the 1 3⁄4-inch inside width of the channel.
With both arches centered in the channel, I clamped the assembly in the vice and, with an electric drill, carefully and dead level, drilled either side of the arches through the hole in the channel leg. I then reversed the arches and, making sure they were centered in exactly the same position, re-clamped them in the vise and drilled through the other side. At this point, it was possible to push a 2 1⁄2-inch-long 1⁄4-inch bolt straight through the channel and both arches, pinning them together.
Here, I have a couple of tips for anyone making these blocks. First, don’t be tempted to try to drill straight through both arches — it is very unlikely you will be level using a hand drill. If your measuring or drilling has not been accurate enough to make it possible to push a bolt through, ream the holes level by carefully running a 1⁄4-inch drill through. I discovered some unevenness when assembling my row of three channels to make the six-sheave block, but I ran a 1⁄4-inch drill through the whole lot and they worked perfectly when bolted together.
Sheaves and bushings
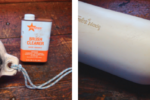
The Ronstan sheave has a 5⁄16-inch center hole and no ball or roller bearings. I therefore bought some small 5⁄16-inch bronze bushings from Ace Hardware for $3 each. Lowes and Home Depot also sell them. These fit perfectly inside the sheaves and reduce the hole diameter to 1⁄4 inch. Unfortunately, they’re only available in lengths of 3⁄4 inch, so I had to carefully saw and file 1⁄8 inch off one end to make them 5⁄8 inch long to fit snugly inside the arches. The sheaves rotate on the bushings and the bushings rotate on the bolt, giving an almost friction-free roller-bearing surface for the sheaves. If a sheave didn’t rotate completely freely, it meant the bushing had become distorted while being shortened or needed to be deburred.
Assembly and attachment
To fix the channels to my fiberglass deck, I used 3⁄4-inch-long #12 flathead self-tapping screws that finished flush with the bottom of the channel in the countersunk hole. I screwed these directly into the deck and bedded them with 3M 4000 adhesive sealant. It did not seem necessary to bolt these blocks through the deck as you would for a deck eye, because when the lines are under load they press the assembly down to the deck, rather than pulling it upward. It was, of course, necessary to fix the channel to the deck before assembling the sheaves, then assemble the rest in situ.
Just before this final assembly, I put a dab of winch grease on the bolt and bushings, but not on the bushing-to-sheave surface. I positioned the sheaves and bushings inside their arches, pushed the arches into the channel, then passed the bolt through the whole lot and secured it with a thin washer and Nyloc nut. I found it best not to tighten the bolt too much but allow some play in the bearing surfaces so everything rolls freely.
Combinations
Joining three two-block assemblies to make a neat row of six was just a matter of passing a 6-inch bolt through all three assemblies. To make a multi-sheave combination, I found it was best to bolt them all together without the sheaves or arches, position them where I wanted them on the deck, mark the centers of the attachment holes, and then drill the holes for the fasteners.
I also needed a three-sheave block and a single-sheave block. To make the three-sheave block, I cut one leg off a channel, then made a corresponding half channel to butt against it. A 3 1⁄2-inch bolt goes straight through all three sheaves, locking them together, then a fastener beneath each secures them to the deck.
The single sheave leads the jib furling line down to the foredeck so it can be routed up and over the forward coachroof and the saloon coachroof. This block was also made using half a channel, but it has a different shape so I could screw it to the toerail. I secured a small half channel with one of the screws to fix it to the toerail. A 1 1⁄4-inch bolt fastens the assembly together.
These combinations demonstrate the versatility of this method of making over-the-top blocks. There’s no reason why the blocks could not be assembled in larger combinations as needed. To give them a really professional-looking finish, the individual pieces can be polished on a bench grinder with a large polishing wheel and a graphite applicator. The aluminum will shine up like chrome.
Practical and inexpensive
My over-the-top blocks work marvelously and with considerably less friction than the bullseye fairleads I tried in my first experiment. The lines look very neat running close to the deck, and there is much less risk of tripping over them.
The total cost in materials was under $120 for 12 blocks, or about $10 for each control line. This is quite a savings compared to buying commercial units for about $500. This does not count my labor, of course, but on boats that’s supposed to be a pleasure . . .
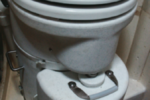
Roger Hughes has been sailing for nearly half a century as a professional skipper, charterer, restorer, and frequent imbiber aboard lots of boats, including square-riggers. His latest project is refurbishing a rundown Down East 45 and re-rigging it as a brigantine schooner with a beautiful unique roller-furling square sail on the foremast and a few other “inventions,” like his over-the-top blocks and a hot tub in the owner’s head. See more of the projects Roger has been doing at www.schooner-britannia.com.
Thank you to Sailrite Enterprises, Inc., for providing free access to back issues of Good Old Boat through intellectual property rights. Sailrite.com