It began with reclaiming space from in-deck storage
Issue 112: Jan/Feb 2017
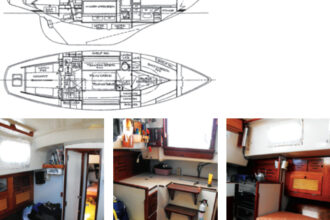
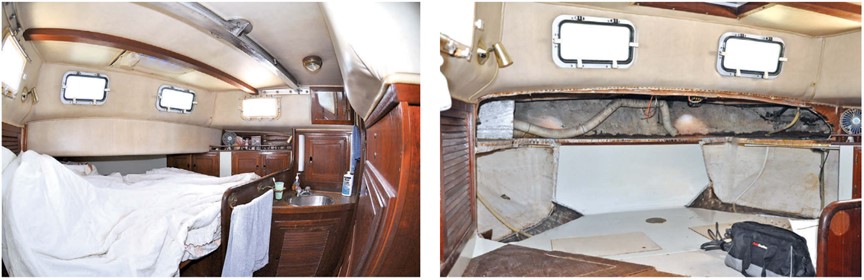
Our Down East 45 has a large aft cabin with an attached en-suite head compartment. Entry to this cabin is by way of a passageway through the galley on the starboard side. As Britannia carries her beam well aft, this cabin is quite roomy — 10 feet 6 inches at its widest and 9 feet fore and aft. The head compartment contains a toilet, a shower, and a full-size bathtub.
Unfortunately, the layout of this cabin was not optimal. Across half the berth, which stretched the width of the cabin, headroom was restricted to only 15 inches by a pair of deep lazarettes molded into the aft deck. In addition, a small stainless-steel wash basin was built into a corner on the port side of the cabin, adjacent to a partial bulkhead that stretched halfway across the bunk.
This particular detail mystified me; why install the washbasin in the cabin rather than in the head? And anyone sleeping on that side had to scramble over the bulkhead and basin to get into and out of the berth. Also, small lockers fitted on either side, beneath the lazarette, could only be reached by lying on the bed, and their doors were set so low they would not open when the berth was made up.
The accommodation plan for this cabin had clearly been subordinated by the concept of traditional lazarettes. These were “glory holes.” On every boat I have seen that has them, they have been full of anything and everything. Ours included a propane tank lying on its side (which I considered dangerous because if the tank leaked, gas would seep into the cabin). Both lazarette hatches leaked, leaving the locker contents often sitting in water.
I didn’t like this setup from day one, but I could see the potential for a very nice owner’s stateroom with an attached head compartment with a bathtub. It just needed a bit of remodeling.
Demolition
The obvious first objective in remodeling this cabin was to make it possible for two people to sleep side by side in the berth without having to climb over each other to get in and out. This meant removing those intrusive lazarettes. Easier said than done.
Because the lockers were an integral part of the deck molding, the job entailed two full and very dusty days of hacking through multiple layers of plywood and fiberglass with a powerful reciprocating saw backed up by a couple of sharp chisels and a big hammer. This was followed by another couple of days trimming the rough cuts and permanently sealing the two deck hatches with fiberglass and resin. Thankfully, that stopped the leaks.
In the cabin below, I further opened up the area by removing the useless little lockers at the foot of the berth. When everything was finally removed, the cabin was considerably larger. I then dismantled the silly little “un-stainless-steel” washbasin, along with its vanity stand and partial bulkhead. I cut away the door to the head, together with its frame and bulkhead.
Restoration
I repositioned the head door and bulkhead at an angle so a washbasin could later be installed inside the compartment, as in any normal bathroom.
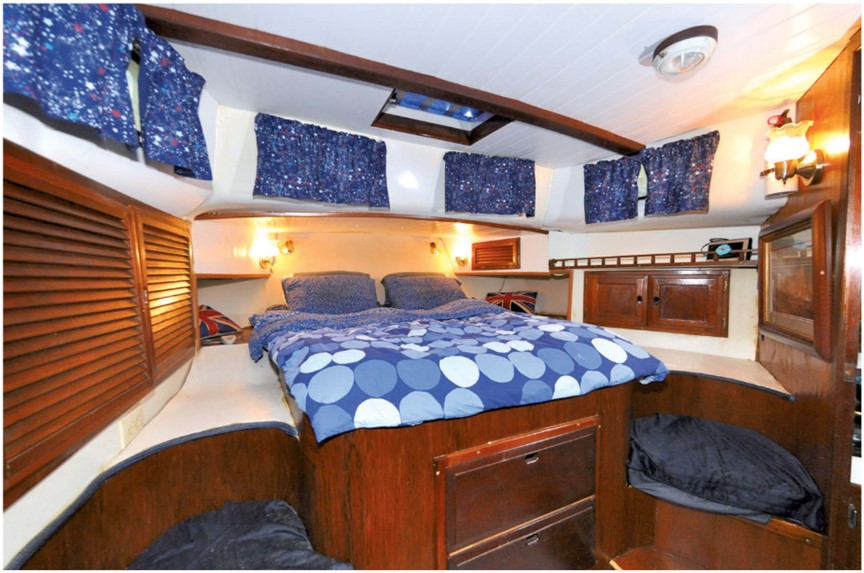
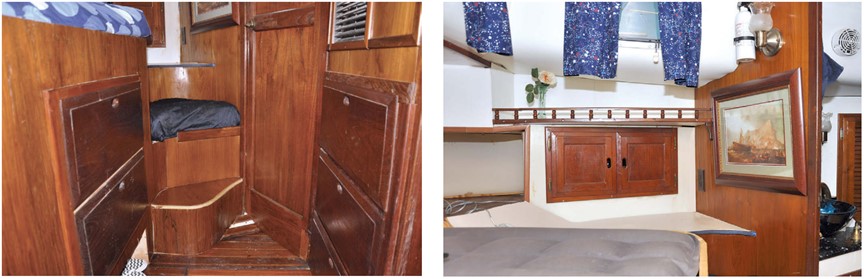
Because the rudder stock, steering quadrant, and hydraulic autopilot ram are beneath the berth, the mattress is 3 feet above the cabin sole. Climbing into and out of the berth was difficult at the best of times. I solved this problem by tapering the foot of my new berth framework to allow enough room for me to build, on each side of the bunk, a bucket seat that doubles as a step and makes it very easy to get into and out of the berth. The new bunk measures 6 feet wide at the head (king size), 4 feet wide at the foot, and more than 6 feet long.
Next, I built the curved bucket seats on each side of the bed by laminating together three layers of 1/16-inch plywood, which I could bend easily enough individually to form the seatbacks. Reusing the old cupboard doors, I made new lockers to go above the seats and, above the lockers, shelves that I edged with traditional teak pinrails.
The aft cabin had a bank of five large drawers built into the rear of the engine room. I would not normally have touched them, but I needed a space to install an air conditioning unit for the aft part of the boat. (See “Time to Chill,” May 2016.) Removing two of the drawers gave me the space I needed and, rather than lose the drawers, I incorporated them into the space under the bed. It’s quite marvelous how, with a bit of ingenuity, space on boats can be reconfigured. In this case, I actually gained 3 square feet to install the AC unit.
Over the course of this project, I used a lot of wood left over from other projects on board. I did end up buying a 4- x 8-foot sheet of teak veneer from Ovisonline.com to finish the curved seats and cover all the exposed plywood edges.
The veneer was easy to cut with scissors, and I glued it in place with contact adhesive, taking great care to place it correctly the first time. Contact adhesive allows little opportunity for adjustment, especially on larger areas. After one coat of clear satin varnish, the result is a very pleasing, uniform appearance.
Collateral damage
By removing the lazarettes, I exposed the unfinished inside of the transom. I covered this surface with a sheet of plywood covered with vinyl foam on one side, then ran wires for 120-volt and 12-volt dual-voltage reading lights and sconce lights.
Also left unfinished after I’d removed the lazarette was the overhead. To cover this area, I used Ever-True PVC interior wainscot panels from a big-box home-improvement store. They are tongue-and-groove plastic panels, 7 1⁄2 inches wide by 8 feet long, that lock together and were easy to screw to the overhead. I trimmed the exposed edge with teak.
I accidently tore the original foam-backed vinyl cabin-side liners during the dismantling work, so I made cardboard templates and replaced them with Plas-Tex pliable plastic sheeting, which comes in 4- x 8-foot panels and is waterproof and washable. I glued it to the sides of the boat with contact adhesive.
On the port side, I incorporated a locker with a solid door to house 50 feet of chain and rope for a stern anchor.
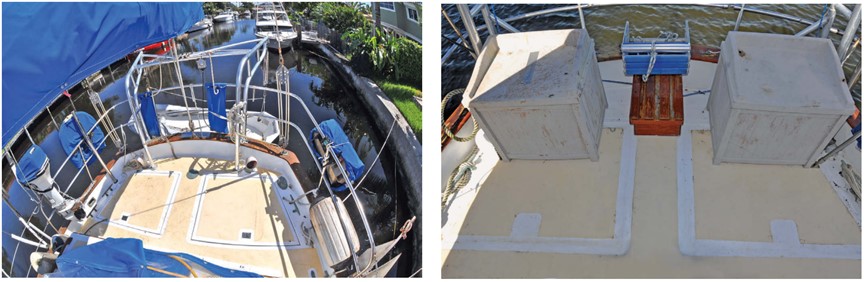
Of course, in removing the lazarettes I sacrificed deck storage and had to decide where to stow the propane tank. I found two plastic seat boxes of the type used on patios and fastened them to the deck, cutting the base out of one so it could carry the gas bottle in an upright position. Most important, the tank is now completely separate from the cabin and any leaks will vent to the atmosphere. The total capacity of the boxes is only a little less than that of the lazarettes, and they make nice seats on the aft deck.
Comfort
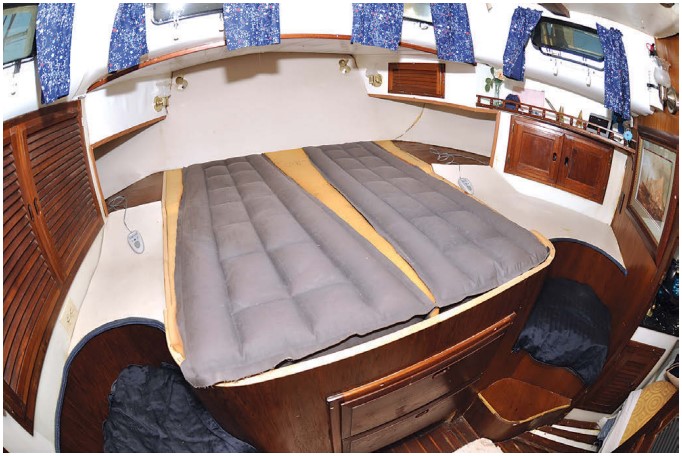
The old mattress foam had lost its support and — even when supplemented with an extra 2 inches of new foam — was horrible to sleep on. I like a soft bed, but my wife likes more support, so I accommodated our individual preferences by installing two commercial air mattresses, like those used in hospitals.
Unlike foam, air mattresses are non-absorbent, lightweight, easy to deflate and remove when necessary, and fully adjustable for firmness. They are 2 feet wide, 6 feet long, and 5 inches thick. I surrounded the mattresses with strips of foam that abut the tapered sides of the bed framework and keep everything in place.
The mattresses can be inflated and deflated independently with the 120-volt compressor that came with them. Twin controls on the compressor also allow the firmness of each mattress to be adjusted individually. A 120-volt system obviously works when we’re on shorepower, but will also work at sea when the inverter is on. It’s not a big power consumer because we rarely adjust the pressure. My wife, Kati, and I agree, this is one of the most comfortable beds we have ever slept on anywhere — on land or at sea.
Kati sewed drapes for the four portlights, adding a nice homey touch to the cabin.
This cabin is what I now call a stateroom. It has space to move about in and dress and somewhere to sit when either of us needs a bit of peace. As a final touch, I am looking for a couple of portlights I can mount in the transom.
The renovation cost surprisingly little, considering it was a total transformation of the principal sleeping cabin. The biggest element was labor.
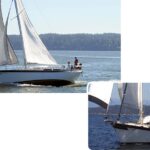
Roger Hughes has been sailing for nearly half a century as a professional captain, charterer, restorer, and happy imbiber on a lot of boats. His present project, the restoration of Britannia, a once run-down Down East 45, is nearing completion after five years. (Roger thought it would take two at the most.) Roger and his wife, Kati, look forward to cruising later in 2017 and using all the innovations he has incorporated into the boat, many of which have been featured in Good Old Boat. To see more of Roger’s ideas and innovations, visit his website at www.schooner-britannia.com.
Thank you to Sailrite Enterprises, Inc., for providing free access to back issues of Good Old Boat through intellectual property rights. Sailrite.com