A drop-in refrigerator delivers the cold
Issue 104 : Sept/Oct 2015
Whether to have an icebox or a refrigerator on a sailboat has always been a difficult choice, especially on a small boat with limited space and power. While wanting to keep things as simple as possible with the rebuild of my 27-foot 1975 Albin Vega, Blue Max, I was pretty sure I wanted refrigeration if I could figure out how to make it fit.
I have no experience with refrigeration, so it had to be easy to install. In looking at the options at boat shows and online, it seemed that I would have to hook up a bunch of parts. I wasn’t sure what I’d end up with. I could have hired someone to install it, but the price would double at a minimum. I also considered using a portable refrigerator that didn’t have to be installed, but where could I store it?
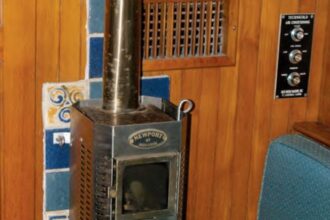
While researching the portables made by Engel, I came across the MB40 Drop-In model with a 42-quart capacity. It had the simplicity of a portable but was designed to drop into a hole cut in the countertop. That seemed very appealing and, at at less than $1,000, so did the price. I decided to give it a shot.
The Engel Drop-In comes with the condensing unit attached to the bottom of the box with sheet metal screws. The Engel website shows models with this unit either attached or detachable. I couldn’t tell the difference between the two from the pictures. The model with the detachable condensing unit has two coiled copper lines inside a single insulated cover between the condensing unit and the box. These can be uncoiled, so the unit can be up to 6 feet from the box. Of course, they don’t tell you how stiff the copper tubing is and how easy it would be to kink or that the condensing unit has to remain in the same “top up” position no matter where you mount it. That last piece I had to confirm with a technical support representative because it would have made things so much easier had that not been the case.
In spite of those two difficulties, the Engel unit offered a lot of advantages. It works with 12 or 24 volts and power consumption is comparatively low at between 0.7 and 2.8 amps, even at startup. It can also be inclined up to 30 degrees and handle vibrations in extreme conditions . . . you know, a typical day on a sailboat.
More “slide-in” than “drop-in”
On Blue Max, the companionway divides the galley. The sink and icebox are to starboard. I considered putting the refrigerator in a different location, but I would have lost precious space. That meant using the existing icebox space. Unfortunately, it wouldn’t be as simple as taking out the icebox and dropping in the Engel. However, I had gutted the interior of the boat and was replacing all the bulkheads and counters, and that did make installing the Engel somewhat easier than it might otherwise have been.
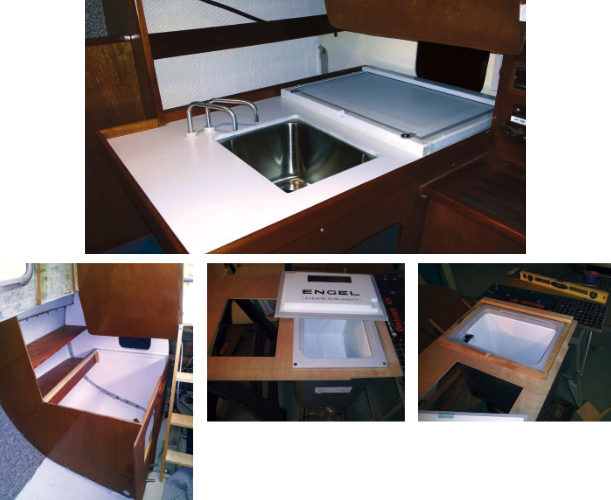
The countertop to which the icebox was connected sits partially below the cockpit with roughly 12 inches of space above the counter. While access to the icebox was easy enough, dropping the Engel through the counter cutout with the new counter already in place would have been impossible. To complicate things, the counter was about 2 inches too low to allow me to leave the condensing unit attached to the bottom of the box.
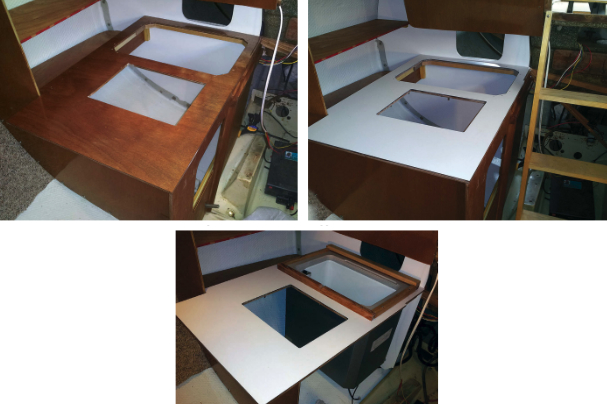
In building out the new counter, I went with a slightly smaller sink, giving me a little added room for the wider Engel. As the first step, I installed both new bulkheads and the cupboard above the counter. That gave me the back and both ends to support the combined countertop with the Engel installed as I maneuvered it into place. Having the countertop separate from the galley framework allowed me to suspend it between a couple of sawhorses while I configured the four corners where the Engel is screwed to the counter. To provide more support, I epoxied wooden stiffeners around the cutout on the underside of the countertop.
Securing the lid
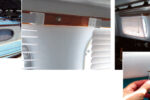
The one really quirky thing about the Engel Drop-In is that the lid isn’t attached in any manner. It just sits on top without a good seal. This requires that, after installing the box, you have to install a support system on all four sides for the lid. You also need to come up with some type of fastening system to hold the lid in place in rough conditions or the occasional knockdown.
When I designed the lips around the lid, I cut the aftmost lip, which is under the cockpit, so that a section of the wood extended about 1⁄2 inch over the lid for the length of that side. The overhang requires that I slide the aft portion of the lid down first, then push it aft so the forward portion of the lid can slide into place. A small semicircular cutout in the forward lip provides a way to grasp the edge of the lid and lift it back up. The lips create a firm contact point for the seal that surrounds the edges of the lid and make a nice tight fit. The final touch was finding some teardrop-shaped flat acrylic pieces about 1 inch long that could be screwed to the top of the forward lip. These are easy to turn so they overlap the lid and keep the front edge from coming open in rough conditions.
A delicate maneuver
Once I had the Engel attached to the countertop, the next big challenge was to get the countertop in place with the box hanging from it. At this point I needed some additional help. I could have done it by myself, but it would have been a major ordeal, especially as I had to disconnect the condensing unit.
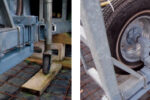
On my Vega, the aft bulkhead sits between the galley and the cockpit locker and extends to the companionway opening. While I would later build additional supports and panels to enclose that area, it was still open with enough space for me to slide the condensing unit past the aft bulkhead so it could be mounted in the cockpit locker against the aft bulkhead. Slowly unbending the copper tubing and moving the condensing unit around the bulkhead while remaining stuffed in a small, cramped space was an exercise in patience and slow, deliberate movements. Perhaps I should mention that I’m 6-feet 2-inches tall.
As noted earlier, the condensing unit, if separated, has to be mounted in the same orientation as it was when attached to the box. Well, the only provision for attaching the condensing unit to anything is on the top. Had I been able to mount the condensing unit on its side, I could have bolted it directly to the bulkhead. Furthermore, the condensing unit is air-cooled, so it needs to be in a location with good air circulation.
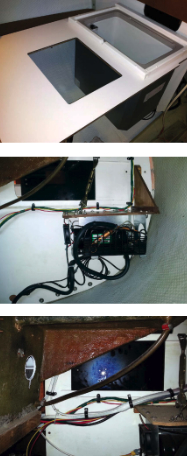
A sliding door is built into the bulkhead just above the counter in the galley to give access to that area of the cockpit locker. This meant I had to create a shelf that didn’t block the sliding door on top or the airflow around the condensing unit below. I also didn’t want to drill any holes into the fiberglass, so my options were limited. My solution was to attach a piece of plywood in the shape of a right triangle to the bulkhead as an attachment point for the outer end of the shelf. For the inner end, I used a turnbuckle connected between the shelf and the bulkhead to provide upward pressure against the wooden strip between the shelf and the cockpit seat. This design allowed me to create a very sturdy shelf without drilling holes into the cockpit or blocking the airflow around the condensing unit.
Once I had dealt with the condensing unit, I slowly moved the countertop and box into place, taking care not to kink the copper tubes. Once it was in place, I connected the Engel to the battery to confirm that it still functioned properly. It did.
Having a box that large provided some challenges when installing the sink and connecting it to the discharge through-hull, but the biggest was the confined space I had to work in. I was able to add a small shelf and cubby behind the through-hull that should help keep stuff from piling around the through-hull valve and ensure that it will be accessible.
Engel claims that the MB40 Drop-In provides “efficient cooling independent from ambient,” along with being solar compatible. While I’m not sure how I’m going to test the first part, I can say that the box cools down quickly, maintains the cool temperatures for a relatively long period of time after the box is powered off, and does a six-pack proud. One more on my long list of projects is complete as Blue Max takes shape.
Ric Maxfield started sailing in 1970 when he was in the Marine Corps stationed at Kaneohe Bay, Hawaii. He now lives in Southern California and got into larger boats in the late 1990s while sailing at Orange Coast College School for Sailing and Seamanship and Club Nautique. He has delivered boats up and down the west coasts of California and Mexico, from the British Virgin Islands to Florida, and across the South Pacific. The Vega is the first sailboat he has owned outright and it should see some long-distance cruises of its own.
Thank you to Sailrite Enterprises, Inc., for providing free access to back issues of Good Old Boat through intellectual property rights. Sailrite.com