Getting a grip on a tired molded-in deck surface
Issue 117: Nov/Dec 2017
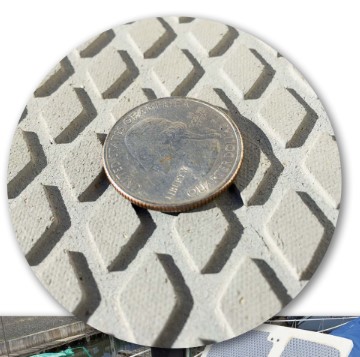
My 26-foot Paceship, Pelorus, was built with non-skid molded into the deck in a cross-hatch pattern rather like a gun grip. Lots of boat decks have similar molded patterns. When new, these non-skid surfaces may have actually worked. However, they lose their “grippiness” as they age. That’s not a good thing.
One time, on only the second day of my summer cruise, my foot slid out from under me while I was lowering my sails in a moderate chop. That had happened before, but this time it hurt, and one side of my foot swelled up like an egg. My friend Gene, an emergency-room physician who lived near my destination on Long Island, diagnosed it as a broken bone, one of the long bones on the side of the foot. “Ice it down and strap it up with an Ace bandage,” he said. I limped around for a few weeks, but I was on my sailboat, living the dream. That incident did make me think that there must be a better way to keep my feet on deck where they belonged.
The most obvious and least expensive solution was to paint the deck and sprinkle something like crushed nutshells or sand on the wet paint. Friends of mine have done this and it works well, though it can look unattractive if the sand or ground shells are not evenly distributed. That part wasn’t so easy to do, they said.
Teak was revered for its non-slip qualities by old-time sailors, who tended to go around barefoot. At the Annapolis sailboat show I found a number of vendors selling what looked convincingly like teak, but most of the products came in sheets or rolls and installing them seemed to require more cabinetmaking skills than I possess.
Up to that point, I’d not given a thought to the small patches of Treadmaster non-skid I’d installed on four companionway steps nearly 20 years ago. I have never slipped on them, barefoot or shod, even with the boat heeled at extreme angles. It’s pretty tough material and has held up well. That was enough to convince me that Treadmaster was the right stuff to restore some grip to my deck.
Sizing up Treadmaster
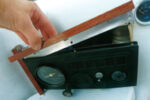
Treadmaster comes in several formulations and patterns these days, but I chose to use the Treadmaster Original Diamond, which is available in sheets (approximately 8 feet by 3) with or without a self-adhesive backing. Treadmaster’s proprietary adhesive costs about $60 a quart, but epoxy works just fine, and I had most of a quart at home.
I found several vendors for the sheets online, but before shelling out $125 a sheet, I thought I had first better see how many I really needed.
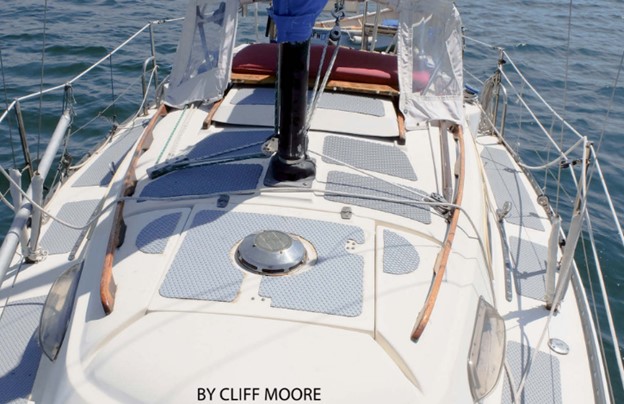
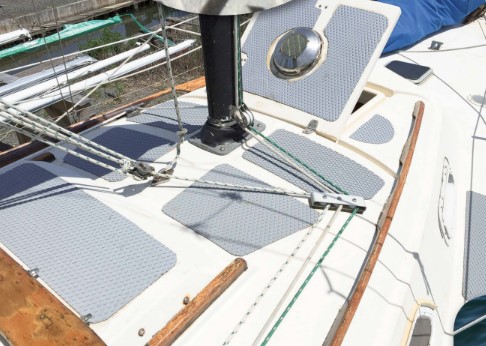
The first step was to take a good look at the deck and think about where I would be most likely to need serious non-skid. The foredeck was a good place to start. Many times, I’d gone forward when the bow was actually dipping into waves, but I normally had a death grip on the lifelines and never ever slipped there. I knew, though, that abrasion could be a serious issue if I dragged the foresails across the aggressive Treadmaster surface. Also, because I often kneel on the deck while working, I was concerned that the diamond treads might skin my knees. For the time being, I decided it was best to keep the old factory-issue non-skid on the foredeck and maintain a good grip on the lifelines.
However, the headsails don’t reach too far aft along the sidedecks, where I broke my foot. So, starting there, I made paper patterns of the areas where I would be stepping and would, therefore, want non-skid. That meant any place where I might place my feet while shifting my weight from one foot to another, such as the cockpit seats where I step down from the sidedecks, as well as any place I might be standing for some time while the boat was heeled, such as the bridge deck and the cabintop. I often stand on the forehatch while working around the mast, so that, too, got marked for a patch of Treadmaster.
Other areas I needed it included the tops of the cockpit seatbacks, where I plant my feet while getting into and out of my dinghy and when stepping onto and off a dock.
I cut the patterns from sheets of photographers’ background paper, but anything works, even newspapers. I measured and marked the patterns in pencil, then cut them out with scissors, after making sure I’d marked each pattern with its location on the boat, an arrow to indicate “forward,” and “P” or “S” as appropriate. Keeping in mind that many boats are not symmetrical, I did not assume that a pattern made for the port side would be an exact fit on the starboard side.
As it happened, I needed two sheets of Treadmaster. By maximizing the cuts and cutting carefully, I finished up with little more than scraps left over.
Treadmaster techniques
Transferring the patterns to the Treadmaster sheets was slightly complicated. Rather than working right side up and marking the gnarly working surface, I turned the patterns upside down and traced the shapes with a marker pen on the smooth underside of the Treadmaster. I rounded the corners with a roughly 2-inch radius, as hard corners tend to wear more quickly. I also made sure, before cutting, that all my curves were fair.
No special tools are required for working with Treadmaster. It’s very flexible, sort of like heavy cardboard, and cuts with ordinary utility scissors.
Pieces of Treadmaster can be butted together if necessary, but I found it almost impossible to do that without some adhesive squeezing onto the top, where it resists anything like an easy cleanup. It’s better to leave an inch or so space between two pieces, wide enough for masking tape.
Before gluing the Treadmaster down, I laid each piece in its destined location and drew around it with a pencil. I laid blue masking tape to the pencil line, so that the tape would fall just outside of the Treadmaster. Using the masking tape as a guide, I used a rotary sander with 80-grit paper to rough up the factory non-skid just enough to give it a bit of tooth for the adhesive.
When I epoxied the Treadmaster down, the masking tape borders helped keep most of the slop off the surrounding deck. I gave the epoxy 15 to 20 minutes to set up, then peeled up the masking tape. Most of the thin bead of excess epoxy came up with it. The rest came up with a scraper, a Dremel tool, and harsh language.
I was concerned to begin with that the Treadmaster would need some kind of weight to “clamp” it in place while the epoxy set. It didn’t. However, I learned that it’s best to work on days when the temperature is about 60°F. Any warmer and the epoxy might kick too soon as the sun warms the deck. When that happens, the epoxy sometimes outgases and forms bubbles under the Treadmaster, and that can cause problems later.
A job worth doing
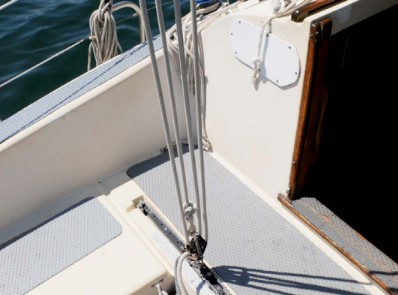
Treadmaster comes in several colors. I chose the light gray to contrast with a very light off-white deck. At night, I never use a deck light, and thought that the darker Treadmaster would stand out from the lighter-colored deck and make it easier for me to see where to plant my feet when going forward. That has worked pretty well so far, and gives me a tremendous sense of security when I’m moving around under rough conditions.
Best of all, my new non-skid works as advertised. It cleans up surprisingly well after picking up bottom mud, food spills, and bird poop, and resists engine oil and diesel spills. The area that has seen two summers of wear, on the bridge deck, looks great and appears to be holding up well.
Cliff Moore is a Good Old Boat contributing editor. His first boat was a Kool Cigarettes foam dinghy with no rudder or sail. Many years and many boats later, he’s sailing Pelorus, a 26-foot AMF Paceship 26 he acquired and rebuilt after Hurricane Bob trashed it in 1991. He is the editor of a community newspaper.
Thank you to Sailrite Enterprises, Inc., for providing free access to back issues of Good Old Boat through intellectual property rights. Sailrite.com