on damaged bearings. Regular inspection and maintenance will keep a trailer rolling.
Don’t be sidelined by bad bearings
Issue 117: Nov/Dec 2017
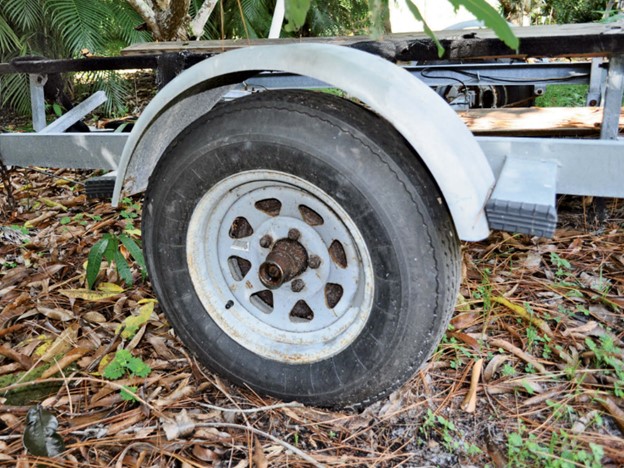
Two hours into the 3-hour drive to Virginia’s Ware River Yacht Club, where I was taking my Chrysler Mutineer 15 to race in the Governor’s Cup, I heard a screeching noise. Glancing in my rearview mirror, I saw smoke coming from the driver’s side of the boat’s trailer. Looking again, I saw the wheel had a distinct wobble, so I pulled off the road. Both sets of wheel bearings had disintegrated. Fortunately, sailing buddies on the same route were able to purchase a couple of sets of bearings and bring them to me. Three hours later, I was back on the road. But, 20 minutes short of my destination, I heard the same screeching noise. The problem was now with the other trailer wheel. Sure enough, its bearings, too, had disintegrated. This time, it took me only two hours to replace the bearings and get back on the road.
All this could and should have been avoided if I had properly maintained my trailer’s wheel bearings. Prior to the incidents described above, my maintenance program consisted of two periodic squirts of grease into the bearing protectors. I’ve since developed, and now follow, a simple maintenance program that has prevented a repeat of the events of that fateful day.
I no longer use bearing protectors (see “Bearing Protectors,” below), nor do I recommend their use, not because they do not work as designed, but because their use discourages regular maintenance. I believe that wheel bearings on a boat trailer should be inspected every year for corrosion, and also for damage to the bearings and races that can be caused by a wheel hitting a pothole, a curb, or something in the road. Such damage can cause bearings to bind and overheat.
A proper inspection can only be made after the bearings have been removed and cleaned with solvent. If they pass inspection, they can be packed with grease and reinstalled. Damaged bearings or races need to be replaced.
I recommend inspecting wheel bearings at the end of the season. This prevents moisture that has found its way into the hub and bearings from destroying them during the off-season. Besides, it’s good to know, when you remove the tarps and covers at the beginning of the season, that your trailer’s wheel bearings are ready to go.
I make an exception to an annual inspection if the hubs were not immersed in water at all during the season. In that case, I jack up each wheel and check that it spins freely while I listen for any unusual noise. I then look at the inner seal and the area around it. If I see any grease, which would indicate the grease seal had failed, I remove the hub and inspect the bearings.
Replacing bearings
Removing, cleaning, inspecting, and repacking wheel bearings is an easy job that should take no more than 30 minutes per wheel. No special mechanic’s skills are required. If you don’t know the part numbers for replacement parts, you can find them on the bearings, seals, and races once you have disassembled the hub. You will always need a grease seal for each hub, as removing the seals from the hub damages them and they should not be reused. I keep on hand a number of grease seals and at least two sets of bearings for each of my trailers. (We don’t count boats or trailers in my family.) Make sure you have the necessary tools. I have found a few tools that make this job much easier (see “Tow in Peace,” below).
Disassembly
1. Loosen the lug nuts, jack up the trailer, and remove the wheel. (For safety, I place a jack stand under the trailer on each side of the wheel.)
2. Remove the dust cap. This can be done by working a regular screwdriver with a thin blade around the lip of the dust cap.
3. Straighten and remove the cotter pin. Diagonal pliers work well for this task.
4. Remove the castle nut with channel-lock pliers.
5.Remove the outer bearing washer (this might be part of the castle nut).
6. While supporting the hub with one hand, remove the outer bearing.
7. Gently slide the hub assembly off the spindle.
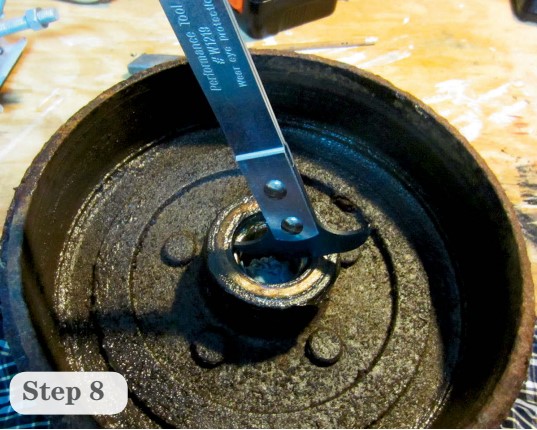
8. Remove the grease seal. A number of tools can be used for this. (I purchased a special tool.)
9. Remove the inner bearing.
10. Clean the hub by removing all the old grease with solvent (WD-40 works for me), a parts-cleaning brush, and lint-free towels.
11. Clean the bearings with solvent and a parts-cleaning brush to remove all the grease, then dry them with lint-free towels.
12. Inspect the bearings for nicks, dents, corrosion, spots, discoloration, pits . . . any hint of damage. Turn the rollers to check them all over. If you have to replace the bearings, you must also replace the race. If the bearings pass inspection, dry them completely with lint-free towels and set them aside.
13. Inspect the races for damage of any kind. If the races and bearings pass inspection, go to step 16.
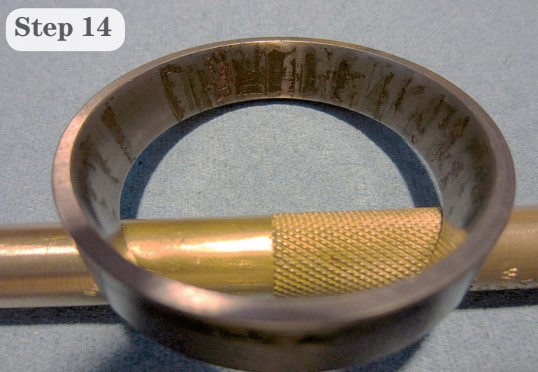
14. You are here because either the bearings or races must be replaced. The races protrude a little into the hub. To remove them, you need a brass punch, sometimes called a drift punch, and a hammer. The brass punch is softer than steel and won’t damage the hub bore when you’re removing the races. Place the hub on a solid surface and, working all the way around the race, tap it using the brass punch and the hammer. Keep the race even in the bore as you work it out. This takes time and patience. Repeat for the other race, if necessary. Clean the hub bore and dry it with lint-free towels.
Reassembly
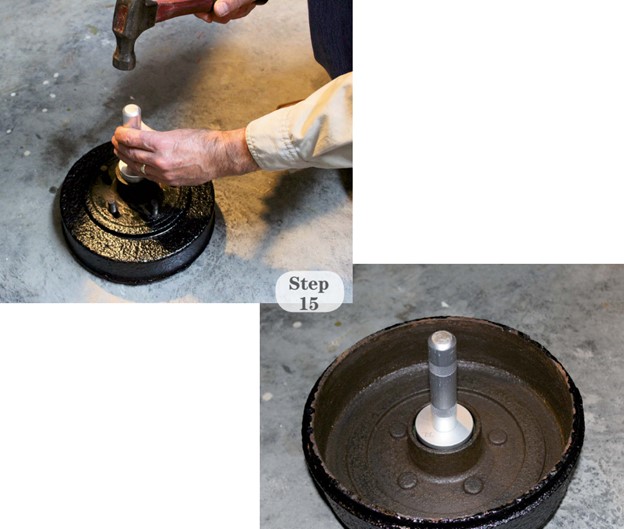
15. Install the new races. This is best done with a special tool that makes the job a breeze. Simply select the disk that fits your race (the tool comes with six different sizes of disk to fit the most common race sizes) and attach it to the handle. Position the race in the hub bore, position the installation tool in the race, and tap the race home. The tool distributes the force equally around the entire race and drives it home evenly without damaging the race or the hub bore.
16. Coat the hub bore with a light coat of grease, including the races.
17. Repack the bearings with grease. A bearing packer works, but I prefer to pack by hand. I place a large blob of grease in the palm of my left hand (I’m right-handed) and, with my right hand, repeatedly press the bearing into the grease, forcing grease into every space on all sides.
18. Clean and inspect the spindle. If you see damage on the spindle, I recommend that you have a professional evaluate it. I damaged a spindle once while trying to remove a “spun” bearing, one that had overheated so that the bearing cone had become stuck on the spindle. Once that happens it can be very difficult to remove. I ended up replacing the axle.
19. Place a light coat of grease on the spindle.
20. Replace the inner bearing. Reverse the disk on the race-and-seal tool and use it to install the grease seal. Some seals come with a thin coat of rubber that acts as a sealant. I was assured by an expert at Etrailer.com that a sealant is not required for grease seals that do not have the light coat of rubber.
21. Gently slip the hub onto the spindle. While supporting the hub with one hand, install the outer bearing with the other hand.
22. Place the washer (if required) and the castle nut on the spindle. Tighten the nut with the channel-lock pliers to ensure that all the parts are in place, then loosen the castle nut and tighten it by hand until it’s snug. Make sure the hub turns freely. Now back off the nut just enough to reveal the hole in the spindle for the cotter pin. Install the cotter pin.
23. Install the dust cap. I purchased a dust-cap driver tool. Using it is much less frustrating than trying to apply uniform pressure using a hammer and a block of wood.
Once bitten . . .
When traveling with a boat on a trailer, I am now better prepared. In addition to a jack, jack stands (especially for boats over 20 feet), a spare tire, grease, spare parts, and tools, I take along a spare hub that’s ready to go. The bearings are packed and in place along with the grease seal. If a bearing fails, I won’t have to fiddle with replacing races at the side of the road but can simply remove the damaged hub, clean the spindle, apply a light coat of grease, and install the spare hub. The side of a road is a dangerous place to be; the less time I need to spend there, the better.
Tow in peace

Following a few simple guidelines will help ensure trouble-free towing.
- Inspect your trailer’s wheel bearings annually.
- Travel with a spare hub that’s ready to go, should it be needed.
- Whenever you stop, feel your hubs. They should be warm, but not hot. If they are hot, it’s time to inspect them.
- Always allow a trailer’s wheel hubs to cool completely before immersing them in water. (The time needed to put up a sailboat’s mast and rig should be long enough.)
- Keep plenty of spare parts on hand. I keep more grease seals than anything, as they must be replaced after every inspection. I also keep at least two sets of bearings, castle nuts, cotter pins, washers, dust caps, and lug nuts in my supplies bag. I tend to buy in bulk to take advantage when a vendor offers free shipping above a certain purchase amount.
I also recommend purchasing the specialized tools that simplify the task of inspecting and maintaining bearings:
- Brass drift punch, 1⁄2 x 7 inches ($14)
- Seal puller ($9)
- Bearing race and seal driver, 7-piece set ($26)
- Dust-cap driver ($12-14)
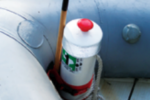
Bearing protectors
On the internet, I found many opinions regarding bearing protectors: some folks swear by them, others do not.
Bearing protectors are designed to create and maintain a small amount of pressure, around 3 psi (equal to the water pressure at about a 6-foot depth), inside the wheel hub. The object is to prevent water from seeping into the hub when the wheel is immersed in water. Air inside the wheel hub expands when the hub warms up from normal use. When the hub is immersed in cold water, the air contracts, lowering the pressure inside and possibly sucking in water. This is compounded if there is any moisture in the hub. The pressure maintained by the bearing protector is sufficient to keep the water out. Installation instructions for the protector require that the hub be filled with grease, leaving little space for air.
At least one major manufacturer of bearing protectors recommends that, if bearing protectors are used, the bearings not be inspected more frequently than once every five years, because wear on the protectors caused by removing and reinstalling them can result in their falling or flying off.
The problem with following that guidance is that a wheel-bearing maintenance program becomes simply two squirts of grease in each bearing protector at the beginning of the season. This, in my view, leads to complacency, and possibly to the need for roadside repairs.
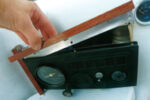
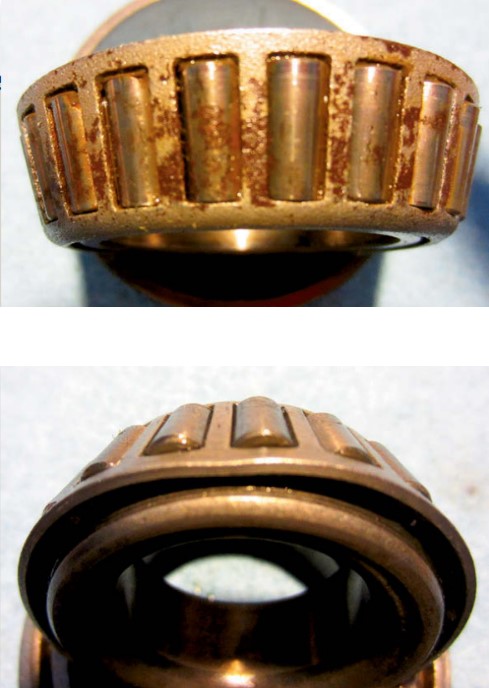
The photos above are of the inner race and bearing from the trailer that came with the Gloucester 22 I recently purchased. They are both damaged and must be replaced. The trailer was equipped with bearing protectors; the previous owner gave them a couple of squirts of grease each year.
Jerry Thompson is an information systems professional who works and lives in eastern North Carolina. He learned to sail more than 25 years ago at the Armed Forces Recreation Center, Lake Chiemsee, Germany. North Carolina’s milder winters keep Jerry on the water year-round.
Thank you to Sailrite Enterprises, Inc., for providing free access to back issues of Good Old Boat through intellectual property rights. Sailrite.com