Why build more than you need?
Issue 128: Sept/Oct 2019
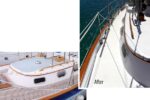
We wanted two things to enhance our sailing lives aboard our Catalina 34: protection from the sun and rain while at the helm and a solar panel to keep our 400-amp-hour battery bank charged. We’d seen boats like ours with rigid solar panels attached to a stainless steel frame or arch above a bimini. We’d seen others with flexible panels fastened directly atop a bimini.
Estimates for building a bimini ran as high as $5,500 CAD. Adding three 100-watt flexible solar panels to the top could increase the cost by $2,000 CAD, depending on panel quality. Alternatively, adding the same wattage in rigid panels to a frame or arch above the bimini would be a heavier option and cost at least $1,500 CAD more, considerably more with an arch. All these costs were sobering.
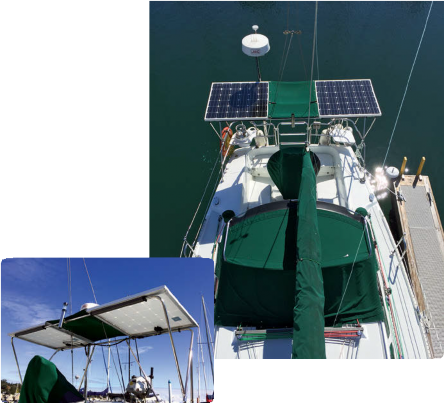
But why cover the bimini with solar panels or build additional framework above the bimini to support them? What if the solar panels could also be the bimini? Looking at the stainless steel frame for the traditional Catalina 34 bimini, I realized it would be a straightforward DIY project to build a modified version of the frame and attach rigid panels to the top. The larger the panels, the more charging power and protection from the elements we’d gain.
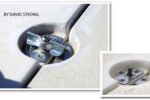
We used two 20-foot lengths of 1-inch stainless steel tubing for the main horizontal arms that support the panels, hiring a local metal shop to make the 90-degree bends (no bending was required for the crown because we wanted the panels to lie flat). Offcuts from the main structure and an extra 10 feet of tubing were all we needed to create the four smaller support arms. All the fittings were available at our local chandlery. We ended up with a solid stiff frame just over 6 feet above the cockpit sole. It’s flat on top and angled slightly aft to allow rainwater to flow off the panels. We spent just over $700 making the frame.
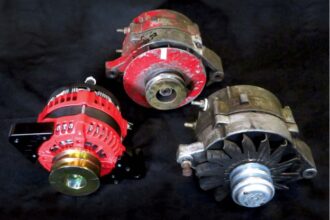
Because our backstay splits above the top of the bimini frame, we opted for two 150-watt rigid panels, one on the outside of each backstay cable. To connect each panel to the two fore and aft poles of the bimini frame, we used two flat aluminum bars and four nylon rail fittings. We filled the space between the two panels with a piece of Sunbrella clipped to an L-shaped aluminum bar we fastened to the sides of the panels. Alternatively, we could have made a filler using Plexiglass or Starboard.
The two hard panels, Sunbrella filler, and aluminum bar and fittings added another $800 CAD to the cost of the project. We ended up with about 4 x 8 feet of cover.
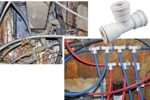
Of course, however panels are mounted on a boat, there are costs involved with connecting them to the battery bank. In our case, 100 feet of 10 AWG wire, 4 MC4 connectors, 2 Genasun controllers, and a switch to disconnect the panels from the 400-amp-hour lead-acid battery bank added $500 to the total cost.
The performance of our solar panel bimini met our expectations. The helmsperson is protected from overhead sun and rain and, even on cloudy days, the panels pump electricity into our battery bank. And the value of reducing our carbon footprint? Priceless!
In the mid-70s, John Langford bought a well-used 27-foot Pearson Renegade in Fort Lauderdale and set off for the Bahamas during hurricane season. The gods were kind and over the next year, John explored the islands and sailed the boat back to Toronto. He’s not been without a boat since. Today, the retired university professor lives in Victoria, British Columbia, where he and his wife, Kate Seaborne, regularly sail the Pacific Northwest aboard their Catalina 34, Calypso.
Thank you to Sailrite Enterprises, Inc., for providing free access to back issues of Good Old Boat through intellectual property rights. Sailrite.com