Home / Sailing / Sailing Tips / Splicing double-braid

Splicing double-braid

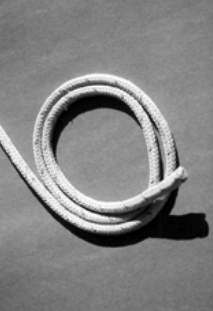
Step 1. Measure five or six fid lengths from the end of the line. Either tie a knot or carefully put a fid through the cover and core. Holding the knot or fid, smooth the cover from the knot to the end.

If you’re a frustrated splicer, read this and take heart

Issue 40 : Jan/Feb 2005

Almost every boat has some double-braided line aboard. In most cases, the ends of the lines are ragged and sloppy. Many people use tape instead of whipping or splicing or resort to knots to fill in for eye-splices. With a bit of effort and patience, however, everyone can learn to splice double-braided line. I think most people are simply intimidated by it. However, splicing double-braid is not that much more difficult than splicing three-stranded line. The results will make your boat look more shipshape, and it will be safer too.
Step 1. Measure five or six fid lengths from the end of the line. Either tie a knot or carefully put a fid through the cover and core. Holding the knot or fid, smooth the cover from the knot to the end.

As tempting as it may be to start with the eye-splice, I recommend against that. I assume you will make your first splicing attempts with used line that you have aboard. While this may be economical, starting with an eye-splice will create a level of frustration that will send you looking for duct tape. The eye-splice is very difficult with old line. I suggest instead that you start with a back-splice. I see very few boats with back-splices in the lines. This splice can be done with old line without too much difficulty. It will provide a level of confidence that will help you when you do get to the eye-splice. It will also help give you a foundation for the concept of the eye-splice.
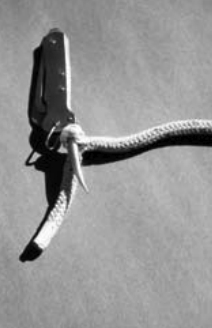
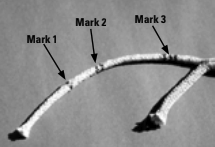
Step 2. Measure one short fid length back from the end and mark this point on the cover. Carefully remove the core from the cover here. Mark the core with one band where it exits the cover (Mark 1).

There are different brands of splicing kits available. I was told when I started that they were equal in terms of ease of use. I was also told that whichever one I started with is the one I would like better. Well, I have both sets now. There are good qualities in both sets, and I tend to use different tools for different splices. This is not to say you should buy both at first. I would say to buy the set you want or feel you would have better success with. Either set will serve your needs. There are times when I use straightened coat-hangers too. Some of my training came from another sailor who has done a lot of splicing in larger lines for ships. He generally uses coat-hangers or other long, stiff wires. Either way you will need a few supplies that you probably already have:

  • a very sharp knife
  • sharp scissors
  • splicing tool/s
  • sharp-pointed marking pen
  • electrical tape
  • a small fid or marlinespike
  • a good length of line
Step 3. Pull the cover back, exposing more of the core. From the first band, measure one half fid length toward the knot or fid. Mark this with two bands (Mark 2). Measure one short fid length from the double band toward the knot or fid and mark with three bands (Mark 3).

Follow the instructions and pictures here and you will succeed with your first backsplice. As you finish up the splice, the way it comes together will amaze you.
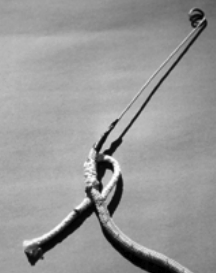
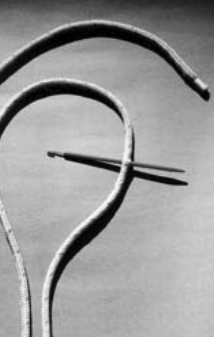
Step 4. Use a fid or wire (as shown) and insert it at Mark 3 and out at Mark 2. Tape the cover to the wire. Pull the cover up through the core and out at Mark 3.

Once you have accomplished a few back-splices, you will be ready to tackle the eye-splice. For that project I suggest that you buy a length of new double-braid designed for docklines. It is easier to work than the line used for halyards and such. It will make your first attempts less frustrating.
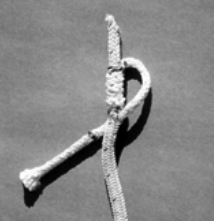
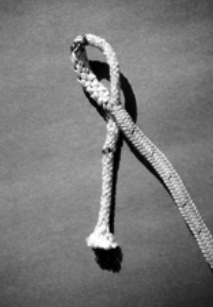
Step 5. Remove the fid or wire from the cover. Trim the end of the cover at about a 45-degree angle and shorten so that it will all be able to be covered by the core.
Step 6. Smooth the core over the cover so that the cover is completely inside the core. Your splice should look like this now. Trim the core back to Mark 1 and taper it as you did the cover.
Step 7. Now smooth the cover from your knot or fid toward the splice. This will start to bury the core. Untie the knot or remove the fid and smooth (milking style) the cover. Some remnants of the core may need to be cut off (especially with older line). Now milk and smooth until the core is completely inside the cover. Smooth and shape the splice. Like me, I think you’ll find your well-made splice somewhat soul-satisfying.

Once you have mastered splicing double-braid you will be far ahead of most boatowners. You will be proud to have a boat that doesn’t sport a lot of cows’ tails. Your boat will look more shipshape and be safer. Splicing well provides a sense of inner satisfaction that is hard to duplicate.

Thank you to Sailrite Enterprises, Inc., for providing free access to back issues of Good Old Boat through intellectual property rights. Sailrite.com

Tagged: