Your guide to making a tricky job simpler and easier
Issue 37 : Jul/Aug 2004
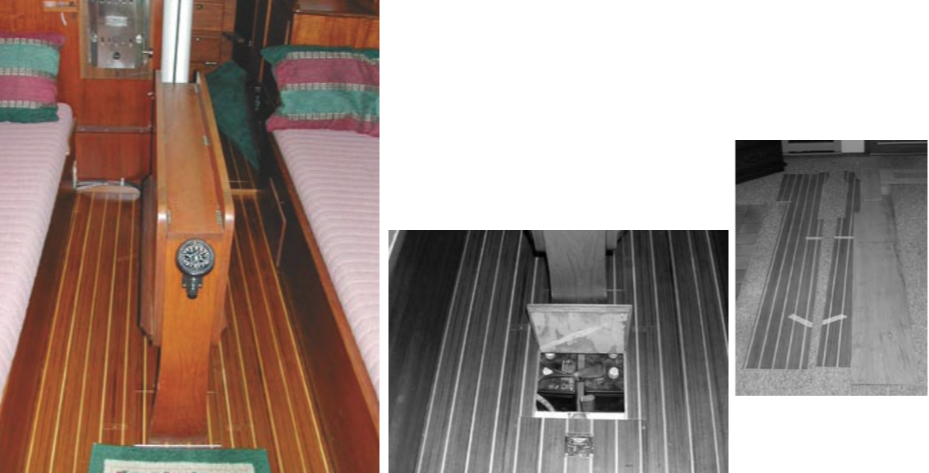
When you peer into the companionway of an unfamiliar boat, the first thing you notice is the cabin sole. It may be a textured fiberglass liner, a piece of carpeting, or a genuine teak-and-holly sole. It may also be a thin piece of plywood masquerading as the latter. Some boats combine the look of the molded fiberglass sole with teak-and-holly plywood inserts. I think this looks better than an all-fiberglass liner, and it is pretty easy to replace the plywood inserts when they are damaged.
The problem with wood is that it can look ratty after a while. Given the inevitable sand, water, and dropped tools, that gleaming sole can be turned into a hunk of banged-up wood in several years. In fact, a banged-up sole is just about the standard issue in a typical older boat.
Years ago when I decided the laid teak-and-white-oak sole of our Ericson 46 was no longer in keeping with the rest of the upgraded and refinished interior, I sanded and refinished it. This involved many hours of sanding with huge sanders followed by a similar number of hours spent varnishing. I was rewarded by the gleaming cabin sole of our dreams, and it lasted as long as we owned the boat. But what if the sole is beyond refinishing?
There are several steps to installing a new sole. The sequence of steps depends on the original construction of the sole. The traditional sole is built up of strips or planks of teak and holly or other woods. These may be thick (1⁄2 inch or more) planks held in place with adhesive and countersunk screws, or they may be thin strips (1⁄8- to 3⁄16-inch thick) held in place with adhesive. The simpler method uses 1⁄4- to 1⁄2-inch plywood in which the surface veneer is teak-and-holly strips.
Veneer must be varnished
This plywood is readily available but not cheap. I paid $120 per sheet for 1⁄4-inch material. The plywood is very attractive but must be varnished if long life is expected. This material usually has a top veneer thickness of about 0.040 inch, allowing for no more than one careful refinishing. It is easy to finish it, as the plywood is sanded very well at the factory and only requires touching up the screw hole plugs. The primary weakness of this plywood is that it dents readily, as the core laminates are not teak but a softer hardwood such as okoume. It is much easier to install and finish. This is what I ended up using.
First, a general overview of the installation process.
- Planning: Figure out what techniques and materials you are going to use and how you are going to fasten the sole in place. Allow for access to whatever is under the sole where required (I had to have access to eight large bolts countersunk in the existing sole). If you have curved surfaces, how will you cover them? How will you handle hatch openings? If you have the typical teak-and-holly sole, will it be symmetrical, and where will the joints fall? How will you align the planks and holly strips on the hatches and sole? If you use screws to hold it down, how many will you need and where will you place them? If you are using adhesive, how will you align everything as it hardens? (Note: This step is the most important, as the appearance and functionality of the finished sole will depend on how well you preplan the details.)
- Layout: Remove trim and obstructions where possible. Make a pattern if necessary and transfer it to the new sole. Dry-fit the new sole if possible. Have a means of aligning the sole when you actually install it and of holding it in place as the adhesive hardens.
- Surface preparation: Clean and prepare the old surface with solvent wipes and coarse sanding. If the surface is uneven, fair it somehow. Make sure you know where existing screws and other things are so you won’t try to drive a new screw into a previous one.
- Installation: Work in sections so you can move around as necessary. Mix and apply the adhesive. Install the new sole and hold it in place with temporary or permanent screws and/or weights. If you are concerned about removing temporary screws, coat them with a release material, and remove them after the adhesive has kicked but before it is fully hardened. Countersink and plug screw holes (if used). Sand the sole as necessary (a little or a lot depending on the sole construction technique used). If you are going to finish any of the trim along with the sole, install it now (I don’t like to do this since future removal of the finished-in-place trim will damage the sole finish).
- Finish: Clean up everything (sawdust and debris) and wipe down the surface with solvent and tack cloths. Apply finish (if varnish, this will probably mean five or more coats with sanding and cleaning between coats). Install any finished trim you did not finish along with the sole.
Practical instructions
While all details may not apply to the installation on a different boat, the general flow of my project will be similar. Just remember that the planning stage is critical.
In the May 2004 issue of Good Old Boat I described the replacement of the fuel tank on our Nor’West 33 sailboat, Sailor’s Joy. The fuel tank, which was located in the keel, required cutting a rather large hole in the cabin sole to remove the old tank and install the new one. Since I didn’t want to destroy the new cabin sole if I needed to remove the tank in the future, I decided to make the center hatch large enough to cover the existing opening. I made a new hatch of 5⁄8-inch marine-grade fir plywood. Recesses were cut into the underside of the hatch to clear the crossbeams, and I fastened pieces of 1⁄2-inch marine-grade fir plywood to the underside of the edges of the recess to support the new hatch. The hatch was made flush with the existing floor. Similarly, the remaining hatches running down the centerline of the cabin sole were duplicated using 5⁄8-inch marine plywood.
I did not remove the existing cabin sole because the interior furniture had been installed on it. The loss of headroom resulting from a thin cabin sole installed right on top of the existing sole was not enough to justify the additional work involved in removing the original floor. In the V-berth, where headroom was limited, I did remove the countersunk screws and the flooring. I also removed the existing trim pieces where possible.
Chose plywood
I considered fabricating a sole of individual teak-and-holly strips glued to the existing flooring. I had covered a small hatch this way, and it worked well. The costs would be similar to teak-and-holly plywood, assuming that I used strips of 3⁄16-inch thickness resawn from 1-inch lumber. Thicker material has a tendency to delaminate from the flooring because of swelling and shrinking as moisture content changes. It would also cost more and, if too thick, affect the headroom more than I could tolerate. I decided against the fabrication technique because glue (and no screws) had to be used to fasten the strips in place (the thickness would not allow for countersunk screws) and also because I remembered the 40 hours required to sand and finish the sole of my Ericson all too well and with little fondness.
The alternative method was to install an overlay of teak-and-holly plywood. If I used 1⁄4- inch plywood fastened to the original floor, I would not lose a significant amount of headroom, and installation would be done in large sections and move along relatively quickly.
Planning
Planning means trying to think of everything that might go wrong and figuring how to prevent it. Since-teak and-holly plywood costs $120 per sheet, I couldn’t afford many mistakes.
The first step was to make a scale drawing of the cabin sole to insure that the holly seams would line up in the finished sole and hatches and that the finished sole would be symmetrical about the centerline. I decided to place a teak plank on the centerline. This allowed the joint between the narrow center hatches and the large hatch over the fuel tank to fall in the middle of a teak plank. This paper step was an essential part of the planning stage. Final layout of the cuts on the expensive plywood was done with careful reference to this drawing.
Not wanting to experiment with fit on the expensive plywood, I purchased two sheets of 1⁄8-inch mahogany plywood for $8 a sheet. I made careful measurements, transferred them to the pattern material, and cut the patterns out. I did not attempt to make them in a single sheet. Instead I fabricated the complex shapes in the galley/navigation station area from 4- to 6-inch-wide strips of material and fastened them together on site using a staple gun. These smaller pieces were trimmed and fitted using a saber saw, files, and a hand scroll saw and then stapled together. These patterns, along with the drawings, were used to lay out the required shape on the back of the teak-and-holly plywood. I cut the plywood using a saber saw and a fine-tooth blade and smoothed the edges using an assortment of sanding blocks.
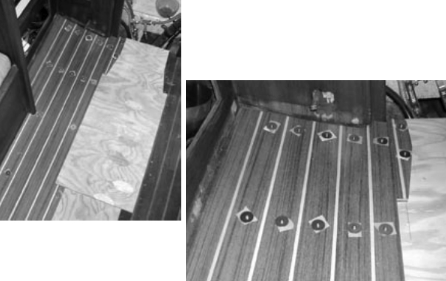
Since the cabin sole was longer than the plywood, I had to decide where the joint would fall. I ended up placing it adjacent to the mast to make it as inconspicuous as possible. The sole on the port side of the boat was L-shaped with a short leg at the aft end under the navigation station. I made this area as a separate piece and covered the joint with a small teak batten. This detail was the same as what had been used in the original flooring. It was necessary to make four oval openings in the flooring to provide access to large flathead bolts that held the table supports beneath the existing cabin sole. The openings were filled with matching plugs of teak-and-holly plywood, each held in place by a single bronze screw.
Installing the sole
I installed the sole using filled epoxy as an adhesive and mechanical fastenings. These fasteners were countersunk and filled with teak plugs as in a traditional teak sole. The 1⁄4-inch thickness of the plywood was just sufficient to allow for countersinking the screws. I checked the fit of the cut plywood and trimmed it where necessary before installation. Then I laid it in place and secured it using panhead stainless-steel screws and 1-inch-diameter fender washers. I didn’t countersink the holes yet. I placed the screws where the final plugged screw holes were to be located. I used enough screws to securely locate the plywood and to pull it into a curvature to fit the curved cabin sole in the aft part of the cabin. This dry fitting ensured that when the epoxy was added, the plywood would end up in exactly the desired spot, held by the predrilled and fitted screws.
After removing the fitted plywood, I cleaned the old cabin sole with lacquer thinner and rough-sanded it to ensure good adhesion. I sprayed the panhead screws with silicone mold release and placed plastic washers cut from a milk bottle under the fender washers. (Do not spray the washers or use excessive silicone. Silicone is almost impossible to remove from the wood and will cause fish-eyes in the final finish.)
I mixed the epoxy and spread it on the old cabin sole using a notched trowel. Then I put the new plywood in place, reinstalled the screws, and placed sandbags on top to insure good contact. I did only one side of the cabin at a time. After three hours when the epoxy had kicked, but the leftover epoxy was still soft enough to dent with a fingernail, I removed the screws. Leaving them in until the epoxy has fully hardened may make them difficult (or impossible) to remove.
Glued the plugs
After letting the epoxy set overnight, I removed the sandbags, countersunk the existing holes, installed the flathead screws, and glued the teak plugs in with epoxy. Before countersinking, I adjusted the depth setting on scrap pieces of the plywood. I used sufficient depth to allow a plug of 0.150- to 0.187-inch length to be installed over the screw. When the epoxy holding the plugs was set (I used five-minute epoxy), I sawed or chiseled off the protruding portions and carefully sanded them flush.
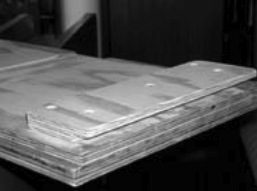
The port side of the cabin sole was installed in an identical fashion. After it was finished I installed the small area under the navigation station. Because of the significant curvature in the sole, I scored the back side of the plywood parallel to the curvature. I used a table saw to cut a series of grooves to a depth of about half the thickness of the plywood and spaced about 3⁄4-inch apart. The plywood bent easily to conform to the curvature. I installed a small teak batten over the joint. This batten also provides a convenient foot stop while sitting at the navigation station.
Next I covered the centerline hatches with the teak-and-holly plywood. The large hatch over the fuel tank acted as the key alignment point for the planks. I laid the uncovered plywood hatch in place and carefully marked the location of the holly inlays in the newly installed cabin sole on it in pencil.
Bolted through sole
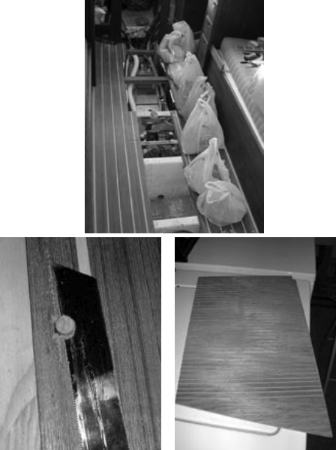
Then I installed the latches for the hatches. Two of the centerline hatches were held in place by the drop-leaf table, which was bolted through the cabin sole into aluminum crossbraces. The small hatch aft of the table was hinged by a length of piano hinge to the one held down by the rear table support. A ring pull was recessed into the hatch surface on the other end to allow easy access to the bilge. The hatch over the fuel tank and the hatch under the table, where canned goods are normally stored, were secured by installing locking latch lifts.
For the V-berth area, where I removed the old cabin sole, I used the same procedure for installation except the inset hatch and sole were cut from a single piece of plywood using the removed sole as a pattern. I took care to align the holly inlays of the V-berth sole with those of the cabin sole. I set the hatch in place and temporarily installed the new plywood sole using the panhead screws/fender washers. I removed the screws from the sole base and lifted off the new plywood with the hatch still attached.
Using the hatch as a guide and a thin, very fine-tooth blade in a saber saw, I cut the plywood around the hatch. I used a series of small overlapping drilled holes instead of a large single one to insert the saber saw blade to start the cut. I sanded the edges carefully and had a hatch cover that exactly matched the surrounding sole in grain and holly strip alignment. To secure the hatch, which is primarily for access rather than storage, I installed a small piece of plywood on the front end, which slips under the sole, and secured the hatch at the aft end with a pair of bronze screws.
Urethane varnish
The sole was complete and required only finishing using urethane varnish. I started with a light sanding with 150- grit sandpaper, followed by vacuuming and wiping with lacquer thinner. Before varnishing I did a final wipe with a tack rag. I used gloss urethane exterior marine varnish and sanded, vacuumed, and wiped with a tack rag between coats. I applied enough coats to fill the grain of the teak and give a smooth surface, typically five coats. I finished with a single coat of satin urethane varnish. By using the satin varnish only for the final coat, the finish did not end up cloudy but still had the visual depth that can only be achieved with many coats of varnish.
I then repaired and refinished the trim, which I had removed. I filled the original drilled-out plugs, which had covered the countersunk mounting screws, with new teak plugs, cut the plugs off, and sanded them flush. I re-drilled and countersunk the flathead screws flush to the top surface. After finishing it with four coats of gloss varnish, I reinstalled the trim using flathead square-drive bronze screws. These match the trim, resist bunging during installation and removal, and match the teak trim very well. They also allow easy removal of the trim without damage at any time.
One year later, the finished sole is very attractive and functional and almost unscarred. We keep a small area rug at the bottom of the companionway ladder to catch sand, which is hard on varnish. The rug, purchased for less than $15, has a rubberized base. I did not record the amount of time spent (this is for fun, right?) but would estimate my time at between 60 and 80 hours. I spent quite a few hours planning before I made the first cut and a long time waiting for the varnish to dry (the 45-degree water temperature kept the sole very cool despite the use of an electric heater).
Installation problems
With the advantage of hindsight, we always see things we could have done differently. In this project, there were two things I could have improved. I did not groove the back of the installed plywood in the galley area before installation. It was a little difficult to draw down the plywood to fit the existing sole evenly and, if you look very carefully, you can see slight depressions where the screws are located. Although it would have been complicated to partially groove this area (and not locate the grooves under the screw holes), it may have been worth trying.
The major problem I encountered was spraying too much silicone on the screws holding the plywood in place initially. I did not remove the plastic washers before spraying and was rewarded with fish-eyeing around some of the holes. This was despite liberal and repeated cleanings with lacquer cleaner and silicone remover before varnishing. It took an additional week of cleaning and re-varnishing to get even coverage in these areas.
Considering the complexity of the entire project, the problems were few and the results extremely gratifying. The final compliment came when having the boat re-surveyed to increase its coverage; the surveyor commented on the woodwork being done to “professional standards.”
Thank you to Sailrite Enterprises, Inc., for providing free access to back issues of Good Old Boat through intellectual property rights. Sailrite.com