Confronting the details to finish the job
Issue 81 : Nov/Dec 2011
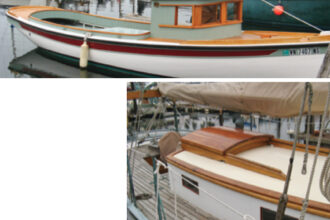
A couple of years ago, my wife, Mary, and I decided to renew the worn non-skid on our 30-year-old Pearson 28 with a non-skid paint product called KiwiGrip. In a previous article (“Getting a Grip,” January 2011), I discussed our reasons for choosing KiwiGrip over other methods of non-skid renewal and the steps involved in renewing the worn non-skid in the cockpit. We started with the cockpit because it has five relatively uniform rectangular areas that were easy to prep, mask, and paint. We had hoped to complete the entire project in one season, but our plans to renew the rest of the non-skid had to wait another year because of my work schedule.
The next phase of the project — renewing the non-skid on the rest of the deck — was more challenging. The weather was a major factor; I’d originally planned to tackle this phase of the project in the spring when temperatures and humidity levels would be within the manufacturer’s recommendations. Unfortunately, the project was delayed until mid-June, when the northeast region of the country where we live experienced unusually warm temperatures and high humidity. As a result, much of the project was completed under conditions that were at the upper limits of the manufacturer’s recommendations.

Working around fixtures
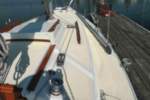
Unlike the cockpit, most of which could be conveniently rolled out in small sections, the deck presented a large surface with many obstructions such as hardware, grabrails, and rope clutches. This would make the application of any non-skid product more difficult than on the uncluttered surfaces in the cockpit, and raised the issue of how to apply the non-skid neatly around all these fixtures.
The most obvious solution was to remove all obstructions and re-install them once the non-skid had been applied. But we knew from past experience that it’s difficult to obtain a satisfactory caulk line around hardware when rebedding it over a very textured non-skid surface. This is primarily a cosmetic issue, although an insufficient seal around hardware may result in deck leaks.
Paint or gelcoat borders?
The next decision was whether to use gelcoat or paint to integrate the new borders. Based on my cabinetmaking experience, I decided paint was more user-friendly and selected Pettit Easypoxy, a one-part polyurethane enamel. I knew from previous experience that Easypoxy had many good qualities. When applied under the correct temperature conditions, the paint dried rapidly. With proper preparation, it was possible to create a very smooth finish coat that could be wet- sanded and buffed to look very similar to shiny gelcoat. Another advantage of one-part polyurethane paints is they’re a little easier to blend in than are gelcoats or the catalyzed paints when making repairs or touch-ups.
In the borders we had previously painted, we were able to match our existing gelcoat color using standard colors in the Easypoxy line. Mixing equal parts of the Easypoxy White and Off-White gave us a match that, in most light conditions, was nearly indiscernible from our Pearson 28’s cream-colored gelcoat. Natural differences in the fading of vertical and horizontal gelcoat surfaces made an exact match impossible unless we were prepared to match each area individually.
We wanted the pattern of borders around the hardware to be attractive and reasonably congruent with all the existing gelcoated areas. We knew from our previous experience that blending smoothly sanded surfaces into factory non-skid areas was not difficult to accomplish with KiwiGrip, due to its consistency.
We decided the additional labor involved in painting the border areas was worth the effort because it would result in a professional-looking non-skid. We planned to upgrade some of the hardware, such as the grabrails
and genoa-sheet cleats, but we believed we could leave other items in place and create borders around them without having to remove them. After carefully looking over the deck and marking all the areas with rough pencil lines, we came up with a general plan.
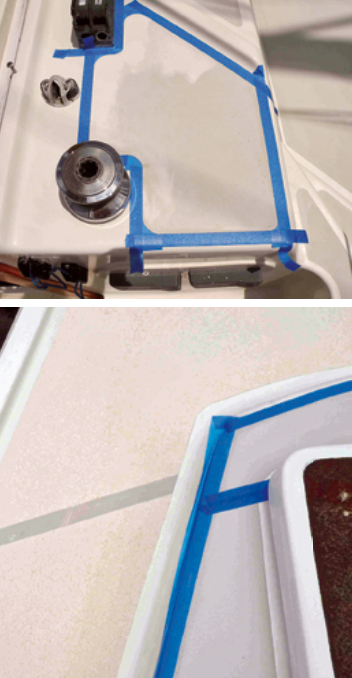
Marking the hardware borders
We chose a border width of 3⁄4 inch and began marking the areas in pencil to determine what radiuses would work best. We started by drawing the straight lines in soft dark pencil. Once we’d done that, we experimented with different radiuses and determined that a radius of 1 inch looked best and worked well around most of the hardware and other objects on deck.
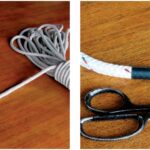
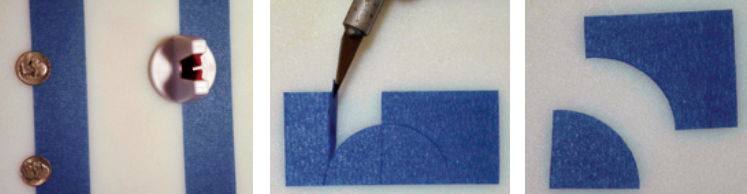
We then had to figure out how to mask off all these areas with uniform curves. We could not bend tape to these radiuses so we would have to cut the shapes out of masking tape. A search for an object to use as a template turned up a plastic towel hanger that provided the perfect 2-inch diameter to give us our 1-inch radius. In the smaller deck areas where this radius didn’t work, we drew around quarters and nickels. As a precaution, before getting too involved with masking tape, we drew a few sample curves with a compass to make sure we were satisfied with the overall look.
For the next step, we had to determine which areas of the factory non-skid would require sanding and how much sanding was necessary to create a surface smooth enough to paint at the borders. We also wanted to ensure we painted the borders wide enough to encompass both the inside and outside curves, and we wanted to know that we could sand those areas without damaging the hardware; if not, we would have to remove it.
A system for sanding
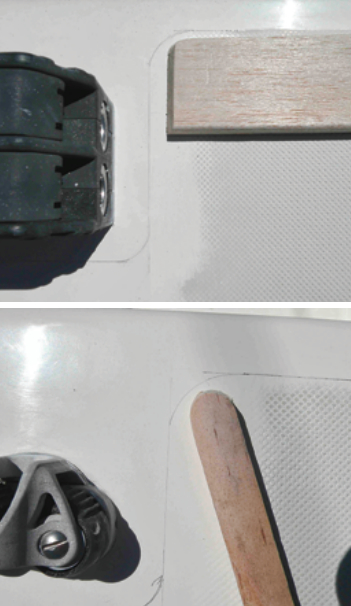
A test was in order. I masked off one of the rope clutches by applying the tape as close as I could to the deck. As part of our experiment, we created custom balsa-wood sanding blocks to use with self-stick 80-grit sandpaper cut from rolls. Balsa wood is easy to cut and shape. (We later cut these blocks into various shapes to facilitate sanding the inside and outside curves after the border painting was complete.) We also made blocks with one side beveled to a knife edge to facilitate sanding right up to the test-case rope clutch. We applied the adhesive sandpaper to the bottoms of these blocks and carefully trimmed off the excess. This worked well. We were able to sand right up to any piece of hardware without scratching or otherwise damaging the surface.
Ultimately, deciding between removing the hardware or tediously sanding right up to the hardware seemed to be a toss-up. But since the sanding system worked so well, we left most of the hardware in place and removed only the items we planned to replace.
We used 80-grit sandpaper for the initial sanding. In most cases, sanding about 2 inches from each hardware item allowed enough space for feathering to avoid ridges that might show through the non-skid.
Prep for painting
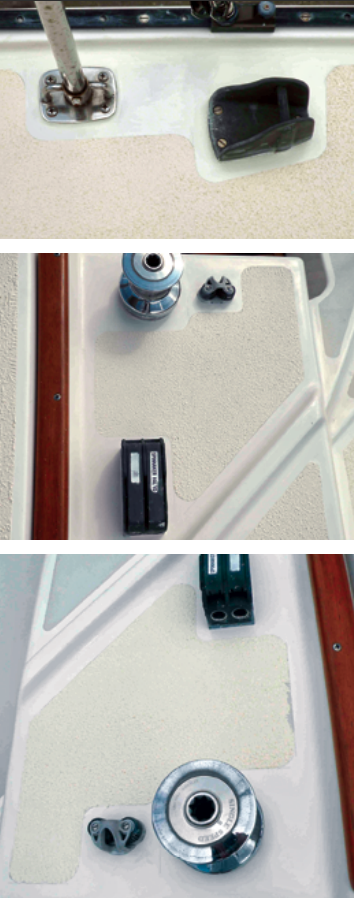
When the sanding was complete, we washed down the deck with BoatLife Fiberglass Powder Cleaner, allowed it to dry, and started accurately outlining in pencil everything that needed to be painted. We didn’t want to repaint all the existing gelcoat on deck, so we focused on locating the areas where it would be easiest to camouflage where the paint ends and the gelcoat begins. This usually (although not always) occurred where there was a 90-degree turn in the deck mold. In some cases, we painted more gelcoat areas than were strictly necessary to achieve a more uniform appearance.
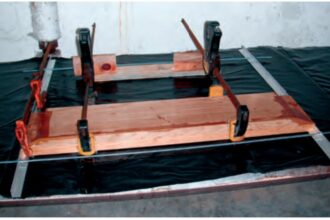
Once we had decided which areas were to be painted, we repaired some of the more serious gelcoat cracks that might otherwise have shown through the paint or non-skid. In some cases, we made fiberglass pads for pieces of hardware (we always thought the genoa sheet cleats were a little too low for the winch so we fabricated and installed 1-inch risers.) We also fabricated 3⁄8-inch risers for the bases of the Bimini and made angled spacers out of gray PVC that was a fairly close match in color to some of the anodized deck hardware.
Before painting, we once again masked off all the hardware. We primed all the deck areas that had been repaired with Pettit Protect High Build Epoxy Primer and painted all the borders with our custom-mixed Pettit Easypoxy color. We applied four to six coats of paint, sanding between coats with 220-grit paper, sometimes wet-sanding. In some areas, four coats of paint were sufficient; in others, it took five or six coats to build up enough paint thickness to achieve a surface smooth enough to be buffed. After applying the final coat, we wet-sanded twice, first with 320-grit, then with 600-grit sandpaper. Finally, we buffed the painted surfaces with two grades of polishing compound. The end result was a surface finish on the borders that looked remarkably like gelcoat.
Prep for non-skid
Next, we laid out all the areas that were going to be our finished borders, taped everything off with painter’s tape, and sanded the painted areas where the paint extended beyond our intended borders. This was tedious work; sometimes we were sanding to a pencil line and sometimes we were masking first, then using the masking tape as a guide for our sanding blocks. Where there were long straight lines, we pressed a fl at, thin board to the deck as a guide for the sanding block. This produced a very clean, crisp edge. All the curves had to be meticulously sanded by hand with the custom sanding blocks. We had to change the sandpaper frequently to maintain very sharp sanding edges on the blocks.
Once the areas requiring sanding were ready, we masked the non-skid areas. The most efficient way to mask off these radiuses was to apply strips of tape to a piece of glass, place the template on the tape, and cut out the curves with an Exacto knife. We then peeled the tape from the glass, applied it to the curves in small quadrants or sections, and finished off by connecting these curves in the conventional manner with straight tape. We worked together; Mary cut the shapes in the cockpit and handed them to me while I worked on deck, masking the areas. We referred to this step as “connecting the dots.”
The main event
We were finally ready to roll on the KiwiGrip. Because of the unusually warm and humid weather, I tried to schedule this phase on overcast days. I also hung tarps over the deck areas where I would be working to shade them from the sun. At this point I was faced with another challenge: Mary was recovering from surgery, so I would be working alone.
Although it is certainly possible for one person to tackle the job, the process is much easier when you have an assistant. It’s very important to remove the tape before the KiwiGrip has time to set up. When Mary and I renewed the cockpit non-skid the previous year, she followed me, peeling off the tape as I finished each section, which allowed me to go on to the next section without interruption. Now, not only was I working alone, but I also had to work faster because of the warmer weather.
Initially, I attempted to roll out three of the smaller areas at once before peeling the tape. Unfortunately, the KiwiGrip had already started to set up in two of the sections so some of the non-skid came off with the tape, marring the otherwise perfect edges. I waited until the KiwiGrip was completely dry then sanded smooth the areas that had peeled, re-taped the sections and re-applied the KiwiGrip.
After this do-over I resisted the temptation to roll out multiple sections and worked section-by-section instead. I also discovered the hard way that KiwiGrip does not come out of the rollers easily, even when only partially dry. When working alone in higher temperatures and humidity, once a section has been rolled it’s best to toss your brushes and rollers into a pail of water to remove the excess paint, then dry the applicators and start again fresh with the next section.
Once I’d completed the smaller sections, I had to work out how to apply the KiwiGrip uniformly on some of the larger areas. In the prevailing weather conditions, I found it necessary to spread the KiwiGrip, roll it out to my satisfaction, and peel off the tape within 10 minutes, before the KiwiGrip began to dry.
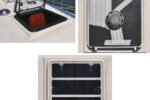
On the sidedecks, I broke up the large areas with 1-inch borders, creating smaller areas where I would be able to roll out the paint and peel off the tape fairly quickly. The cabintop presented a large area with no convenient place to create additional borders or divisions. There, I had to apply the KiwiGrip in four smaller sections and blend them together. I did most of the blending in the area just forward and outboard of the cabinhouse grabrails where the non-skid area narrows to 3 inches.
Spatter zone
When you’re applying KiwiGrip, anything within several inches of what you’re rolling will get spattered, and KiwiGrip sticks to surfaces like crazy. In a couple of places, I got minor spatter on the rope clutches. I had to scrape it off with a wooden stick or plastic scraper, after which I wet-sanded the rope clutches and polished them to restore the surface.
The best way to minimize this problem if you’re working alone is to mask off everything within several inches of the application area. Alternatively, you could enlist a helper to follow behind you and wipe adjacent surfaces with a damp sponge once the tape has been removed.
I discovered that applying minor touch-ups to the painted borders we had created was fairly straight-forward once the non-skid had completely set up. The KiwiGrip rolls on thickly enough that you can use the thickness of the non-skid paint film as a guide for sanding, and hitting the edges of the KiwiGrip when buffing out the subsequent repairs does not damage the KiwiGrip surface.
A satisfying result
The entire deck job took approximately 120 hours, or three average workweeks. I estimate that anyone reading this article carefully and learning from my mistakes could shave10 to 20 hours off that time.
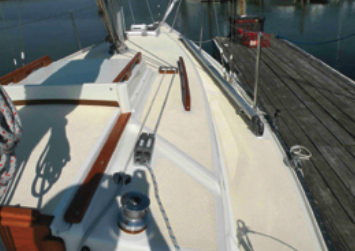
We are very pleased with the overall look of the deck and cockpit, and now that we have had a chance to use the boat with the non-skid for two seasons, we feel qualified to offer preliminary comments on the product.
Most important, we’re very satisfied with its non-skid properties. We both feel much more secure when working on deck. Even at extreme angles of heel, the new non-skid provides plenty of traction, wet or dry.
The KiwiGrip requires minimal care. It’s extremely stain-resistant and maintenance consists of the occasional scrubbing with a stiff brush to remove dirt and mud. The company’s excellent customer service continued long after our initial purchase when their U.S. rep advised us on how to remove a particularly stubborn stain in the cockpit.
Finally, our new non-skid is aesthetically pleasing; we’ve received many compliments on the appearance of our deck and cockpit.
Stephen Perry is a marine surveyor and consultant who enjoys restoring good old boats in his spare time. Steve and his wife, Mary Broderick, have been sailing coastal New England waters together for more than 20 years on their Pearson 28, Indecision, and hold USCG Masters licenses. They are currently restoring a Nicholson 35 and planning an extended cruise.
Thank you to Sailrite Enterprises, Inc., for providing free access to back issues of Good Old Boat through intellectual property rights. Sailrite.com