One sailing family’s answer to the dinghy problem
Issue 32 : Sept/Oct 2003
Cursing while sailing among the Apostle Islands never seems wise, not with a couple hundred feet of melted glacier beneath our keel. Yet there I was, blaspheming into a stiffening wind coming off Lake Superior as it once more flipped our trailing Zodiac.
We’ve never liked towing an inflatable dinghy. The slosh pi-slosh of its progress adds an extra layer of noise, and its presence mars the clean angle of a diminishing wake. I can never seem to drain all the water that splashes in. An inflatable is often gaudy, butt-ugly, or silvered with duct tape. It leaks. Paddling one is like steering a bathtub. And sometimes, it flips. Arrrghh, indeed.
By the time we’d rounded the north end of Stockton Island, I had tugged and manhandled ours into subservience while my sailing partner was fully occupied with actual sailing. By the time we set anchor in Julian Bay, we vowed that, should the day come when we’d move from chartering to boat ownership, we’d find a better way.
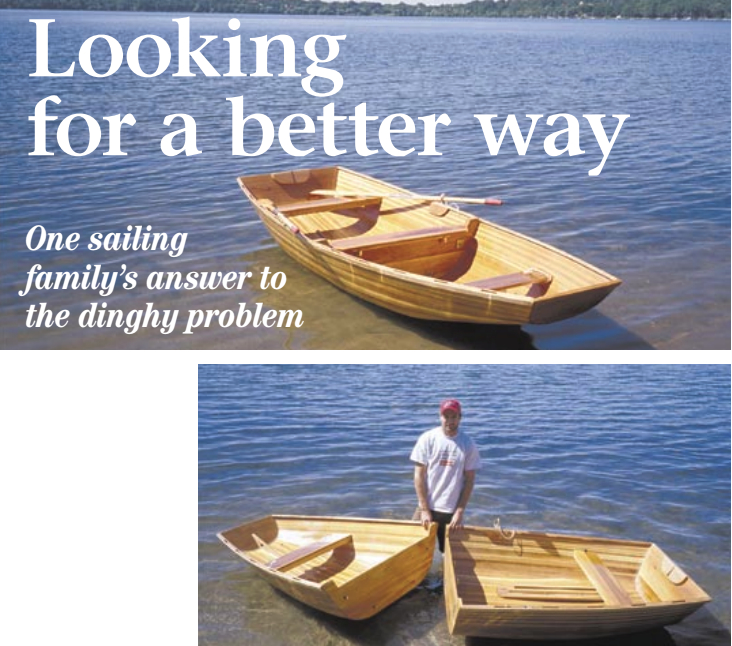
The day finally came and, for us, the better way has proven to be a cedarstrip nesting dinghy. It’s beautiful, glides for yards on a single oar stroke, and stores efficiently. But most of all, it’s light. Our 9-foot dinghy weighs 60 pounds, compared with inflatables that range up to twice that heavy.
And because it is a nesting dinghy, you’re never lifting the whole thing at once, only half at a time. The emphasis on weight was due to my husband’s back surgery, but really, why should any of us lift more than we have to?
It was a given that my husband, John, would build the dinghy. He loves cedar-strip construction, having built three canoes.
Personal experience
“You end up knowing every nook and cranny,” he says. “It’s personal. You know you’ve created something. To me, it’s more of a boat-building technique.” Then he smiles: “Plywood doesn’t get the comments. And let’s face it, sometimes you want something that isn’t available locally.”
Our dinghy was the second John built. The first was an 11-footer for his brother, Paul, thus continuing a long tradition of experimenting on a younger sibling. (See the article about these two brothers and their Cape Dory Typhoon refits in the November 2000 issue. –Ed.) Paul, who sails a Cape Dory 33 out of Grand Marais, Minn., was willing, and research began into a plywood design by Dave Gerr.
John took the best of Dave Gerr’s work with proportion and, combined with his knowledge of cedar-strip technique, redrew a plan for an 11-foot nesting dinghy. The challenges were apparent from the first.
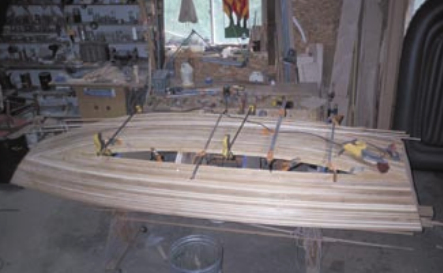
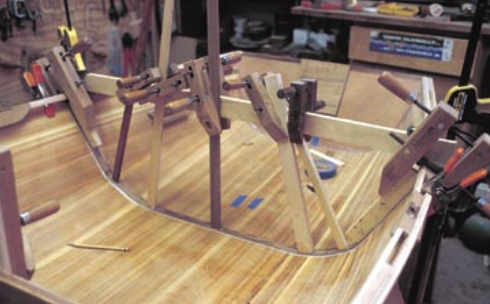
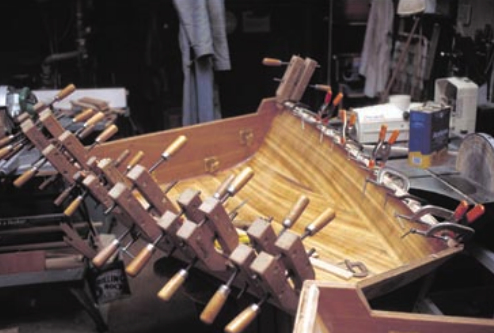
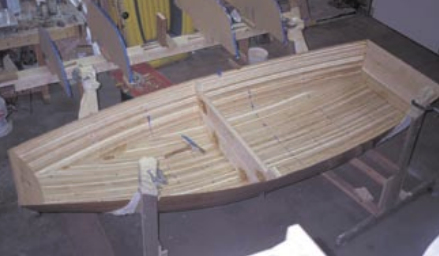
A cedar-strip boat is built in three distinct stages and starts out upside down. First, plywood shapes are cut and assembled on a form, which looks like the remains of a particularly successful feast. Then long, inch-wide strips of cedar, 1⁄4-inch thick, are stapled to the ribs to make the actual shell. Finally, fiberglass cloth is laid on the outside and inside and coated with epoxy.
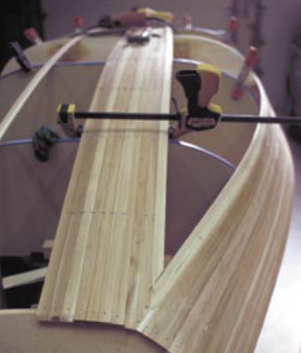
Applying the cedar strips is the most time-consuming step, but also the most time-forgiving. Each must be glued to its neighbor and then stapled to the form. Each edge must be shaped with a plane to fit the curve, which eventually narrows to a slim kayak-shaped slot for the last piece. You can do as many or as few strips at a time as you please. “I like to do about four strips, then walk away,” John says.
Sanding aplenty
After the thin shell of the boat is completed, all the staples must be removed. Then the sanding begins, in lengthy sessions with the random orbital sander, evening the edges of each strip and smoothing gaps with epoxy filler. “Sanding the hull, shaping the hull — you can get quite obsessed with it, although you don’t need to,” John says. Gaps between strips, and unevenness from sanding too aggressively, are more of a cosmetic problem than a structural one. The strength of the boat comes from the epoxy and the fiberglass, which act as the ribs of the dinghy and as its waterproof barrier.
Unfortunately, the fabric doesn’t take strong angles very well. This isn’t a problem in canoes, which are all lovely arcs and curves. But this dinghy design has right angles where the bow, stern, and come-apart transoms join the hull. The cloth, while seeming to mold to the turn while wet, has a tendency to pull away from the angle as it cures, forming a void and losing strength.
By applying a fillet of epoxy paste — about 3⁄4-inch in width — along the joint, the builder can soften the angle just enough to enable the fiberglass cloth to be laid with a consistent bond to the surfaces. The bead of epoxy — actually a blend of epoxy resin and colloidal silica — also strengthens that joint.
For all the challenge of fussing and fitting, John finds fiberglassing the most enjoyable part of the process. “Fiberglassing can be kind of a social thing, someone mixing the resin, someone coating. It needs to be done in one session and in a place that’s reasonably warm and dry,” he notes. The epoxy transforms the lumpy, opaque cloth into a clear sheath of glass, magically revealing the warm beauty of the wood.
Parts remain
One difference between building canoes and dinghies is that a canoe ultimately is removed from the entire form. In a dinghy, parts of the form remain in the boat, serving as the bow, the two center bulkheads, and the transom. Instead of using staples to attach strips to these sections, John used stainless-steel nails in the first boat and bronze ring-shank nails in the second. Slightly recessing the nails into the wood allowed him to sand over them.
As he applied the long strips, John cut each in half along the joint of the two bulkheads. He likes to apply long strips to minimize the seam and to maintain the flow of the wood grain the length of the boat. Later, after he applied the fiberglass, the boat would be cut again along that line into its separate sections.
Once the boat was “cracked” and removed from the form, each half could be set on end and stored out of the way between finishing sessions — nice if your car has been banished to the driveway all this time.
Before that moment, though, there is sanding . . . endless sanding. A random orbital sander is essential along with a good dust-control system. Finally, though, the first dinghy was smooth and halved, and John could install the thwarts, build the gunwales, and add the skeg before finishing it all with good-quality marine varnish.
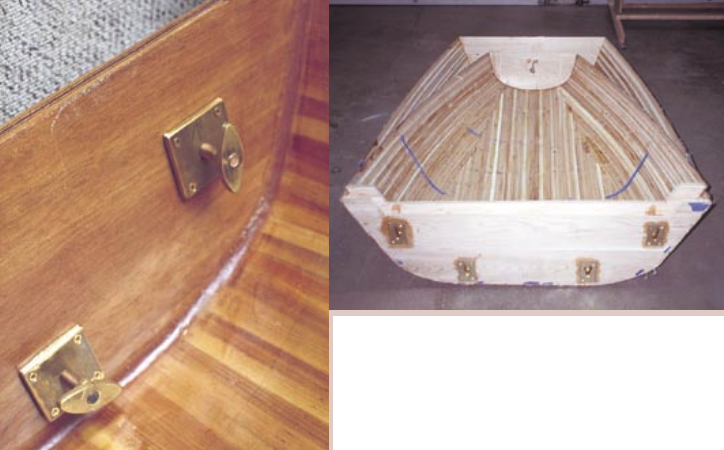
The latch system that locks the two halves together couldn’t be simpler and comes essentially from Dave Gerr, who specifies using bronze for the entire latching system. With a jigsaw, John cut the keyholes from plate brass and used hex bolts instead of Dave’s method of welding discs to rods. “I know, I know,” John says. “There are people who will berate me for using brass, but it’s a lot easier to find than bronze. For now, we only intend to sail in fresh water. If we ever want to go to the ocean, that will be one of the things — on a huge list of things — that we’ll have to do to prepare for salt water.”
Two into one
Assembling the halves works like this: once both sections are in the water and secured to the boat with lines, you climb down into the bow and guide the stern section, with its protruding bolts, into the “keyholes” of the bow plates. Buoyancy causes the stern to bounce up and be held in place while you tighten the latch bolts.
Of course, this was all theory until we gave her a test float on Lake Harriet in Minneapolis. A quick dip to lock the notches, and she was one . . . more easily than we’d dared imagine and more easily than on land.
The first oar stroke sent her 10 feet. Stroke, glide. Stroke, glide. Success! Brother Paul was happy, and John was eager to try building another. The reason to do so finally came. With a check for a Cape Dory 36 deposited in someone else’s bank account, John set about refining his original design. Paul’s dinghy can be set afloat and hauled in by one person, but just. John wanted to see how small he could go, yet retain the functionality to ferry a family of four from ship to shore.
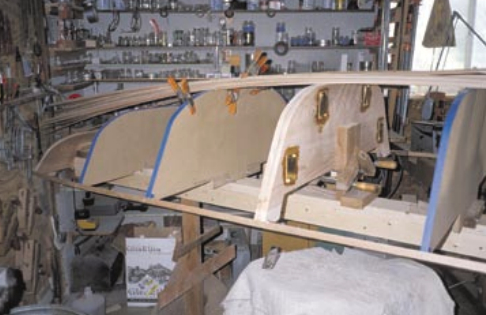
He reduced the original plans by 18 percent, to build a 9-foot boat. For the first boat, he’d used solid cedar for the bulkheads, stem, transom, and thwarts. But he found it difficult to keep those parts from warping so he switched to 3⁄4-inch mahogany plywood. He also added a footrest and glassed in a stiffening rib in the stern section to keep the boat from twisting when rowed.
Instead of using plastic 1⁄2-inch hose for a fender, he screwed into the gunwales a length of braided rope, which looks spiffier. Finally, he refined how the removable thwarts are stowed.
Down for good
“I wanted the oars and seats stowed on the dinghy so there’s no need to climb back and forth,” he says. “When you’re down in the boat, you’re down in the boat for good.”
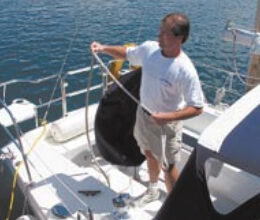
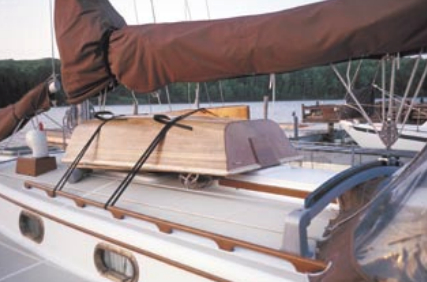
Our dinghy fits on our boat’s cabintop over the skylight, resting on blocks of closed-cell foam and strapped to the handrails. This lets us leave the skylight slightly open for ventilation in the rain and also while we’re gone. Paul does the same and has a foredeck option as well. Because all boats are different, John stresses taking careful measurements of the deck space available before beginning your plans.
As for cost, the biggest expenses were the cedar lumber, epoxy, and glass. You can be outrageous or basic with what you use for gunwales or what you choose for oarlocks. Specifically, the 11-foot dinghy cost $1,093 when it hit the water. Our nine-footer cost $724. Any typical home workshop will have the tools required for this project. But you can never have too many clamps.
John didn’t punch the clock while doing this and therefore can’t say exactly how much time it took, but he’s always said he’ll build one for anybody for $3,000, and that’s working cheap. Figure it out from there.
Regarding upkeep, you’ll likely find that after a summer of going ashore, the bottom of the dinghy will be scratched and dull. This is easily repaired in the garage, preferably in the dead of winter.
An afternoon of lightly plying the orbital sander and brushing on a fresh coat of varnish will return your cedar strip to its original luster, while letting you revisit the best days on the water. There’s a memory of a great beach behind every scratch.
After 22 years with my husband, I know there’s a third dinghy in the offing, probably in the 10-foot range. John found that taking the original plans down 18 percent was a bit too much. Our dinghy rides a little lower in the water than we’d like, and he’s contemplating adding two inches to the oarlocks to keep from hitting his knees while rowing.
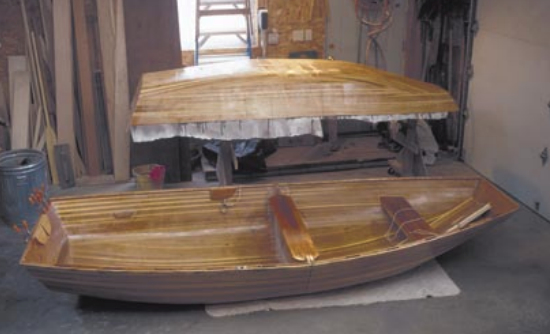
It’s the perfect kids’ boat, though, and our son and daughter have reveled in rowing it around the marina where we keep our boat. It should prove a nice fit threading the sea caves of our cruising ground as well.
“She’s a looker,” John says with unabashed pride. “Building it was a series of little epiphanies, reaffirming that you’re going to end up with something quite beautiful.”
And not available locally.
Thank you to Sailrite Enterprises, Inc., for providing free access to back issues of Good Old Boat through intellectual property rights. Sailrite.com