Issue 5 : Mar/Apr 1999
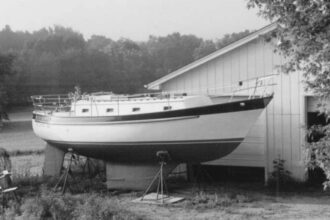
Four years ago, I decided the aluminum portlight frames on Surprise!, our Bristol 29.9, looked pretty tacky. The aluminum was splotchy and corroded. I decided to clean and anodize them. After recovering from the sticker shock of a commercial estimate, I decided it just can’t be that hard. After some research, I came across an article about aluminum finishing in the amateur radio magazine, QST, of May, 1950.
I followed the instructions and lo and behold, the portlight frames looked really great. It was so much fun I then anodized several cleats. Today, these parts look just as they did when I finished the job. Two of those years have been spent in the salty water of the Pamlico River.
Anodizing sounds impressive but, like many things, a little analysis shows there is nothing very tough about it. The term simply means the outer surface of the aluminum is changed to aluminum oxide. The oxide is the stuff of which many precious stones are made. It is as hard as rubies or sapphires. It is a good insulator — a property used to test the finished product.
To make the anodized film, you connect the piece of aluminum to be treated, a cleat for instance, to the positive side of a DC power supply and another piece of aluminum to the negative side. This piece should have about the same surface area as the cleat. You place them both in a sulfuric acid solution. The current from the DC supply passes from one piece of aluminum to the other through the solution. At the positive side, our cleat, also known as the anode (hence the name anodizing) generates atomic oxygen. This gas immediately reacts with the cleat and changes the surface to aluminum oxide. The other piece of aluminum (the cathode) is busy generating hydrogen. It’s not dangerous because so little is generated.
There is nothing the least bit critical about this process. Commercial operations control all the variables because they want to produce a consistent product thousands of times. For our boats, we can be much less fussy and get really good results.
Let’s go through the procedure using a corroded, black painted cleat from my mast. Removing the corroded cleat was a three-hour chore. The mounting screws were “cemented” to the cleat’s mounting holes. The cement was aluminum oxide (see, I told you it was tough stuff!) made by the electrolytic action between the aluminum of the cleat and the stainless mounting screws.
The first step is cleaning the cleat. I removed the black paint using a strong paint stripper. Next I sanded the corrosion off the cleat with sandpaper. Then I used an abrasive pad to polish the surface to a desirable sheen and texture. (I’ve tried buffing to a “silver” shine, but the anodizing process removes this luster.) I then washed the cleat with soap and water.
For this cleat, I decided to get a matte finish by submerging the part in a lye (sodium hydroxide) solution. (Just a couple of tablespoons of lye in a pint of hot water.) The cleat bubbled furiously as the aluminum and lye solution reacted. I let it bubble for about 15 minutes. (If you leave the cleat in long enough, it will totally dissolve!) The surface of some aluminum alloys may turn black. This one did. Just scrub it off with abrasive cleansing powder like Ajax.
Now assemble the actual anodizing setup. First you need a DC source. My 12-volt trolling motor battery was in the garage (on the concrete floor), and not doing anything, so I used it. I found a piece of scrap aluminum for the cathode. I cleaned it so it would not contaminate the process. You also need aluminum wire to connect to the cleat and the cathode. It’s very important to have only aluminum metal in the acid solution. Other metals will react with the acid solution and “poison” the anodizing process.
Lots of hardware stores have aluminum clothesline or picture wire. While you are at the hardware store, get a couple of nylon bolts and nuts to attach the wires to the cleat and the cathode.
You must have a container for the process. It should be a glass or plastic pan big enough for the cleat and the cathode. I used a Rubbermaid shoe box. You can use an aluminum pan, and it will also serve as the cathode. Editor’s note: Don’t let the cleat (anode) touch the pan, if metal, nor the other piece of aluminum (cathode). A short circuit in a pan full of acid and hydrogen gas will spoil your day.
Next you need the sulfuric solution. I mixed up the sulfuric acid solution from a small bottle of battery acid from an auto parts store ($4.95). The mixture is 1 part acid to 8 parts water by volume. We need enough to submerge both pieces of aluminum. This mixture must be made by pouring the acid into the water. Caution: If done the other way, the acid will spatter, due to heat generated by the mixing. To remember this, think: Do what you oughter. Add acid to the water. I wore old clothes, because the acid will eat holes in most fabrics.
Do a final cleaning with cleanser and water and rinse well. Avoid touching the cleat with your fingers to prevent the oil from your fingers from getting on the cleat. I used a paper towel; the pros use cotton gloves. Connect the cleat to the positive lead of the battery using a nylon bolt to attach the aluminum wire to the cleat. Lower the cleat into the acid solution. Then connect the cathode to the negative lead again using the aluminum wire and nylon bolt and put it in the solution. Both the cleat and the cathode begin bubbling the gases on their surface: oxygen at the cleat and hydrogen at the cathode.
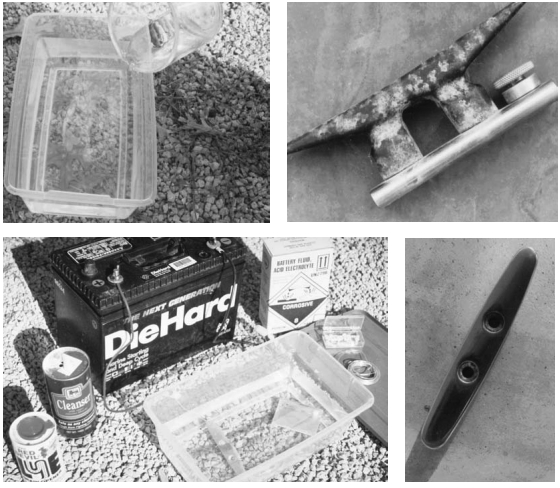
After about half an hour of bubbling, disconnect the battery and remove the cleat from the bath with tongs. Rinse it off with water and air dry it. If you have an ohmmeter, you can touch the probes to the surface to check the resistance. It should be an open circuit on the megohm range. If you don’t have an ohmmeter, trust me.
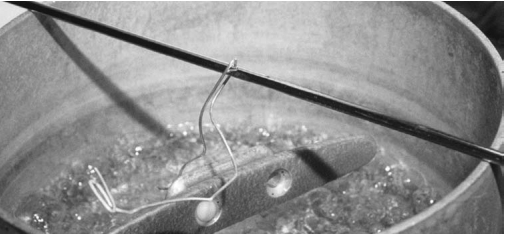
Now the final touch. At this point, the aluminum oxide film is porous like a sponge. You have to close the pores to finish the job. You do this by steaming the cleat. Place a pan of water on the stove to boil. You will need a lid to keep the steam in. Suspend the cleat over the water. Then start the boiling. Let the cleat steam for fifteen minutes. Dry it off, and you are finished.
After some experience, you may want to try a decorative touch. Before the steaming, you can place the part in a dye bath. Standard fabric dyes like RIT work fine. The dye should be mixed twice as strong as the package says. Add a teaspoon of vinegar to the dye mix. Place the part in the dye bath for half an hour. The dye particles fill in the pores of the aluminum oxide. When the steaming operation closes the pores, the dye particles are sealed inside.
If you are really ambitious, there is nothing stopping you from anodizing your mast and boom. You just need a big enough tank.
Thank you to Sailrite Enterprises, Inc., for providing free access to back issues of Good Old Boat through intellectual property rights. Sailrite.com