From aluminum ports to weathered bronze: a clever fraud
Issue 30 : May/Jun 2003
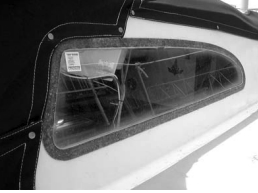
Although we love our boat, we’ve never had any particular affection for her fixed aluminum ports. Plans to retrofit them are on the to-do list, but at the rate we work it may be years before we get that far down the list. So we were pleased to discover a creative camouflage in the form of a two-part chemical process that transforms any surface into “weathered bronze.”
There are a number of two-part products on the market. The one we used is made by Modern Options and was purchased from a craft store, but similar products are available at hardware and paint stores. All operate on the same basic principle: a chemical reaction is triggered by applying an ammonium chloride solution over an initial coat of paint that contains finely ground copper particles. The result is a credible impersonation of weathered bronze without the bother of weathering or the expense of bronze.
We masked the surrounding areas with blue tape before painting. Before beginning the two-part process, we first treated the ports with Alum-A-Prep to ensure good adhesion. We allowed this to dry thoroughly.
Now the process really begins. Prepare yourself for lots of attention from neighbors on your dock. They’ll want to know what you’re thinking, painting your ports that gaudy copper color. Be strong. It will be worth the trauma.
Be sure to shake the first paint bottle well prior to use, as the whole process relies on the reaction of the ground copper particles in the paint and — being heavy — they tend to settle out. Do not thin this paint.
Careful timing
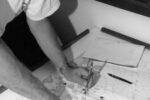
Timing is critical with this procedure; it’s advisable to keep your work area small. After you’ve allowed the initial base to dry, start with one port and apply a generous coat of copper paint using a foam paintbrush. Allow this to dry thoroughly. You’re primarily looking for coverage and a little texture adds some realism, so don’t be too concerned with achieving a perfect finish, just make sure to cover all of the original surface.
Following the directions for your product, allow the next application to become tacky and then — using another foam paintbrush — apply the ammonium chloride. If the copper paint is too dry when you apply the second part, it will fail to react and stubbornly remain its copper color. If it’s too wet, it will run and look streaky. Humidity, temperature, sun exposure, and wind should all be taken into consideration when judging how long to allow the paint to kick before applying the ammonium chloride solution.
There is a learning curve here, but don’t be afraid to experiment. You can always start over if you make a mistake. Just apply more copper paint and begin again. Some practice on a similar surface and in similar conditions can reduce anxiety and improve your confidence and technique.
When you’re happy with the result and everything has dried, you can add a protective finish. A clear coat is available at craft shops, but we used varnish and found that its mellow amber color enhanced the illusion of age and added depth.
Don’t limit yourself to portlights; we have also used this process to transform plastic Dorade vents into “faux bronze.” Use your imagination, the options are endless.
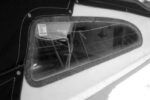
Our “weathered bronze” ports have fooled the practiced eye of many seasoned boaters. Over the past four years the only maintenance has been adding an occasional coat of varnish. Now, if we could just find a way to instantly make them into opening ports . . .
Thank you to Sailrite Enterprises, Inc., for providing free access to back issues of Good Old Boat through intellectual property rights. Sailrite.com