First dodger, then bimini, and then the whole caboodle
Issue 109 : Jul/Aug 2016
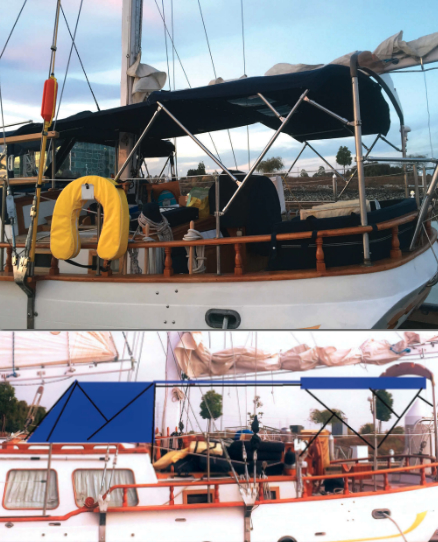
We were motorsailing north along the rugged California coast, fighting a headwind and a strong current. Our ride became ever colder and wetter as the waves built. MoonShadow did not have any type of canvas enclosure at the time. During that trip, I began to think how nice it could be if we added a dodger and bimini to our 1983 Hudson Force 50 ketch. We really needed protection from the elements and a comfortable cockpit gathering place when we were in port. I checked around to get a price on a new dodger and was surprised when I got quotes in the $4,000 to $5,000 range. I wondered if I could build one myself and save a little money in the process.
To get some ideas of how to go about it, I searched on the internet and in magazines for cockpit canvas designs used on boats similar to mine. I found lots of approaches, from a basic hood over the companionway hatch to a full enclosure stretched over a big metal framework. I wanted something in between, a solution that would offer some protection but wouldn’t get in the way of sailing the boat.
I followed up by wandering the docks of marinas in our area, looking closely at features that were appealing. My list of must-haves began to grow. I wanted a design made up of modules so it could be adapted to changing sailing conditions — too hot, too cold, too windy, too wet — while providing good access to the sails. I saw too many designs that lacked that flexibility.
We wanted panels we could remove when it got hot, or to make it easy to sail, and that could be buttoned up when storms threatened. We were on a tight budget, so I decided we’d start by developing the basic design that would work now but would accommodate changes and additions in the future. We could add the side panels later one by one as our budget allowed. All we had to do was to start with the right design.
Preparing a design
I took a photo of our boat and drew a sketch on it that incorporated a lot of the ideas we had developed. I wanted a design that could be easily modified later so we could add features such as solar panels, boom gallows, a connector panel between the dodger and bimini, and weathercloths.
We had to work within the limits imposed by the space available on our boat while ensuring that all of our sailing gear would continue to work without restriction. I hoisted both sails one calm day and measured the arcs where the booms would swing. I wanted to make sure we had 3 to 4 inches of clearance beneath the main and mizzen booms. I also rearranged the mainsheet traveler control lines to simplify our setup.
A dodger from a kit
I had built a dodger for my previous boat from a kit I bought from Sailrite. This had been a good investment so, for this newer and bigger project, I once again ordered a full dodger kit, including the complete frame, canvas, and sewing supplies. To that I added some solid struts to further strengthen the frame. Before starting on the project, I watched the entire training video that came with the kit.
My plan was to make a frame that was similar in shape to the front of MoonShadow’s pilothouse with its two big windows. I did this with three solid struts connecting the forward frame to the deck, and added two more struts at the rear of the dodger frame and two handrails to connect the frames.
Building the frame was a pretty forgiving process, as the pieces of tubing are held together by special sliding connectors that allow a lot of adjustment. Still, before drilling any holes in the deck, I took the time to think carefully through the placement of the bows. For example, I wanted the angle of the dodger’s front windows to match the angle of the pilothouse. I found it helpful to use packing tape and twine to hold the frame in place temporarily while I stood back to study it. The goal was to develop something that was not only functional but would also look good on the boat.
Once we were satisfied with the design, we double-checked that the frame would not interfere with any of our lines, the sails, or the boom. We also checked that the framing angles matched nearby structures, such as the shape of the pilothouse. Ideally, to achieve a professional-looking appearance, the frame legs should be parallel (or perpendicular) to each other.
It’s not uncommon for the port and starboard sides of a boat to have minor variances in shape. Before drilling the first holes, we made sure the dodger frame was symmetrical by measuring it diagonally to see if the angles matched. We also measured from two or three more reference points to make sure the frame was on straight before we screwed it to the deck.
It begins with a pattern
Once the frame was in place, I was able to make a pattern for the canvas covering. I had been debating about whether to have a canvas top or a rigid top. In the end, I decided to build the dodger in separate pieces so I could remove the front panels for ventilation or swap out the top panel for a hardtop if I wanted to later on. Sailrite includes pattern material in the kit, and the instructional video shows how to use double-sided tape to position the pattern material on the frames. The top panel would be the key, as everything else would attach to it.
Once we’d completed the pattern for the top of the dodger, we needed a pattern for the front, as this piece connects the top panel to the deck. The final step was to add patterns for the two side windows. We wanted to mimic the design of the windows in the pilothouse so the overall dodger would look like original equipment.
Sewing the panels
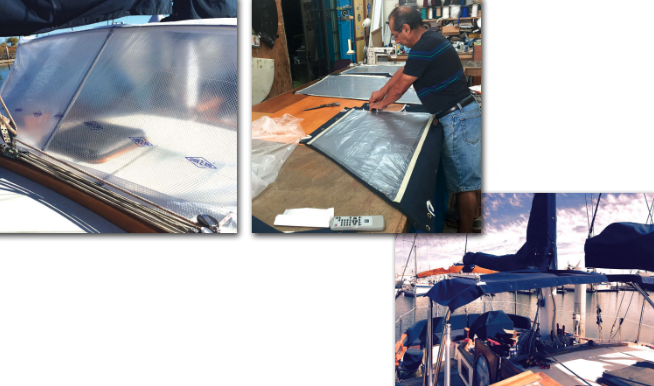
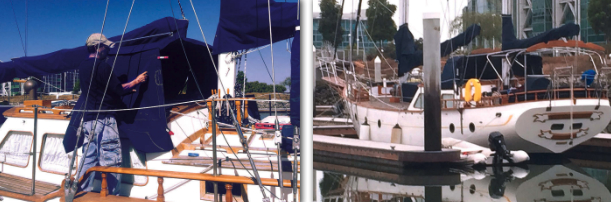
Patterns in hand, it was time to start sewing. I already had a Sailrite sewing machine I’d used for small jobs on the boat, but I was a bit overwhelmed by the scope of this project. I decided to contract with local canvasmaker Ramon Gutierrez of Nor Cal Canvas. Ramon has built dozens of dodgers and biminis and I hoped I would learn a few things by working with him.
Ramon likes to build each project a step at a time with frequent fittings. It was sort of like having a custom suit made to order, which is not surprising because Ramon was a tailor when he lived in Mexico.
When the top was looking pretty good, we added zippers and a 2-inch trim overhang on all of the edges. This gives it a finished look and provides a drip line for water to run off.
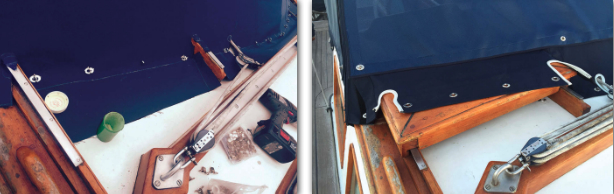
We made the front panels next and, among other obstacles, had to work around the traveler control lines and the handrails. The sliding hatch presented a problem here, as we needed the front panel to be firmly attached to the deck whether the hatch was open or closed.
I made a stainless-steel frame to fit over the hatch and we fitted the bottom of the panel so it could be attached to the tubing with twist-lock fasteners. When the hatch was closed, we could use another row of fasteners to attach the panel to the deck.
When the front panels were finished, we installed twist-lock fasteners with which to join them to the top panel and to the deck. We also added heavy-duty zippers for connecting the side panels to the front panels.
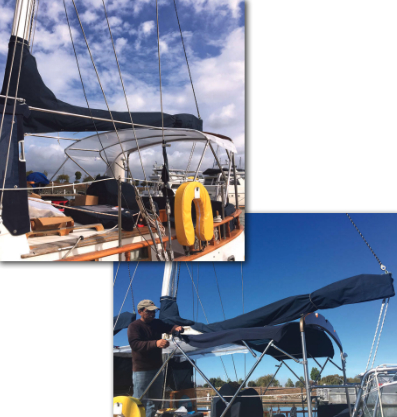
With the canvas complete, we were ready to insert the vinyl windows. We made them as large as we could to provide good visibility while leaving enough fabric around them to give each panel sufficient strength. For added strength, we reinforced the edges with double layers of cloth and sandwiched vinyl strips around the perimeter.
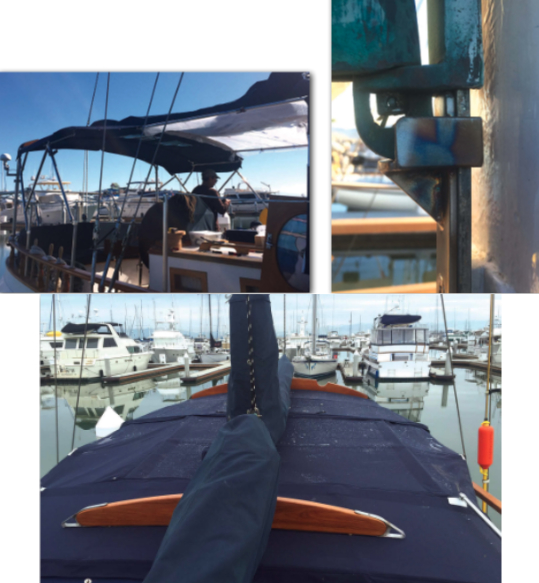
he stainless-steel bars that connect the tops of the dodger bows provide handholds for when we have to walk past the dodger while under way. Cutouts in the fabric allow us to grip the rear struts as well.
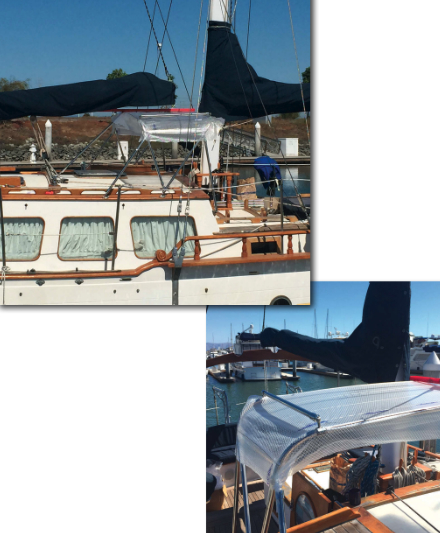
Finally, we installed UV protection panels over each vinyl window. These panels are typically made of Sunbrella, but I wanted to be able to see through the windows even when the covers were on, so we used Phifertex Plus. This fabric provides 90 percent shade while still being somewhat transparent.
Designing the bimini
Now that the dodger was coming together, it was time to build a frame for the bimini. I wanted to tie it into the existing lifeline stanchions and make it possible to attach side curtains at a later time. As always, there were constraints to work within.
The first step was to raise the mizzen-boom gooseneck to allow maximum headroom in the cockpit. The gooseneck is on a track, so I hoisted the sail and installed a stopper on the track to support the boom in a higher position. The mizzen sheet was originally attached to a traveler in the cockpit. When I installed the new boom gallows, I moved the sheet to the end of the boom to keep it from interfering with the bimini frames.
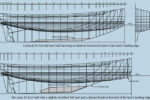
The bimini design proved to be complicated. The beam of MoonShadow narrows significantly toward the stern. The forward bow measures 128 inches, the center one is 118 inches, and the one at the transom is just 98 inches. Unfortunately, the maximum width Sailrite offers in its kits is 106 inches. I spoke with the folks at Sailrite and we came up with a workaround. We would lengthen the stock bows by adding an extra piece of tubing on both ends of each one, joining them with splines inside the tubing. I used pop rivets to hold the splines and tubes together.
The next challenge was assembling the bows and mounting everything securely in place. To make it as strong as possible, I decided to fasten the frame to existing hardware. We attached the bows to the stanchions and reinforced them with struts. I used handholds to tie the bows together and secured the stern bow to the boom gallows. The frame is designed in such a way that it is strong enough to stay up in most weather, but I can collapse the bows if the need arises.
Once everything was in place, I set about dialing it in. I wanted the tops of the bows in perfect alignment and the side legs of the bows aligned as well. Accomplishing that took a lot of bending and some further cutting of the legs and the bows. The sliding connectors that came with the kit were a big help here as I could make fairly significant adjustments with an Allen wrench.
Eventually, all the bows and struts were in place, but my pop-riveted extensions had not held up very well during the bending and cutting process. I decided to remove the bows a final time and take them to a machine shop to have all the extension pieces welded together. Once everything was reassembled, it was very strong. The frame was symmetrical and ready for the canvas.
Patterning the bimini
As with the dodger, the key fabric panel is the top one. To ensure that it would meet our longer-term plans, we added a number of features to the design. These included windows over the helm for viewing the sails when under way, attachment points for future side curtains, and attachment points for a connector panel between the dodger and the bimini.
We started with the pattern for the top panel, then used some of the plastic pattern material to sew a rough draft of the panel. We fitted it on the frame numerous times as we added zippers, side trim, and twist-lock fasteners.
Connector panel
The distance from the back of the dodger to the front of the bimini is about 6 feet. I needed some support for the panel but it had to be something I could easily remove when we were sailing. I decided to tie the dodger frame to the bimini frame with lengths of tubing with quick-release pins at each end. Once these supports were in place, we made a pattern for the connector.
We kept the top panel fairly narrow, just wide enough to cover the aft cabin so we could still move around on the sidedecks and have easy access to the cockpit. When we’re in port, we can zip side panels on to the connector to provide more shelter in the cockpit. They are easy to remove when we are preparing to get under way.
We did run into one problem with the connector panel. There wasn’t enough clearance under the boom near the mizzen mast. The solution was to raise the gooseneck another 2 inches. I had the local welding shop fabricate a slide to fit on the gooseneck track to support the boom.
We also built in a wide Velcro sleeve around the mizzenmast for support and to make the area around the mast more waterproof.
Future projects
We have several more additions planned for our cockpit enclosure, including weathercloths and bimini side panels. While I haven’t yet decided how much of the cockpit I want to enclose, I think these panels will provide good protection without getting in the way of sailing, as it will be easy to put each panel on or take it off as required.
Of course, while we were doing all this work around the cockpit we noticed where we could make other improvements. So the list goes on . . .
Summary
This dodger/bimini project evolved as the work progressed. Along the way, we ran into unanticipated problems and had to make design changes to solve them. We also uncovered new possibilities that made for a better project overall.
A friend on the dock says he built four versions of their cockpit enclosure before they were satisfied with the design. This is our Version 1. We have already made lots of changes, so we are well on our way. Sailing time and dock time will expose our design shortfalls and, of course, lead to new enhancements but, for our first effort, we are pleased with the outcome.
Progress Report
Northern California’s rainy winter brought relief to the state’s populace in general and also put Dale’s new dodger and bimini to the test. Dale sent this update just in time to for it to accompany this article.
Our new canvas has held up very well but, as expected, a few months of use revealed the need for a few design improvements.
- Connector panel – The wooden batten I had originally installed to help hold the shape of the connector panel didn’t stand up well to the rain, and we ended up with a puddle of water on top of the connector. I solved the problem by installing a 1-inch-diameter stainless-steel bow with a curve similar to that of the other bows in the enclosure.
- Access to the sails – The connector panel ended up being a little too permanent. To make it easier to remove the panel when it’s time to put up the sails, I am changing out the two long zippers that ran down each side under the support bow for four shorter ones.
- Canvas doorways – I thought that just adding wind curtains and side panels to our enclosure would give us enough protection in bad weather, but I now see that we will need to be able to button things up completely. We have added a doorway on each side that we can zip in easily when required.
- Solar Panels – It turns out the bimini is a great place to install solar panels. Installing six split side mounts will allow me to mount a frame above the bimini to hold one panel on each side.
Dale and Wendy Bagnell live aboard MoonShadow, their Hudson Force 50, on San Francisco Bay and are upgrading her in anticipation of doing some bluewater cruising in a couple of years.
Thank you to Sailrite Enterprises, Inc., for providing free access to back issues of Good Old Boat through intellectual property rights. Sailrite.com