Economical recycling of throwaway mahogany
Issue 66 : May/Jun 2009
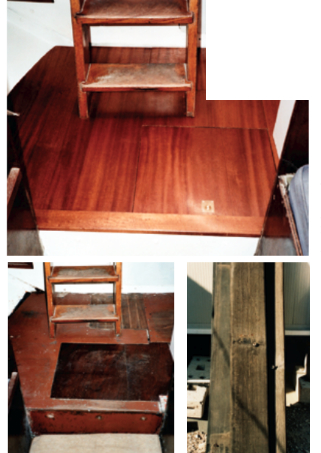
My partner, Magali, and I have attempted to carry out the improvements and modifications to Sigfrid, our 34-foot 6-inch steel ketch, in a logical progression, but the choice of the “next project” has often been influenced by the facilities and materials at hand.
This was definitely the case with the cabin sole in the galley and chart-table area. While it plainly needed replacing, it was not high on our list of priorities — until a local building company offered us some old mahogany banisters that were being thrown away.
The boards were extremely weathered but were 1 1⁄2 -inch thick. We had a local woodworking shop split them in half edgeways and put them through a thickness planer, and ended up with a supply of 5⁄8-inch-thick planks. One face of this machined lumber was perfectly clean, but the other still showed evidence of years of exposure to the elements, with small splits, fissures, and gray areas. Because of this, we decided that the wood could not be relied upon for any sort of structural work, but it could be ideal for a cabin sole if we laid out the planks with their good sides upward.
Although they were large, the mahogany boards unfortunately had a lot of holes where old fastenings had been. After carefully measuring up the available good lumber and the size of the sole we intended to replace, we figured we would make the most efficient use of it by cutting it into planks 3 1⁄8-inch wide.
Cutting to a jig
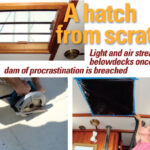
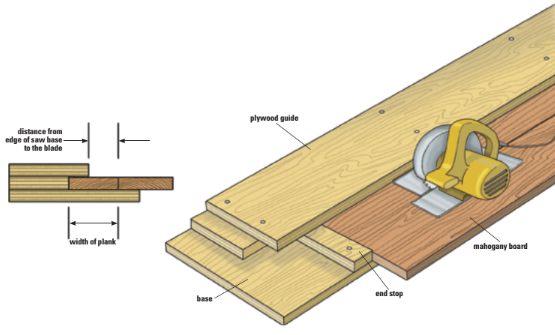
Instead of returning the lumber to the machine shop to have the boards cut to width, we decided to do the job ourselves using a hand-held circular saw. This saved money and allowed us to select exactly which pieces of the mahogany board we would use. It did mean, however, that we needed to construct a jig to ensure that our finished planks were straight, parallel, and all the same size.
We made the jig from four pieces of plywood. One strip, 8 feet long and about 15 inches wide, formed the base. We nailed a second, narrower strip, slightly thicker than our mahogany boards, on top of that, positioned to leave about 6 inches of the base showing along one side. With a small scrap of plywood nailed across one end of the exposed piece of the base to make an end stop, this formed a sort of ledge on which to place the mahogany boards.
The final step was to add a fourth piece of plywood, 8 feet long again and about 8 inches wide, to serve as a guide for the saw. In use, the edge of the saw slides along the edge of this piece of plywood, ensuring that the saw follows a perfectly straight and repeatable line. The position of this plywood guide governs the width of the finished planks.
To align the guide correctly, we drew the width of a plank onto one of the mahogany boards and placed the board on the jig, with the newly marked-out plank against the second strip of ply. We measured the distance from the saw blade to the edge of the saw’s base that would run along the guide. We then laid the plywood guide on top of the jig, carefully positioning it so its edge was parallel to the line marked on the mahogany and the distance from the line to the edge of the plywood matched the distance from the edge of the saw to the blade.
By holding the mahogany boards firmly in place against the second strip of ply, and making the cut with the edge of the saw running along the guide, we were able to cut all the planks to exactly the same width.
Biscuits and glue
As we had many other jobs to complete on Sigfrid before we would be able to go off sailing in the summer, we did not want this project to consume too much of our time. With this in mind, to keep the construction as simple as possible, we would plane the edges of the boards until they fitted together, and then glue them up using jointing biscuits.
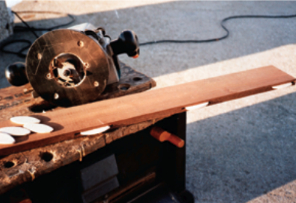
Jointing biscuits are small, lozenge-shaped pieces of compressed plywood sold in packets at building-supply stores. They fit into matching grooves cut into the edges of the boards being joined. When used with a dedicated biscuit-jointer, they offer an extremely quick and efficient method of assembling wooden structures.
For a one-off job, however, which does not justify the expense of a specialized tool, the grooves can be cut with a router fitted with a biscuit-joining bit.
Preparing the lumber
In simple construction like this, the only really challenging woodwork is preparing the lumber, particularly when using hand tools. Ideally, all the planks should be perfectly straight with absolutely square edges so that, when laid down side by side, they fit tightly together and create a level surface. Unfortunately, this is a lot harder to achieve than it sounds, which is why a technique that I was shown in high-school woodworking class came in very useful — see “A perfect fit” on page 27.
A perfect fit
When working without the aid of a shopful of woodworking machines, use this technique to ensure two boards will fit together perfectly.
To begin with, plane the plank edges as accurately as possible. If at this stage you lay the boards out edge-to-edge, any slight discrepancy or deviation from true will be immediately apparent, and the fit will usually be disappointing.
The trick to creating a tight joint is to “fold” adjoining planks as if they were the pages of a book and put them in the vice with their mating edges uppermost. You now carefully plane the two boards as if they were one thicker piece of lumber. When you remove them from the vice and “unfold” them, you will find that any slight deviations from square have been automatically mirrored in the two boards, and therefore will cancel each other out. For a further refinement, you can make one or two final passes with the plane across the center region of the boards. This makes the edges very slightly dished, ensuring that when you glue the boards together, the joints at the ends will be perfectly tight.
Once we had prepared the boards, we could cut the rebate joints for the biscuits. We set the router to cut the rebate in the middle of the edge, and always worked from the good side of the lumber to ensure that the boards would be flush once they were glued together. We placed the biscuits about 8 inches apart, a spacing we arrived at based on the number in the packet rather than any sort of formula. In practice it seems to have given a durable result.
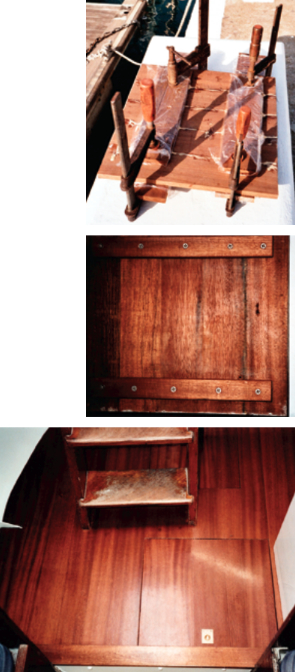
Once we had cut the rebate joints, we did a “dry fit” of the boards, inserting the biscuits and clamping the planks together. This firstly showed us we had not made any mistakes, but it also allowed us to devise an effective clamping system before we applied any glue. We ended up sandwiching our boards between stout pieces of lumber to make sure they would not end up bowed by the pressure of the clamps squeezing the joints shut.
Once we were satisfied with the dry fit, we dismantled the boards, applied glue to them, and reassembled them.
Shaping the cabin sole
The square boards now needed to be cut to fit the shape of the boat. We simply drew around the old boards that we were replacing, correcting the shape in the areas that needed improving. If we’d been starting from scratch, the simplest method at this stage would have been to make a template from stiff cardboard, thin plywood, or some similar material. As well as making sure that we didn’t make a mistake shaping the new sole boards, making a template would have let us ensure we could get the boards in and out of the boat.
With the boards shaped up, the final step in the construction was to screw battens of the same lumber across the underside of each one, crosswise to the direction of the main planks. These battens strengthen the sole board and can be arranged to locate it in its fore-and-aft position.
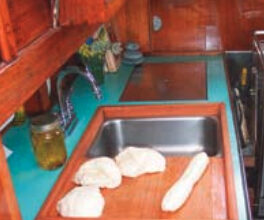
The actual shape and design of the cabin sole is unique to each boat. In Sigfrid, this area is now made up of five pieces: the sole itself, which we split into three sections so it’s easy to get in and out, and two lift-out hatches.
As the center section of the sole goes into the boat first, the crosswise battens under it project out by about 1 inch on each side. This helps to distribute the load between all three boards and reduces any flexing or bounce between them.
Inlaid lifting rings
We fitted the hatches with brass lifting rings inlaid into the boards. We achieved a good fit and a neat result here by using another a simple woodworking technique.
We laid each brass lifting ring face down on the hatch in its correct position and scribed around it with a knife, rather than a pencil. The cuts made by the knife blade perfectly defined the shape of the lifting ring. They also made fine grooves in the wood surface and we later used these marks to locate the blade of the chisel.
We next chopped out the recess for the ring, staying about 1⁄16-inch inside the scribed lines. The last step was to take a wide chisel to trim the recess to shape. For the final cuts, we fitted the tip of the chisel into the grooves scribed around the lifting ring, ensuring a perfect fit.
To complete our new cabin sole, and to bring out the luster of the reclaimed mahogany, we sanded it thoroughly and gave it three coats of International’s satin varnish.
Richard Toyne and his partner, Magali Bellenger, have been exploring the Western Mediterranean in Sigfrid, a 34-foot-6-inch steel ketch, since 2000. They finance their voyages by carpentry work, writing for magazines, and by the sale of handmade jewelry.
Thank you to Sailrite Enterprises, Inc., for providing free access to back issues of Good Old Boat through intellectual property rights. Sailrite.com