Practical tips for a brilliant finish from the author of This Old Boat
Issue 22 : Jan/Feb 2002
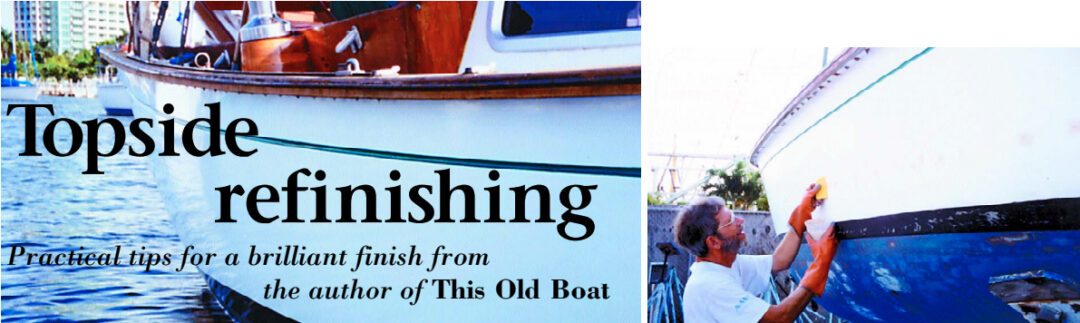
Old boats, like old boat owners, weather on their surfaces. For the boat, at least, a well-applied coat of paint can turn back the clock.
The cost to have this done professionally leaves most boatowners in shock. Even if you dumped your dot.com stocks before they tanked completely, the magnitude of this particular expenditure is likely to be incompatible with your motivation for owning an older boat. Fortunately, this is not an intractable problem. Do the job yourself, and you cut the cost by as much as 90 percent with no discernible difference in the end result.
The only paint choice for the uninterrupted expanse of topsides is two-part polyurethane. This paint has astonishing flow characteristics. Anyone — and I do mean anyone — can get spectacular results. Will the finish be perfect? Probably not. In any job you do yourself, you always see flaws, but they will be visible only to your eyes, unless, like a Poe character, you cannot stop yourself from pointing them out to others.
What follows are step-by-step instructions for preparing and painting your boat’s hull above the waterline. I’m going to tell you what paint to buy, what thinner to use, and what grit of sandpaper is required at each stage. Do it my way, and you will get the result I get; let (other) boatyard wags deflect you, and you are on your own.
Paint
The paint you are going to use is Interlux Interthane Plus. You can get a similar finish from other brands, but Interthane is specifically formulated for do-it-yourself application — meaning rolled and tipped. Polyurethane applied in this manner is hardly more hazardous than oil-based enamel, but it becomes potentially lethal when atomized by a spray gun. Don’t even think about spraying polyurethane yourself. Spray application requires an air-supplied respirator and other safety precautions.
Interthane covers about 200 square feet per quart. Multiplying the beam plus twice the length times the average freeboard in feet yields a fair approximation of topside surface area. Buy enough paint for two coats.
A word about color is in order. I don’t presume to influence what color you paint your boat, but there are two consequences that merit your attention. The first is that painting the hull a dark color raises the daytime cabin temperature significantly, something to consider if a cruise to the tropics is in your plans. The second is that dark colors do not flow out as well as light colors, making it more difficult to achieve a stroke-free finish.
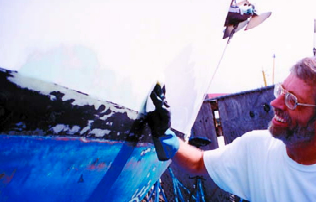
Primer, fillers, and solvents
Unless your gelcoat is in excellent shape (why are you painting?), plan on giving the hull one or two coats of primer. The primer you need is 404/414 Epoxy Barrier-Kote Primer. Coverage is a round 100 square feet per quart.
The reducer (thinner) for both the paint and the primer is designated 2333N Reducing Solvent. When you factor in wipe down and brush cleaning, you will need a quart of reducer for every quart of paint and every two quarts of primer.
Right next to the reducer you will find another green can labeled 202 Dewax Solvent. Add a quart of this to your shopping cart.
If you have scratches and dings in the hull, you are going to need some kind of filler to repair them. I typically use epoxy thickened with a low-density filler, but you can also use a premixed epoxy filler, such as Marine-Tex.
The gloss of the first coat nearly always reveals a number of small flaws that you will not have seen on the dull surface. Fortunately, these blemishes are easy to eliminate with a glazing putty. 3M’s Acryl-Marine Putty is the easiest to use, and no, it doesn’t come in a smaller size.
Tools and supplies
For sanding, you will need a dozen sheets of 120-grit production paper, and a half-dozen sheets of 320-grit wet-or-dry paper. If you don’t already have one, you will also need to buy yourself a palm sander.
Buy an adequate supply of foam roller covers. If you paint one side of the boat in the morning and one side in the afternoon — to avoid painting in direct sunlight — you will need a fresh cover for each application. The strong solvents dissolve ordinary foam rollers, so be sure the ones you buy say they are suitable for polyurethane. The foam rollers marketed for epoxy application are a good choice.
The quality of your finish is greatly influenced by the quality of your “tipping” brush. Ideally we would like one made from butterfly eyelashes, but the closest we can come is a top-quality badger-hair brush. Expect to spend more than $20 for this essential tool. I prefer a 2 1⁄2 inch width, but if a 3-inch brush doesn’t feel unwieldy to you — you are going to be moving it quite fast — the wider brush can be better.
Only a few of the other supplies mentioned in the accompanying “Shopping List” sidebar (see Page 40) need comment. Spend the extra money for Fine Line (#218) tape. Linear polyurethane has the consistency of milk when applied, and it will wick under lesser tapes. The lacquer is a sanding aid, which I will explain more fully later. Enamel won’t do. The disposable brushes are for cutting the paint in at the deck joint and around skin fittings. The rubber gloves must be solvent resistant; use one pair for painting, the other pair for wiping. The respirator is to protect your lungs from the sanding dust, which can be toxic, but after you get a whiff of the dewax and reducing solvents, you may also wear this mask while painting. Ear plugs save your hearing while the sander’s running, and they transform the sanding process from teeth-gritting to serene.
Getting started
First wash the hull with a cup of laundry detergent (Wisk) and a cup of household bleach (Clorox) in a gallon of water. Rinse thoroughly.
Detergent may fail to remove grease and oil, so when the hull is dry, wipe it down with MEK to degrease the surface. Reagent-grade acetone can also be used, but the slower-evaporating MEK holds contaminants in suspension longer. Wear your wiping pair of solvent-resistant gloves and turn the rag often. Change the rag when you run out of clean sides.
You must, I repeat, must dewax the surface you plan to paint. Why would the hull have wax on it? The obvious reason is that you or some previous owner waxed the hull. Less obvious is that the mold was waxed, and that wax transferred to the hull during the original layup. Virtually all bare fiberglass hulls retain traces of the mold-release wax. Silicone is especially tenacious, which is why it has long been a popular wax additive. Neither the detergent nor the MEK will have cleaned the surface of silicone. That takes a dewax solvent — #202.
Do not dewax the hull with a circular motion of the rag. Sweep the saturated rag slowly in one direction, typically in an arc ending at the waterline. Change to a clean side or a fresh cloth often. (Not all rags are created equal. A rag that was once an article of clothing is not a good choice for finishing work. It has almost certainly been exposed to fabric softener and may even be made of a synthetic material that will dissolve in the presence of some solvents. Commercial rags made from new fabric may also have fabric softener on them. Fabric softener and other contaminants can cause fisheyes in a paint job. It is better to use heavy duty undyed paper wipes. -Ed.)
Always dewax the hull before you sand it; otherwise the sandpaper drags the wax into the scratches, making it that much more difficult to remove.
Sanding
With apologies to Thomas Edison, brilliance is 1 percent application and 99 percent preparation. Don’t expect the paint to hide flaws; it accentuates them. If you want a flawless finish, you have to be painting a flawless surface.
Vinyl graphics can be removed by spraying them with Easy-Off Oven Cleaner. Remove a painted-on name with a gelcoat-friendly chemical stripper, such as Interstrip 299E. Be sure you wash away all cleaner and/or stripper residue before beginning your sanding.
If your boat has an indented cove stripe and you intend to paint it, now is the time to sand it. Tear a quarter sheet of 120-grit sandpaper into thirds, then fold these small pieces twice to give you a “fingertip” sanding pad. Wear cloth gloves to protect your fingers and hand sand the stripe.
When you are finished with the cove stripe and any other areas requiring hand sanding, load your palm sander with 120-grit paper and sand the hull stem-to-stern, waterline-to-deck. If you will be sanding away the existing bootstripe, use a flexible straightedge and a scratch awl to score its location before you start. Do not run your sander over any edges, such as where the quarters meet the transom. If you do, the sander will cut right through the gelcoat.
It is essential to remove all the gloss — probably not an issue — and to give the surface a uniform anchor pattern for the paint. While you are sanding you should be “looking” for flaws with your eyes and fingertips; anything you can feel will show in the finish coat. Flush the surface to wash away dust and grit. Running water over the sanded hull also can help you spot flaws you may have missed.
Mix your chosen filler and work your way around the hull, filling every flaw. Do not overfill with the idea of sanding the bulge flush. Differences in the hardness of the filler and the gelcoat typically result in uneven sanding and a visible “moat” around your patch. Instead, use a flexible spreader to make the patch flush.
When the filler has fully cured, sand the patches smooth with your palm sander and 120-grit paper. You should not be able to detect the repair by feel. Expect some of your repairs to require a second application of filler. Minor voids can be taken care of with the glazing putty.
Flush the finished repairs. When they are thoroughly dry, wipe down the entire sanded surface one final time with #202. Tape off the waterline, the cove stripe, and other adjacent areas at risk from your flying roller, and the hull is ready to paint.
Let’s talk about weather
You can do the prep work in almost any kind of weather, but you need calm, mild, dry weather to paint. Wind can blow dirt into any paint job, but it will also mar this free-flowing paint with wave patterns. The hull temperature should be at least 50°F but not warmer than 80°F. This limits what time of the year you can do this job in most places. If you try to apply this paint outside these temperature parameters, I can guarantee inferior results. Avoid painting in direct sunlight, which also affects flow-out.
It isn’t that hard to schedule this job for a time when you can reasonably expect a run of 60-, 70-, or 80-degree days. But there is a another weather concern, and that is moisture. Two-part polyurethanes cure by a chemical reaction, which is what makes the cured coating so durable, but that chemical reaction is accelerated by moisture. If the air is humid, the paint gels before it has a chance to level out to that mirror-like finish we are after. The result is brush strokes in the finish. Do not paint in the early morning or late afternoon, to avoid the detrimental effects of morning or evening dew. Do not paint when rain is in the forecast. Do not paint when the humidity is above 70 percent. Lower is better. If you are sweating when you are preparing the hull, it is too humid to paint. There are no exceptions, as I was to relearn on this paint job. We don’t get many low-humidity days in South Florida between May and December, and because the scheduling of my haul-out was set by other issues, I tried to push the limits. I didn’t get away with it.
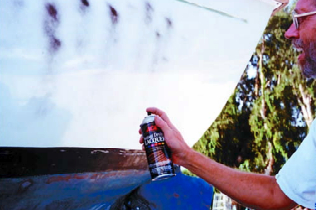
Priming
In general, a hull in need of paint should be primed. It is possible to apply the paint without priming if the hull surface is in particularly good condition, but before you decide to do this, test the gelcoat for porosity. Brush a thin coat of regular enamel — bootstripe paint is perfect — onto a test area. Now examine it carefully. If it shows even a single pinhole, the gelcoat is porous and must be primed. The test patch might also develop “fish eyes” caused by wax residue, indicating the need to rewipe the entire hull with dewaxing solvent.
Even if you decide not to prime the entire hull, all repairs must be primed. The primer in this case is 404/414 Epoxy Barrier-Kote Primer, a two-part product, mixed 3 to 1. Divide the square footage you want to coat by 3 to arrive at the number of mixed ounces you need. Let the combined Parts A and B sit for 20 minutes before adding thinner, then thin about 25 percent by volume; that is, to 20 ounces of mixed primer add 5 ounces of 2333N Reducing Solvent. Thinner is not included in the calculation of paint needed.
Pour the thinned primer into a paint tray and roll it onto the hull with a foam roller. You can apply the primer without tipping, but in my experience tipping the primer reduces the amount of sanding required to prepare it for painting. Tipping is simply dragging the dry brush lightly across the surface of the paint to eliminate the bubbles introduced by the roller and to smooth the surface. If the primer mix does not flow out smoothly, add thinner, a small amount at a time, until it does.
One coat of primer is usually sufficient to cure porosity, but if the gelcoat exhibits surface crazing, a second coat of primer may be required. If you are using 2100/2101 Multithane Primer as a conversion coat over a previously painted surface, apply it in a similar manner — except that the mix is 4 to 1, and Multithane requires less thinner.
After the primer coat has been applied, clean the brush thoroughly in the reducing solvent. It is not clean until it no longer discolors clean solvent. Wrap the brush in paper to maintain its shape.
Let the primer cure — overnight for 404/414, at least three days for 2100/2101 — then sand it with your palm sander loaded with 120-grit paper. You want the primer to be perfectly smooth, but in the case of a conversion coat, be very careful not to sand through the primer. To prevent this I generally sand the conversion coat lightly and overcoat it with 404/414. This reduces the risk of sanding through and it provides a completely compatible base for the polyurethane.
Always peel away the masking tape before sanding. Remove tape by peeling it back onto itself, not by pulling it straight out. Making your pull slightly away from the paint application, so that the stuck and peeled tape form a flat, narrow V, minimizes the risk of lifting the edge of the fresh paint.
Fill the small blemishes that remain with glazing putty, give it an hour to dry, then block sand it with 120-grit. You can paint over the glazing compound, but repriming is better if it doesn’t hold you up.
After you sand these repairs, you should have a flawless surface. Remask the waterline and other adjacent surfaces and wipe the surface one final time with a clean rag dampened with 2333N.
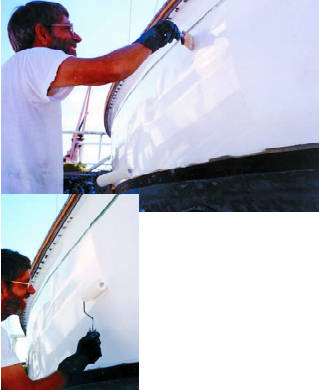
Mixing the paint
The paint, like the primer, is mixed 3 to 1. Unlike the primer, it does not need any induction time. Divide the square footage by 6.25 to approximate the amount of paint to mix. Our 175 square feet required 28 ounces of paint — 21 ounces of Part A and 7 ounces of Part B. Measure each part care fully, then mix them together, stirring for at least a minute. Take care not to accidentally catalyze the paint or contaminate the reactor in the cans by dipping into either with a contaminated stirring stick.
If you have waited for a dry day, the only remaining obstacle to getting a perfect finish is getting the thinner right. The can specifies between 25 and 40 percent by volume. The rule of thumb I use is that the percent of thinner should be half the temperature. If you are painting in 60-degree weather, you will need about 30 percent thinner. If it is 80 degrees, expect the thinner percentage to be around 40. Be forewarned that if you try to thin the paint more than 40 percent, it will lose its gloss. In fact, the less thinner you need, the glossier the finish will be, which argues for painting on a cool day.
To get the paint at the perfect consistency for ambient conditions, you must test it. Foot-square scraps of smooth-finish plastic laminate (Formica) make perfect test panels. So does a piece of window glass. Since these surfaces are perfectly smooth, any texture you see is in the paint.
Pour a little thinned paint into your paint tray, then lightly load your roller. Roll a thin coat of paint onto the test panel and, with the lightest touch you can manage, drag the tip of the dry brush horizontally across the paint. Tip the entire panel, always drawing the brush in the same direction. Now wait a couple of minutes.
If you have the thinner right, the brush strokes introduced when you tipped the paint will fade out completely. If they don’t, you need to add more thinner — always mindful not to exceed 40 percent. If the paint on your test panel runs or curtains (sags), you have too much thinner, and you will need to add some additional mixed paint. As a hedge against this possibility, I always divide the mixed paint evenly and thin only half. Once I have that half exactly right, I can thin the remaining half (or less) to the same viscosity by adding a now-known amount of thinner.
Retest the paint after every thinner adjustment. You can reuse your test panel by wiping off the paint application with solvent, but multiple test panels are better.
For your first mix, I strongly recommend mixing only enough paint to cover the transom. This will allow you to get a feel for how the paint goes on and to develop an application technique that is comfortable and gives a good result. If you get a bad result, you can get back to zero the following day in minutes by simply resanding the transom.
Sprinting for the finish
If you cannot roll the hull-to-deck joint — ours, for example, turns out — cut it in with a brush before you start the roller application. A throw-away bristle brush should do this job adequately. Paint only what the roller won’t reach and brush out the paint several times to make sure it doesn’t run or leave a proud edge that will show when you roll on the main application. Cut in only the periphery ahead of time, not around skin fittings or other topside features.
Rolling and tipping is ideally a two-person process. Beginning at one end of the hull, one person rolls on a uniform, thin coat of paint from the waterline to the deck. The width of the hull section coated — typically 18 to 24 inches — is not critical and is determined by how much surface a roller load of paint covers. A thin coat is essential, so unload excess paint on the ramp of the paint tray before putting the roller to the hull. The person rolling should work quickly with no more strokes than are necessary to apply the paint uniformly.
While the “roller” reloads — and unloads — the roller with paint, the second person, the “tipper,” makes quick, horizontal, parallel strokes through the paint with a dry brush. “Dry” means the brush is never dipped in paint except that already on the hull.
The roller immediately coats the next section of hull, overlapping the previously painted area by an inch or two. The tipper follows with quick, light brush strokes, gently “landing” the brush in the previously tipped paint just behind the fresh roller application and drawing the brush evenly beyond the wet paint onto the dry hull. The tipper must work very quickly, without fuss and with the lightest of touches.
Continue this process — roll, tip, roll, tip — without pause or hesitation until you reach the other end of the hull. If the other side of the hull is not in the sun, you can continue on, painting the entire boat in one session. Every 8 or 10 feet, the tipper should dip the tip of the brush into a cup of 2333N, squeeze out the excess, then “paint” the brush dry on a clean rag to keep it from loading up with paint.
Painting with two-part polyurethane is a sprint. With two people painting, the job should take less than a minute per linear foot. If it is taking you longer than that, your pace is too slow.
While the next roller application is going on, the tipper should examine the just-tipped section for sags or holidays that an extra stroke or two can correct. Once you start tipping a new section, you must never go back to a previous section to “repair” a flaw. You will only make it worse. All flaws are corrected with the following coat.
“Gang” painting is easier and reduces the opportunity for disaster, but unfortunately I needed my “gang” to handle the camera. It so happens that on boats up to around 30 feet in length, equally good results are possible with one person doing both the rolling and tipping. You must not pause, even for a minute, so forethought is required to have plenty of paint in the tray and both thinner and rags at hand for quickly cleaning the brush. I find I tend to lose momentum so I have learned to keep urging myself on to keep up the pace. “Go faster” is my mantra. You cannot go too fast, only too slow.
Keep a small throw-away bristle brush handy to use to trim around skin fittings and other obstacles as you paint the hull section that includes them.
Between coats
As soon as you finish painting, thoroughly clean and wrap your tipping brush.
If you have done your preparation conscientiously, waited on the right weather conditions, and mixed the paint right, you should be standing slack-jawed about now at how good the first coat looks. But we expect the second coat to be even better.
To prepare for the final coat, let the first coat cure overnight, then wet sand it with 320-grit wet-or-dry sandpaper. The safe way to do this is by hand, but I typically speed this process along by loading the wet-or-dry paper into my palm sander and spritzing the hull lightly with a trigger sprayer. This method no doubt poses some risk of electrocution, so I am not necessarily recomending it.
There is no point in sanding more than is necessary. The second coat bonds chemically with the first if applied within 48 hours, so you don’t need tooth. You are sanding mainly to correct surface flaws in the first coat. You are using such a fine grit it can be very hard to see where your sandpaper has been. Also the high gloss tends to make your eyes lose focus. The solution is to mist the paint with contrasting lacquer — black on white, white on black or blue. This allows you to easily see where you have sanded, and it gives your eyes a feature to focus on.
Sanding polyurethane produces a very tenacious scum. When you are through sanding, flush the hull with water and scrub it with a sponge. When it is completely dry, and just before you are ready to apply the top coat, wipe the hull one final time with 2333N.
Laying on the final coat
You have the advantage of experience when you apply the second coat. With the first coat results and the now-dry test panels from the previous day as a guide, thin your paint and test it carefully on fresh panels. When it is exactly right, lay it onto the hull in as close to one continuous flow as you can manage. The results will be spectacular.
Look closely enough and you will almost certainly find flaws, but no one else will ever notice them. Soon enough you won’t either. If you are really disappointed with the results of the second coat, there is nothing to prevent one more attempt at perfection. The cost is nominal, and you begin the third coat with twice the experience level you had for the second. The chances of significant improvement diminish after three coats, so stop there.
As for my own job, I yielded to weather realities and stopped after the second coat. During my next haulout — in the dry season — I will wet-sand the surface and lay on that perfect topcoat. Meanwhile my official position is that a less-than-perfect job might actually be better because I am less uptight about getting a scratch or a ding.
Don Casey co-authored Sensible Cruising: The Thoreau Approach and became the authority on boat fix-it projects with This Old Boat. He is the author of a series of books in the International Marine Sailboat Library and of Dragged Aboard — A Cruising Guide for the Reluctant Mate. He and his wife, Olga, cruise aboard their 29-year-old Allied Seawind. They’ve done all the work themselves with no adult supervision.
Thank you to Sailrite Enterprises, Inc., for providing free access to back issues of Good Old Boat through intellectual property rights. Sailrite.com