A patient sailor learns the hard way how to bulletproof his ports
Issue 34: Jan/Feb 2004
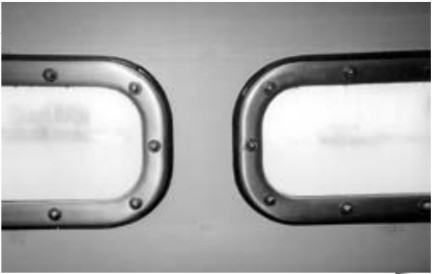
I DO NOT RECALL READING ABOUT A DETAIL I encountered while replacing the ports on my Allied Seawind, Zvirbulis III. These are the kind of ports in which Plexiglas is mounted in aluminum frames that themselves form a sort of sandwich around the outer skin and cabin liner. Long experience should have taught me that anything other than an exact replacement was likely to involve the discovery of a new wrinkle in the elephant. The commonly prescribed remedy for improving clouded, scratched, or otherwise obscured ports consists of several steps:
- Remove the existing ports by unscrewing the aluminum frames (usually secured by stainless-steel screws that have been blind tapped into the exterior frame). Cut new portlights out of acrylic stock using the old ones as patterns. A good jigsaw will do the job and, since you will not remove the adhesive paper protective sheets at this time, a pencil or felt-tip tracing is possible without resorting to grease pencils or sharp objects.
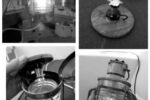
- Drill through the blind-tapped holes in the outer frame with an appropriately sized drill bit and buy some oval-head stainless-steel bolts with acorn cap nuts and twice that number of washers. Care should be taken with the length of the bolts. Figure the thickness of your new acrylic lights, plus the thickness of the two aluminum frames, plus the two washers, plus a smidgen for sealant on both sides of the light, plus enough exposed thread to provide a grip for the cap nuts. A smidgen, by the way, is about 1⁄8 inch if you will use silicone sealant. Since standard bolts may not come in the required length, you may be faced with the prospect of purchasing the next size up, hacksawing through the threads, and filing them to accept the acorn nuts smoothly. This whole procedure is recommended because the original tapping after some decades of immobility in the original construction is likely to be sufficiently damaged or weakened to make re-use of the existing screws difficult.
- Remove the protective sheathing from the newly cut portlights and re-assemble the portlight sandwich. Use the acorn cap nuts on the interior. This operation is made easier with an assistant, but can be managed singlehanded by carefully holding the bolt gently by the threads with needle-nose pliers. The acorn nut is then fixed in place with clamping pliers and the bolt tightened by means of a screwdriver from the exterior. If your frames have about 18 bolts each and there are four of them, the single-handed operation involves a fair amount of scurrying about. This is made more exciting by the dripping silicone, which periodically needs to be reapplied to the voids created.
- Clean up the silicone with paper towels, leaving the extruded parts on the acrylic to dry for peeling off later. It helps to have a large container to provide an easy target for silicone-covered paper towels. Despite how it sounds, this part of the operation goes comparatively well.
At this point the relatively simple job would have been done if, as mentioned earlier, I hadn’t discovered the new wrinkle. This arose through my addiction to books, a number of which stated that the standard 1⁄8-inch acrylic glazing of portlights was woefully inadequate against rogue waves in the North Atlantic and such and recommended carrying 3⁄4-inch plywood shutters along with assorted bolts, brackets, and other paraphernalia for mounting them when questionable weather was expected. A few quick calculations indicated that if I were to carry these, along with all the other absolutely necessary safety equipment on an ocean passage, there would be no room for me or my stores without seriously compromising the buoyancy of the boat.
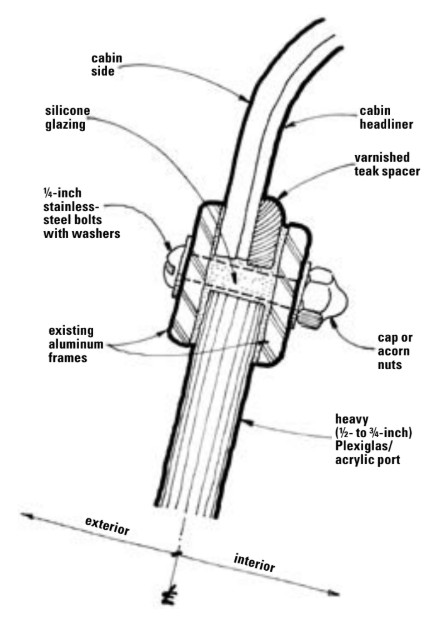
I decided to bulletproof the ports by using 5⁄8-inch or 3⁄4-inch polycarbonate instead of the 1⁄8-inch weakling. Unfortunately, the minimum required space between the exterior and interior aluminum frames exceeded the thickness of the cabin exterior and headliner sandwich by 1⁄4 inch. This probably exceeded the structural capabilities of silicone sealant, so I was forced to look for alternatives.
The varnished teak spacer, or gasket, I arrived at handsomely trims the interior of the port and has given no trouble in the approximately 8 years it has been in place. Then again, we haven’t encountered any rogue waves with which to test it.
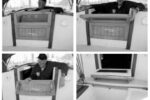
The teak trim was made of 1⁄4-inch stock, traced directly from the portlight frame in six sections to conform to the end curves without spending a fortune on material. The radius was obtained with a Surform rasp and hand sanding. I pre-varnished the pieces and temporarily fastened them to the interior aluminum frame with silicone sealant and spring clamps. This eased final assembly tremendously and held up well until the clamping of the outer and inner frames by means of the bolts took over the job.
If you choose to take the armored portlights approach, one thing I have learned is not to use polycarbonate. It turns milky with exposure to ultraviolet light and has reached the point on my boat where replacement is once again in the cards. If you’re not looking to install “overkill portlights,” you might still want to install thicker portlights. In this case, the trim gasket idea could work if the individually fitted teak strips were replaced with a one-piece marine teak plywood trim ring.
Thank you to Sailrite Enterprises, Inc., for providing free access to back issues of Good Old Boat through intellectual property rights. Sailrite.com