When the noise died down, he needed a new boom
Issue 35 : Mar/Apr 2004
There are a few good reasons to replace your boom. If you want to add capability or features, it’s easier and more cost-effective to adapt an existing boom than to replace it. There’s no shortage of hardware available from the major manufacturers. However, if your boom gets bent or broken you don’t have many options.
A few seconds of inattention by the helmsman while I was at the mast preparing to take in a deep reef, ended in a jibe. The mainsheet was in tight, so this wasn’t a crash jibe where the boom swings 12 feet from one side to the other. But even a 2-foot jibe with the wind blowing around 20 knots was more than our boom could take.
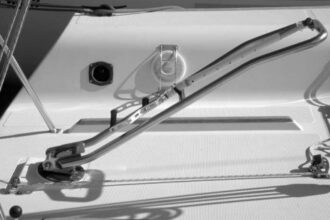
The previous owner had converted Meander, our 1975 Tartan 30, from end-boom to mid-boom sheeting. The cabintop traveler was one of the features that made us choose Meander over other boats when we bought her a few years ago. However a shortcut was taken during the conversion when the mainsheet was fastened to three bails that were bolted through holes in the boom. The increased loads from the mid-boom sheeting, along with the weakening caused by holes, led to the end of our boom’s useful life.
So I had a winter boat project and some interesting research to do. I just hoped the bill wouldn’t put a big hole in our boating budget.
Any boat more than 20 years old has a number of boom variants: short or long booms; roller, slab, or single-line reefing; end- or mid-boom sheeting. Then there are the modifications made by various owners over the years.
Internet search
I went on the Internet to figure out what sort of boom Meander had and what might replace it. I came up with Rig-Rite and their Rig-Rite #6 extrusion. Looking around their site, I also identified the Kenyon E and the Spartan CD-3 as similar extrusions. Many manufacturers of 25- to 33-foot boats have used these booms over the years. Buying a section would cost about $240 plus tax and shipping. All the existing parts would fit so the project would be a quite simple. Rig-Rite offered a number of options for fastening the mainsheet, vang, and preventer, so the boom might be a bit stronger.
I decided that Meander’s boom needed to be substantially stronger. The jibe that bent it was quite mild. I didn’t want to replace the boom twice.
In discussing options for reinforcing the boom with a few machine shops and boatyards, I discovered that welding an aluminum extrusion weakens it substantially. The option of stitching a collar on with pop rivets or machine screws would look horrible and still require cutting holes or slots in the boom to attach the mainsheet and vang. Nobody thought having holes in the boom where the mainsheet and vang attached was a good idea. A boom that didn’t require holes to fasten the mainsheet was required, but how strong would it have to be?
To identify the loads on the boom, I used a service offered by Harken. They gave the mainsheet load on a Tartan 30C with end-boom sheeting as 1,400 pounds. Additional research found that mid-boom sheeting increased the load on the mainsheet by 50 percent or more depending on how “mid” the sheeting was. The mainsheet on Meander fastens 60 inches aft of the mast on a 132- inch boom. This indicated that a load of 2,800 pounds could be expected. This seemed twice the load the original boom was designed for, so I had been lucky (or cautious) for a few years. Returning to the Rig-Rite website, I looked for booms that were at least twice as strong as the original.
Moments of inertia
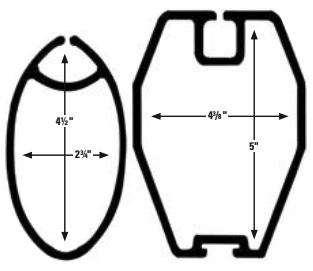
Strength in beams is stated in moments of inertia, which is basically the strength in the horizontal and vertical axis. The numbers for the old boom were Ixx of 2.70 and Iyy of 1.20. I would be looking for a boom section with numbers like Ixx of 5.00 or more and Iyy of 2.4 or more that didn’t require cutting holes to fasten the mainsheet and vang.
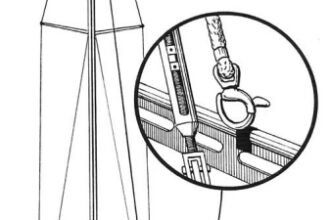
The choices narrowed to the Isomat NB-32 and Z-Spar Z-360. Both have a similar hexagonal profile that includes a track into the bottom to hold a very strong-looking bail assembly. The tracks in the top and bottom add substantial stiffness and strength. As an additional check, I again used the Harken site to compare Meander’s boom loading with that of the various boats that had used these extrusions. It seemed either would provide a comfortable margin of strength (see illustration on Page 17).
This project reminded me of the saying, “Good, fast, cheap: pick two.” I could go with the “good, fast” approach and call a rigging company. Quotes from two companies ran between $1,200 and $1,400 plus tax and shipping. Lines for the reefing would be extra. I wonder what it costs to ship a 12-foot boom?
I could go with the “fast, cheap” option like the previous owner, but that’s what got the boom bent in the first place. (In all honesty, after many years of sailing.)
What I wanted was a “good, cheap” method that would require some work on my part.
Looking up the boom extrusions proposed by the various rigging shops on the Rig-Rite website, I saw that the proposals were basically doubling the strength of the boom and increasing its weight to 2.5 pounds per foot. This gave me great confidence in the Isomat extrusion, which was substantially stronger and lighter than any proposed boom.
Consignment shops
Wherever there are sailboats there are boating consignment shops. These provide a great opportunity to save money as well as to recycle. I visited a few shops with a tape measure and the information from Rig-Rite in hand. At one I found an Isomat NB-32 boom with the mast-mount casting that could be purchased for $240. It was 30 inches longer than needed and had a variety of outhaul and reefing lines wrapped around it. The gooseneck pin was nowhere to be seen and would have to be figured out later.
So for less than $250 I had a nice strong boom that could be shortened and modified to fit Meander. I strapped it to the roof and drove home. . . slowly.
A boom can have attachments for a topping lift, reefing arrangements, an outhaul, lazy-jacks, a vang, a mainsheet, and a preventer. Each has an ideal location. Shifting one even a few inches can be a bad idea. Meander had all of these, and I wanted to make sure everything ended up it its proper location on the new boom.
With a felt-tip marker, I outlined and labeled every piece of hardware attached to the old boom. I made a drawing of the boom showing dimensions from either end to each attachment. Then I removed the hardware and screws and laid them out on the workbench.
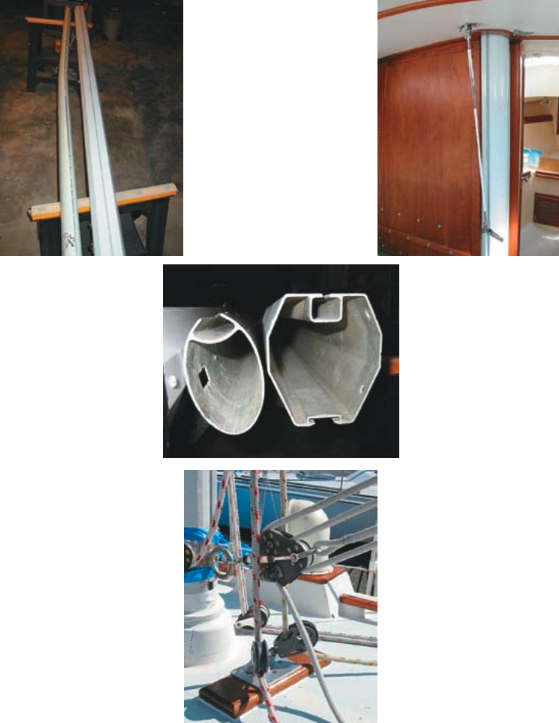
The cast ends of the Isomat boom had been fastened to the extrusion with pop rivets. With a 3⁄8-inch bit, I drilled the tops off and the cores out. To avoid weakening the boom, I drilled through the first pop rivet with a very small bit. Then I enlarged the hole using gradually larger bits until the rivet could be pushed through. This last drill bit was used to remove the rest of the rivets.
Pulled lines out
After removing both end castings, I pulled and tugged each line until I knew their purpose. I pulled all the lines out and pulled in a messenger line twice the length of the boom, plus a few feet.
Peering inside the boom, I could see sharp points from sheet metal screws used to fasten the minor attachments. These points would catch any line inside the boom. I removed the attachments and threw the screws out. I would drill and tap for machine screws to fasten things back together.
To remove the four sheaves from each end casting, I slipped a metal ruler between the sheaves and against the axle and tapped gently with a small hammer. All the parts were checked, cleaned, and tested for ease of operation. Some of the sheaves had nicks in them, but by being careful during reassembly, these nicks were placed against the outer edge of the casting, preventing any future problems.
With all the hardware and lines removed, this was a perfect time to paint the boom. The Isomat was raw aluminum and scruffy looking, while Meander had white spars. It would have been nice to get a professional two-part paint job done, but that wasn’t in the budget. In my experience a very durable finish for aluminum can be achieved with lowly Tremclad enamel. I’ve sprayed and brushed this on aluminum in the past, and it lasted for years. I prefer the satin finish as it hides minor imperfections while still giving a little shine. So the boom was scrubbed with a citrus cleaner and sanded with 320-grit paper to remove the top oxide. A few coats of spray paint made it look good as new. The end castings also got a few light coats of black to freshen them up.
All-internal lines
Meander’s boom was set up for two jiffy reefs with pad-eyes, cheek blocks, and cleats mounted on the outside of the boom. The Isomat had no external reefing attachments; all lines were inside the boom, and there were four sheaves at either end. I was unclear on exactly how this was intended to work.
Returning to my web search, I found a number of reefing methods and discussions on each. I also discussed the methods with members of the Tartan list on SailNet. This is a great resource. One Tartan 31 owner with an Isomat boom copied the reefing page in his manual and emailed it to me for comparison.
The Isomat boom would support any reefing method, except roller reefing. The drawing from the Tartan 31 seemed the best approach to me. With this method, a single line for each reef comes out of the forward end of the boom and is either cleated there or run back to the cockpit. Meander is a tall-rig Tartan 30. While this provides very nice performance in light to medium air, she really needs a reef when the wind hits 15 knots and another before 20 knots. With this in mind, I had already decided to rig for a single deep reef for the next season. The ability to take in and shake out a deep reef from the cockpit would be a major improvement as I frequently sail singlehanded.
This was a great opportunity to simplify and improve all facets of mainsail handling. For example, the lazy-jacks never caught the leech of the sail properly, the outhaul was impossible to reach from the cockpit and was rarely used, the preventer used a mainsheet bail that wasn’t far enough aft, and the Cunningham arrangement I used had no purchase. I’d fix all these annoyances.
Moved attachments
I moved the aft lazy-jack attachment forward 10 inches and the middle one aft 2 inches. Shortening the boom by 30 inches would free up enough outhaul line to reach the cockpit (30 inches with a 4:1 purchase meant 10 feet of extra line). I’d use the reefing bail for the preventer and mount pad-eyes on the side of the boom for the leech reefing attachment. The outhaul from the old boom was used as a Cunningham. It looked like replacing the boom was a stroke of genius. Accidental genius, perhaps, but isn’t most genius accidental?
All the research and discussion, schemes and dreams, sketches and drawings were done; it was time to shorten the boom. “Shorten” sounds so safe and easy. What it really meant was chopping a few feet off of an expensive piece of hardware. I wanted to be sure it was the right amount.
My original intention was to cut both ends of the extrusion to provide clean ends for fastening the end caps. This would require removing and remounting the outhaul attachment and, as there seemed to be little gain in this, I decided to just cut the aft end.
Because Meander’s gooseneck fitting and the Isomat fitting were very different, it wasn’t possible to simply cut the new extrusion to the same length as the old extrusion. To measure the correct length, I temporarily reassembled both booms and placed them on sawhorses. I measured the length from the mast to the end of the old extrusion and transferred that to the new extrusion.
I marked the placement of each piece of hardware on the new extrusion in pencil. I didn’t want to ruin the new paint job. Each measurement was checked several times from both ends of the boom. It wasn’t paranoia, merely caution, and totally appropriate.
During this process, I discovered the aft end of the Isomat extrusion was cut 1⁄4 inch out of square. This seemed to be intentional, as it allowed the aft casting, with its reefing and outhaul sheaves, to tip forward. Once I had confidence that the situation was understood, I carefully drew a cut line.
Removed the end
By practicing on the end that was going to be removed, I developed a tipping-in technique with the saber saw that worked well. Using a fine-tooth blade, I removed the end of the extrusion and then filed the cut smooth.
Now each piece of hardware was fastened to the new extrusion. 10 x 24 x 3⁄8-inch machine screws were used for the smaller pieces such as the lazyjacks and topping lift. Larger items, such as the reefing pads and bails, used 1⁄4 x 20 x 3⁄8-inch machine screws. I used Tef-Gel anti-seize compound on all fasteners to prevent galvanic corrosion, but Loctite makes a similar product.
When fastening each item, I carefully marked, drilled, and tapped an initial hole. I then fastened each item to the boom and made any additional holes one at a time, inserting and tightening the screws as I went. This made sure that each item was fastened properly the first time. Using two rechargeable drills, one for drilling and the other for tapping, speeded up the whole process. (Note: When you use an electric drill to tap threads in aluminum, use a very low speed.)
Now I pulled each line back inside the extrusion with the messenger line, running the ends of each line through the appropriate sheaves on the end caps. Each line was also marked as to function and destination. I drilled, tapped, and fastened the end caps with 1⁄4 x 20 x 3⁄8-inch screws, following the earlier process.
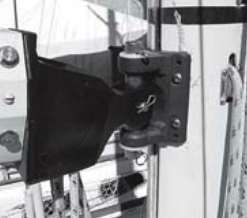
The only item left was the goose-neck pin. To find a machine shop able to drill and cut some 7⁄8-inch bar stock, I did an Internet search for “metal welding Bristol RI.” This found Luther’s Welding and Fabricating. Luther’s had no problem following the picture from Rig-Rite and making it fit the gooseneck casting.
The new boom was finished and ready for fitting in the spring. Mounting would need six drilled and tapped holes in the mast and only take 15 minutes. The new boom would be a substantial improvement in safety and convenience. I could hardly wait.
Of course, this meant a few new projects. I’d have to add turning blocks at the mast base for the reefing line and outhaul, add line organizers and cabintop line stoppers to handle two extra lines to the cockpit, and make backing plates for all the new hardware. I’d even add the cabinroof tie that I’d been planning for the last two years. There’s nothing like messing around in boats . . . or in the winter, messing around in the basement.
Thank you to Sailrite Enterprises, Inc., for providing free access to back issues of Good Old Boat through intellectual property rights. Sailrite.com