It’s as important for cruisers as for racers
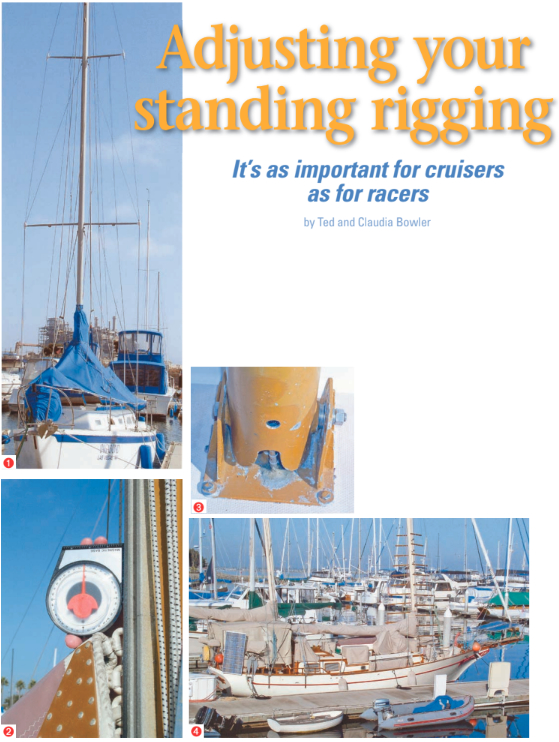
Issue 50 : Sept/Oct 2006
How long have we been sailing? Twenty years? Thirty? How many different sailboats have we owned? Five? Ten? Had we ever tuned our rigging? Never! And yet, since sailboats depend so much on their masts, it’s hard to believe that at no time had we touched our standing rigging.
We had numerous excuses, among them: “We’re cruisers. We’re not interested in racing.” However, every time we were on the same course as another sailboat we continually gauged our relative speed, always trying to get every last fraction of a knot from our course and sail trim.
We also rationalized by saying: “If it ain’t broke, don’t fix it” and “We don’t have enough money to pay a professional.” We made all these excuses and more to avoid the confusing job of tuning the rigging on our boats.
After purchasing Fiddler’s Green, a 28-foot Bristol Channel Cutter designed by Lyle Hess and built in 1977, we noticed she was not performing to our expectations. First, she would rarely reach theoretical hull speed. Theoretical hull speed in knots is 1.34 times the square root of the waterline length in feet. This mathematical expression predicts the maximum speed expected for a displacement hull. Our boat, with a waterline of 26.25 feet, has a theoretical hull speed of 6.9 knots. We regularly sailed at 6.0 to 6.4 knots but seldom went faster.
Second, our speeds on starboard tack and port tack varied. We knew these should be equal. Third, our boat had excessive weather helm. It was tiring after only a few hours of sailing in even moderate winds. And finally, our boat never seemed balanced. We were always fighting to develop a balance that was never achieved.
Knowledgeable people around the dock and professional riggers told us all these deficiencies could be caused by our standing rigging being out of tune. They told us mast rake is very important for boat balance, speed, and weather helm. Decreasing the aft rake of the mast (standing the mast more upright) would decrease weather helm. However, we didn’t even know what the mast rake on our boat should be. Sailing was becoming a chore. We could not put it off any longer. We set about studying the art and science of rig tuning.
Since those days of “rigging ignorance,” we have developed a step-by-step cookbook approach to tuning our standing rigging to make the process simple, understandable, inexpensive, and easy. Our regular tuning allows us to sail at or near hull speed, speed is equal on both tacks, weather helm is greatly reduced, and the boat is balanced, requiring much less effort to sail. Sailing pleasure is increased dramatically.
Standing rigging
The standing rigging consists of stays, shrouds, spreaders, tangs, chainplates, wires, terminals, and turnbuckles. The stays are mast-supporting wires that run fore and aft. The shrouds are mast-supporting wires that run athwartships. Spreaders separate shrouds to reduce compression loads on the mast. Tangs attach the wires to the mast, while chainplates attach the wires to the deck or hull. The attachments at the wire ends are called terminals. Turnbuckles allow fine adjustment of the tension in the standing rigging. Wires can be galvanized steel, stainless steel, or rod; 1 x 19 stainless-steel wire is the most common in use today.
Before you begin tuning your rig, it’s best to know what’s on your boat. Measure the diameter of the wires with a rigging-wire gauge or a caliper. If you can trace the history of your rigging, try to determine what alloy the wires are made from. The diameter and alloy will be important in determining the breaking strength of your wires, which, in turn, is a factor in how you tune your rig.
Mast-tuning objectives
There are three objectives to rig tuning. The first is to keep the mast straight (in column) and perpendicular to the deck under all points of sail. A second objective is to set the desired amount of fore-and-aft mast rake. The third objective is to pretension the rigging.
Contrary to popular belief, a loose rig is not good for a boat. If the rigging is too loose, it produces excessive shock wear and structural damage. On the other hand, if the rigging is too tight, it can overstress the hull and stretch wires. It may even cause fittings to fail.
The boat designer determines the amount of mast rake. It can range from 10 degrees in a classic boat to none at all on some modern designs. Masthead rigs commonly rake the mast a half to a full degree aft; fractional rigs commonly will rake the mast 2 to 3 degrees aft. Extreme racing designs will exceed these norms. No designers rake the mast forward anymore, although this was done on some classics long ago. Sailmakers design their sails to account for the rake of a mast, and in some cases the sailmaker or owners’ association may be able to tell you what is a good starting point for your boat’s mast rake. When the rig is properly set up, there should be a slight weather helm, so that if the wheel or tiller is let go, the boat will slowly head up into the wind. As the mast is raked farther aft, the boat will have increasing weather helm. If it is raked more forward, some weather helm is eliminated. There is a limit to what can be achieved with mast rake. Some designs simply have a lot of weather helm, particularly when excessively heeled, and raking the mast forward will not correct it completely.
Spreader angles are important, but it is not uncommon to see spreaders set up incorrectly. Horizontal spreaders or spreaders pointing downward will cause the boat to experience much higher rigging loads. Spreaders should bisect the shroud, making equal angles with the wire above and below. A simple way to insure that the angles are equal is to fold a piece of paper at the correct angle above the spreader. Then rotate the paper to measure the lower angle. If possible, move the spreader up or down until the angles are equal. Some spreaders and spreader sockets are configured so the spreader angle cannot be adjusted. In these situations, it is probably better to accept the angle of the spreader that is built into the spar.
Dock analysis
It is false economy to try to tune your rigging without a rigging tension gauge. Start by documenting exactly how your rig is currently set up and tensioned before making any changes. Record the tension of each wire and the rake of the spar.
Choose the right days
For the dockside part of the tuning process you need calm weather. Wind and chop increase the tension on the windward side of the rigging and cause rolling, making it difficult to determine the exact mast rake. The second part of the tuning process is done under sail. For that, a good stiff breeze is needed in a place where waves have not yet developed.
Each type of rig design is tuned somewhat differently. If we ignore ketches, yawls, and schooners, we still have four common single-mast rigs: the masthead sloop and cutter, and the fractional rig with or without running backstays. These vary further, depending on how many spreaders and how many lower shrouds they have. We will focus mainly on the masthead rig because it is a more common cruising rig. There are seven parts to tuning most rigs:
- Hand-tighten cap shrouds to make the mast vertical as viewed from ahead or astern.
- Adjust mast rake with the forestay and backstay.
- Tension the cap shrouds to 15 percent of the wire’s breaking load.
- Set the mast pre-bend, if this is part of the rig design.
- Check and adjust maximum mast bend.
- Check and adjust the cap shrouds under sail.
- Straighten the mast sideways while under sail by adjusting the lowers and intermediates, if there are any.
The process is slightly different for fractional rigs. There are two main types of fractional rigs. One uses running backstays and spreaders set perpendicular to the keel. For this rig, the second step involves setting mast rake with the forestay and the running backstays. The other kind of fractional rig uses aft-swept spreaders. In this case, set the mast rake with the forestay and backstay, but set the cap shrouds to 20 percent of breaking strength. This is needed to keep the forestay tight.
First trim the boat
To begin, insure that your boat is level. You will need to be on the shore or at a pier to trim your boat. There should be no list to port or starboard. Examine the fore-and-aft position. The boat should float on its lines. Return to the boat and use an inclinometer or level to verify that it is level. Sadly, boats are less symmetrical and uniform than you might think. Try several ways to determine level, perhaps placing a very flat plank across the seats or even using a level on the galley table. If the boat is not in trim and is listing one way or another, adjust the position of the gear and supplies on board to attain proper trim side-to-side and fore-and-aft.
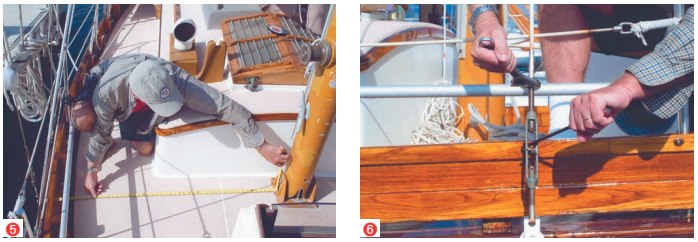
Slacken mast attachments
Slacken all attachments including sheets, topping lifts, shrouds, and stays. There should be no tension on the mast. Support the boom or remove it. Now is a good time to lubricate the turnbuckles. Spray the threads with WD-40 and clean off all the corrosion. We find it easiest to clean the threads with a small stainless-steel wire brush. Place a rag on the deck to catch the over-spray. Once the fitting is clean and free of corrosion, apply a small amount of Teflon grease. We use an old toothbrush to get lubricant into all the small threaded areas. Remove all cotter pins, split rings, and seizing wire. Place a small piece of masking tape on one side of the turnbuckle to help you remember the exact position. Count the number of turns of the turnbuckle as you tighten or loosen each fitting. You can also define the adjustment of an open turnbuckle by measuring the span between the ends of the threaded studs.
Center the mast
Now check to see if the mast base is centered. Use a tape measure and measure from the outer edge of the mast to the inner edge of the chainplate, port and starboard. The distance should be equal. Our mast is mounted in a deck tabernacle, which is supported by a compression post extending to the keel. This bracket allows for some horizontal change in the position of the mast base. If your mast is keel-stepped, it might take some work to reposition the step, but you can easily adjust the way the mast is positioned as it passes through the deck. This is an important step. If the mast is off-center, the boat will be unbalanced.
Next, check to see if the mast top is centered. If you take the mainsail halyard and extend it to the inner edge of the port and starboard chainplate, the distance should be equal. If it is not equal in length, you will have to begin adjusting the upper shrouds, pulling the masthead into proper position. Slightly tighten and loosen each upper shroud until the distance measured by the halyard is equal. After each adjustment, sight up the mainsail track to insure the mast remains straight. Note: tighten and loosen only one turn at a time on each side.
When tightening and loosening the stays and shrouds, always keep a wrench on the wire side of the fitting to insure you are not twisting or untwisting the wire.
Mast rake
Place an inclinometer (purchased at any hardware store) along the mast and read the angle of the mast rake. This gives you the rake for this particular position on the mast. If the mast is straight along its whole length, this is your mast rake. However, if your mast is not straight the whole distance, this angle is not accurate.
A more precise way to determine your mast rake is by placing a weight at the end of the mainsail halyard. This creates a plumb line hanging vertically from the top of the mast. Measure how far back the line is where it crosses the boom. If you know how far behind the mast the halyard is when it leaves the sheave box, the length of the mainsail luff, and where the plumb line crosses the boom, you can calculate the angle of rake. This calculation may be of some academic interest, but knowing the actual angle is not as important as just knowing how far back the plumb line is when it crosses the boom. Many sailing classes simply tune by measuring the distance of the plumb line from the mast. It is actually a more sensitive measure than the calculated angle, which is necessarily quite small.
If you want to decrease weather helm, rake the mast forward. If you want to increase weather helm, tip the mast back. Move the mast by adjusting the forestay and the backstay on masthead rigs. Fractional rigs that have their spreaders swept aft will make this adjustment using the forestay and upper shrouds instead of the forestay and backstay. Fractional rigs that do not have their spreaders swept aft will use the forestay and running backstays. Remember to measure rake before you adjust it and then afterward, so if you don’t like the way the boat handles, you can go back to the way it was before you started “improving” it.
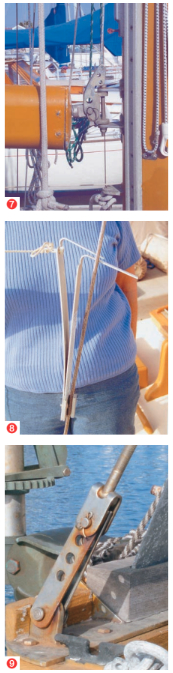
Forestay/backstay
When you have a bunch of wires holding a post up, it is almost intuitively clear that changing the tension of any one of them will change the tension of all the others. Still, many people tune rigging without taking this into account. Keep in mind that wires directly opposite the wire being adjusted will be changed the most. There is a weak relationship between cap shrouds, a stronger one between lowers, and a very strong one indeed between the forestay and the backstay. Think of the length of the forestay as determining mast rake and the tension of the backstay as determining the tension of the backstay and the forestay.
Keep in mind that if the size of your rigging wires has been increased at some point, you should not tension the rig to the percentage of the breaking strength of the new wires. Tension it to a percentage of breaking strength of the old (as the rig was designed) wires. The hull and mast step may not be able to withstand the higher rig tension of the new wires. Their higher breaking strength is only useful as a safety margin.
With the mast rake set, tension the backstay to 30 percent of breaking load and then back it off to 20 percent of breaking load. This will cause the forestay to be tighter than 20 percent of breaking load because it is at a steeper angle to the mast. Measure the forestay, and ease the backstay if the forestay is above 30 percent of breaking load. There may also be maximums given by your boat’s manufacturer for either the backstay or the forestay. Don’t violate these maximums. Manufacturers have seen hydraulic backstay adjusters damage hulls and rigging. They know the safe limits. Follow their requirements.
The tension of the forestay and backstay combination will have a major effect on forestay sag when sailing. We want to keep sag to a minimum when beating in strong winds. Too much sag decreases windward performance. Remember that the length of the forestay controls rake; the tension of the backstay controls the tension of the forestay and thus its tendency to sag off to leeward on a beat. On a typical 30-foot boat, 4 inches of sag might be OK, but 6 inches would be considered too much.
Upper shrouds
The wires needing the most tension after the forestay are the upper shrouds. Tension here should be in the range of 15 percent of the breaking strength of the cable. Tighten both sides hand-tight. Then sight up the mast to see that it is straight. Begin tightening one side at a time, one or two turns at a time, until the desired tension is achieved. Sight up the mast regularly to insure it’s straight. If you develop a bend to starboard or port, the shrouds have uneven tension, and you need to loosen and tighten the respective sides until the mast is straight once more. Remember that the tension of one side will have some effect on the tension of the other. In the case of a fractional rig with aft-swept spreaders, set the cap shrouds to 20 percent of breaking strength. This is necessary to get enough tension in the forestay. If the forestay tension is still not enough, and it sags off too much to leeward on a heavy weather beat, pre-tension the cap shrouds to an absolute maximum of 25 percent of breaking strength.
Mast pre-bend
At this point, mast pre-bend should be set if the rig is designed to have prebend. On masthead rigs the bend can be achieved with a baby stay or with the forward lowers. It may also involve moving the mast step aft, so the mast is bent over the partners at the deck by the backstay. On fractional rigs that have the spreaders swept aft, the tension of the cap shrouds will force the middle of the mast forward at the spreaders. Set up the lowers to limit this pre-bend to the desired amount. The amount of pre-bend on a masthead rig can be as much as half the fore-and-aft thickness of the mast, but in no case should it exceed 2 percent of the total mast height above deck.
Mast bend on a fractional rig may be adjustable while sailing. This is done to flatten the mainsail in heavy air. The total bend, including the adjustment range, may be as much as 1 1⁄2 times the fore-and-aft thickness of the mast. In all cases, even with the backstay set up to the full allowed tension, the bend should be limited to no more than 2 percent of the height from the deck to where the forestay joins the mast. Sails that are cut for some pre-bend will not set right without it. The best source of information about how much pre-bend to put in your rig will come from your boat’s designer or builder. The sailmaker will know how much pre-bend was allowed for in the cut of the mainsail, and some class associations will have valuable opinions as well. Many cruising boats are set up with no pre-bend at all.
Lower shrouds
Set the lowers by hand-tightening them to just snug and then tightening each side one turn at a time. The lowers can be quite loose compared to the uppers before the final adjustment is made while sailing. The forward lower shrouds should have greater tension than the aft lower shrouds. The aft lower shrouds should have one or two turns greater than “finger tight.” After each adjustment sight up the mast to insure that it remains in column. Don’t tension these wires to 15 percent of breaking strength yet. They typically need not be as tight as the uppers to keep the mast in column side to side.
Intermediate shrouds
Finally, if you have them, tighten the posterior intermediate shrouds or runners. These should be tightened just enough to keep the mast straight to counteract the force of the inner forestay. Our inner forestay has a large pelican clasp intended as a quick-release lever. This enables us to easily remove the inner forestay when we are flying a large jib. Tighten the inner forestay as tight as you can and still release and close the lever.
After all adjustments have been made at the dock, sight up the mainsail track and insure the mast remains straight. Re-check tensions on all stays and shrouds. Opposing shrouds should have equal tension.
Stay or shroud too short
During your tuning you may find one of the rigging wires too short. You can call a local rigger to the dock and have him replace it. Better yet, save some money by removing the rigging wire yourself and taking it to his shop with instructions for how much longer it must be. However, if your measurements are incorrect, the rigger cannot be responsible. Another alternative is adding a link tang extension, which will extend your existing wire so you do not have to replace the wire. Use the link tang extension with confidence if the breaking strength is greater than the breaking strength of the existing rigging wire.
Stay or shroud too long
If during your adjustments you find that the wire is too long, you can have new wire and fitting constructed by your local rigger at the dock. You can save money by taking the rigging wire down and delivering it to rigging shop yourself. The rigger will swage on a new fitting at the length you direct. Nevertheless, if your measurements are incorrect, you will be stuck with an extra wire that does not fit anywhere. If you have any doubts, let a rigger complete the whole procedure. Finally, you can cut the wire yourself and install your own fittings. Swageless fittings are expensive, but you get the experience of doing it yourself and the fittings are generally reusable with a new central cone. If you go this route, follow the instructions and you should have no problems. For more on doing it yourself, see the Good Old Boat article in September 1999.
Tuning under sail
The final adjustments are done while sailing. The seas should be as flat as possible; the wind should be strong enough to heel the boat 20 to 25 degrees. Select, perhaps, a time in the morning just as the sea breeze begins to fill in. The vast majority of your work has been done already at the dock. Only small adjustments will be needed under sail. Typically, at this point the forward lowers will be tighter than the aft lowers, and any intermediate shrouds will be hand-tight but tighter than any of the lowers.
On a beat, check the leeward cap shroud. The wire should be handtight and not flopping about. If it is too loose, give it a turn or two. Tack and set the other upper shroud tighter by the same amount. Then evaluate again. When the leeward shroud is just tight enough so it does not flop around, the cap shrouds are set properly.
Now, sight up the mast. If the mast is not straight, tighten the lower and intermediate shrouds to bring it into column from side to side. In each case, to make an adjustment to a turnbuckle, tack to put it on the leeward side. Your goal is to set up the lowers and intermediates so the mast is straight. If the boat has both fore and aft lowers, adjust both a turn at a time so that the pre-bend is preserved. After adjustment is completed, the forward lowers should still be tighter than the aft lowers.
That’s it. When the mast is straight, the adjustment is done. Return to port and record the tension of each wire for reference. The tension of similar wires should be equal from side to side. If you still have too much or too little weather helm, you can experiment with the adjustment of the backstay and forestay to rake the mast more or less. After each rake adjustment, set the tensions back where they were.
Secure the turnbuckles with cotter pins, split rings, or seizing wire to insure they will not back off as you sail your boat. We like split rings, as they can be removed by hand without going to the toolbox for the right tool. Finally, use rigging tape to cover any sharp edges so they don’t cut or tear the sails.
Rigging inspection/care
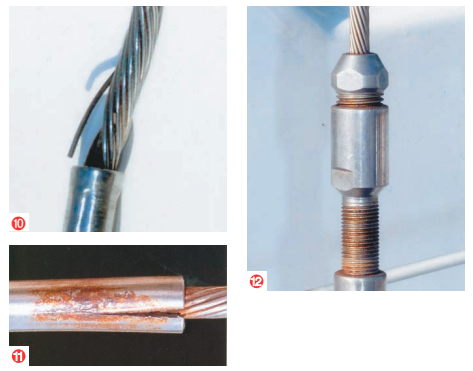
Once or twice a year, inspect your rigging. Use a magnifying glass and a small mirror and inspect all the terminals on the rigging. It is generally easy to see any cracks beginning on the fittings. If you have any specific concerns, use a “rig-check dye.” Follow the instructions on the box. (Typically, you first clean the fitting and apply a dye. A contrasting medium is then applied so the dye shows through, staining the flaw.)
Next check the wire itself. We tie a rag saturated with soapy water to a halyard and the shroud or stay. We attach a “downhaul line” to the rag as well and then slide the rag up and down, cleaning the corrosion and dirt off the stainless steel while checking for broken strands, or “meat hooks.” If the soapy rag snags, it is an indication that a strand is broken. Once all the rigging has been gone over with the soapy rag, we spray it down with fresh water to eliminate the soap scum that will accumulate dirt. If you find any cracks in the terminals or breaks in the wire, replace the failed component. Consider the age of your rigging and, if it is past its prime, the first crack or two in fittings may be telling you to replace the whole set.
While cleaning and inspecting the rigging, it’s a good time to check the tune of your mast. Sight up the mast to insure it is straight and in column. Stand on the dock and gaze at your spreaders to insure that they point slightly upward. The top spreader should have a greater upward angle. Bring out your log and your tension gauge and insure the tensions remain what they were at your previous tuning session. If everything checks out, you can be sure your standing rigging will be safe and functioning optimally in the months to come.
A bit of expertise
Now people come up to us and ask: “What is the rake of your mast? What is the tension on your forestay? Is your mast tuned? How can we decrease our weather helm? Do you regularly sail near maximum theoretical hull speed? What has your mast tuning done to your overall performance?”
We can confidently answer these questions and more. We are cruisers, yet we now have the knowledge of racers and can simply and easily tune our own rigging for increased safety, speed, and balance.
Thank you to Sailrite Enterprises, Inc., for providing free access to back issues of Good Old Boat through intellectual property rights. Sailrite.com