An uplifting way to cure pesky deck leaks
Issue 65 : Mar/Apr 2009
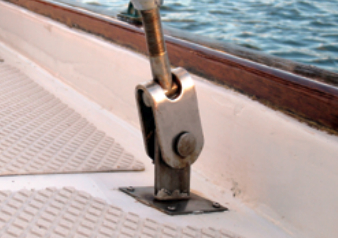
All the water that comes aboard our boat, whether from sea or sky, is supposed to drain off through scuppers in the sidedecks. Unfortunately, the scuppers are not the only holes there. Chainplates fastened to knees inside the cabin pass up through holes in the deck. Sealant is supposed to keep water from flowing below but, as everyone knows, the grip of sealant on the thin edge of fiberglass around the hole is temporary at best.
To me, this type of chainplate installation looks just like a pop-up bathtub drain, and functions about the same too. Mounting chainplates through holes in the lowest part of the deck has never struck me as award-winning engineering, but the fact that I have lived with this inanity for more than 30 years doesn’t put me in the genius class either. Fortunately, I eventually met fellow Seawind owner, Bill Lynch, in Grenada. Bill had devised a solution: raise the hole above the deck. Duh.
Bill fashioned spacers and bonded them to the deck. I felt there was still potential for water to eventually find its way under the spacers and opted instead to cast epoxy islands, confident that if I first ground the deck vigorously with 36-grit paper, the island and deck would essentially become one.
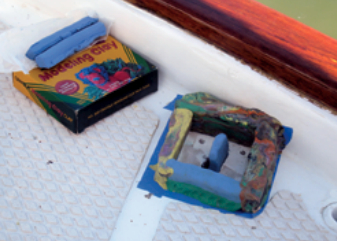
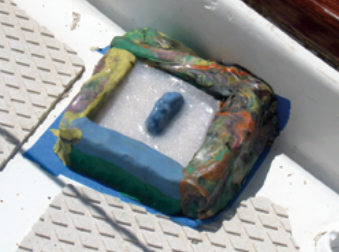
Blue tape and modeling clay
To get a truly permanent bond, carefully but thoroughly grind the deck around the chainplate. Outline the island with blue tape, then build the mold on the tape from kids’ modeling clay. Be careful not to make the islands too tall, or you won’t be able to pin the toggle to the chainplate.
I did one island at a time, re-using the same clay to cast six islands. If the clay is a dark color, shade it from the sun to keep it from going soft. Close the hole through the deck with tape. If you close it with clay, the heat from the curing epoxy will open it and the epoxy will drain below (don’t ask me how I know this). A clay “chainplate” (sitting on top of the tape) lets you cast the hole rather than having to machine it. Make it slightly small and dress the hole to size with a rotary tool. Similarly, make the island slightly large and sand it to size and shape.
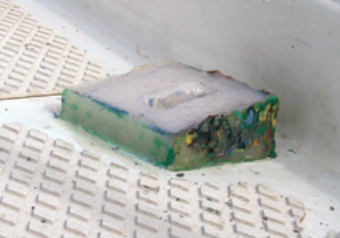
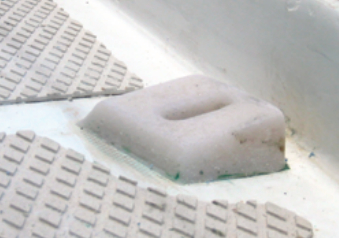
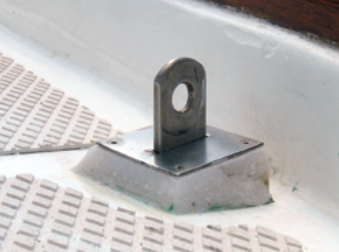
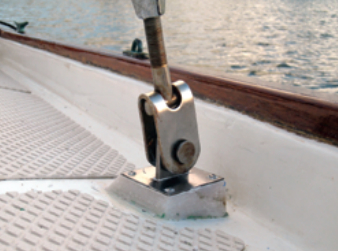
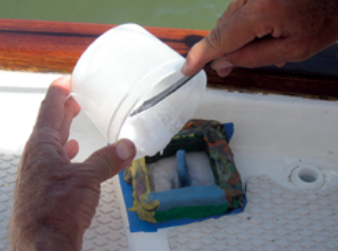
I used epoxy resin thickened with glass microfibers to a thick ketchup consistency which yielded ivory-like islands of admirable appearance and hardness. Do multiple pours so the heat generated by the curing epoxy doesn’t soften the clay mold. I made three 1-ounce pours for each island, allowing each pour to gel before adding the next layer.
Let the epoxy cure at least 24 hours before sanding it to the final shape. When you reinstall the chainplates, you will happily discover that chainplate islands create a bonding surface for the sealant as wide as the island is tall, a vast improvement over deck thickness. Pump sealant around the chainplate, install the cover plates, reattach the rig, and your chainplate leaks will be a thing of the past. Paint the exposed epoxy to match the deck and to protect the UV-sensitive resin.
Don’t drop your guard
There is a downside to this improvement. Chainplates that fail to demand attention probably won’t get any — a risky oversight for stainless-steel hardware. Every few years, remember to pull your chainplates — no matter how watertight they are — and inspect them for corrosion. After you’ve gone to all this trouble, they should be as dry as a desert, but you cannot know without checking.
Don Casey became the authority on boat fix-it projects with This Old Boat. He and his wife, Olga, have been cruising aboard their 1969 Allied Seawind, Richard Corey, since 2002. See the editorial on page 5 for more about Don and his connection to Good Old Boat.
Thank you to Sailrite Enterprises, Inc., for providing free access to back issues of Good Old Boat through intellectual property rights. Sailrite.com