Light and air stream belowdecks once the dam of procrastination is breached
Issue 66 : May/Jun 2009
Sometimes, the simple solution to a problem is not easy to contemplate. Although Sea Trek, our Mariner 40 ketch, is a great cruising vessel, she had a few features we wanted to change. One drawback she had was a lack of good ventilation below. With six opening ports, we thought this would not be a problem, but the 10-inch-high bulwarks around the deck block them from the breeze. The only deck hatch is forward over the V-berth. This is fine for sleeping but not great for airflow through the main cabin. We added strategically placed solar vents and cabin fans, but in the tropical areas we usually cruise, it was still not enough.
Our main saloon is very open and spacious. A center hatch would be the perfect solution to make it more airy. It should have been an easy project, but I was intimidated. Since I’m not an experienced woodworker, I sought professional help. For some reason, we couldn’t get a carpenter to come to the boat even to look at or estimate the job for us. Some were willing to give us an exorbitant estimate based on my measurements, sight unseen. This went on for six years.
A skilled friend helps out
One day, I was reconnected with an old friend who is a very good woodworker and had all the necessary tools and skills. When he offered to help make it happen, I was delighted. Sea Trek is a very traditional-looking vessel. Off-the-shelf hatches would not do. The new addition had to match the forward hatch as closely as possible. Since that hatch was teak, this one needed to be the same. It also needed to be strong enough to withstand heavy breaking seas and take the weight of someone walking on it.
The actual hatch size was to be 24 x 24 inches. We found a piece of teak at a local wood shop that was 3/4 inch x 10 inches x 9 feet. The cost was just under $200, including some finish planing. Since we wanted the hatch to open in both directions, we designed it with two sets of hinges with removable pins. We also had to be able to dog it down in both positions, so we needed two sets of latches. A good strong pair of hatch supports to allow us to hold it open in any position rounded out the hardware. The total cost for the hardware was about $95. The final piece would be the polycarbonate top for the finished cover. We chose the dark smoked shade to match the forward hatch and decided on 1/2 -inch material. This was slightly thicker than the forward hatch but, in its central location on the deck, it was going to be walked on and needed to be strong. Purchased locally, the polycarbonate cost $81.
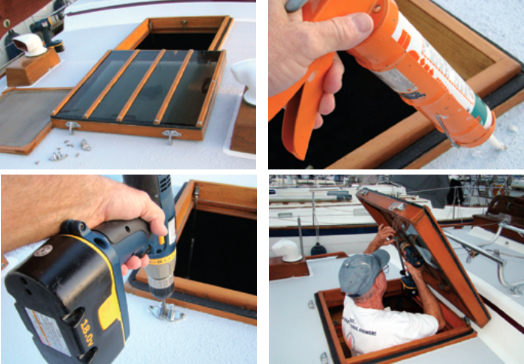
A low profile
The design incorporated two finished pieces. One, the hatch surround, was to be 24 inches square and only 3 1/2 inches deep, which would give it a low profile on the deck and fit flush with the headliner inside the cabin. Around it, we fitted a strip frame that would sit above the deck to position the hatch frame at the right depth on the inside. It also provided an overlap on the deck for thorough bedding — the potential for deck leaks is always a concern in a project of this nature. We screwed and epoxied all the pieces together and countersunk and bunged the screws. To trim the hatch inside the cabin, we needed a 1 1/2 -inch finishing frame that would attach to the bottom of the hatch.
The second piece was the hatch lid, which had to overlap the main frame so water couldn’t work its way under it. We decided to allow the lid to sit on the strip frame that would rest on the deck. This gave a nice appearance when the hatch was closed and would match the forward hatch. The hatch frame stood 2 1/2 inches above the deck. The lid was 3 inches tall. When closed, the entire finished hatch stands just 3 3/4 inches off the deck, due to the overlap.
We flush-mounted the polycarbonate to the top, countersinking all the fasteners for a finished look, and used a polysulfide sealant to make it watertight. (Note: LifeSeal is a better choice with plastics –Eds.) Next we added five 3/4 -inch-wide strips of teak across the lid. Their purpose is both decorative and functional: they hide some of the fasteners in the polycarbonate and keep it from getting too scratched when we have to walk on it. We decided that, to provide greater strength, all corners would be overlapped, not mitered.
Marking for the big cut
The most important step was to install the hatch in the right location. I had designed it to fit nicely between two teak crossbeams on the headliner. Using the frame as a template, we drew out the inside area with a pencil on the interior headliner. Before going any further, we checked to be sure the template we had just marked was truly square. Next we checked to be sure the interior finishing frame would fit clear of any obstructions.
I rechecked each of these items about 10 times. Once I was satisfied that this was the spot, I drilled a 1/4-inch hole through the headliner and deck at each corner. Now I was committed. We took the main section on deck and lined it up with the four holes I had drilled. Once I was satisfied with the positioning, I drew another outline using the frame as a template. This time I used the outside dimensions. Once again, we checked everything to be sure it was square. Then we checked it again . . . and again . . . and again.
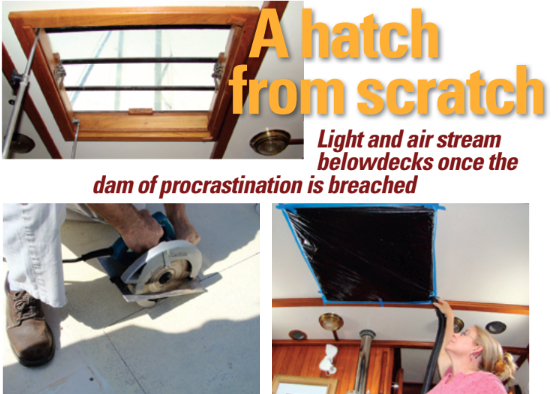
The next part was scarier still. I was about to cut a 2-foot-square hole in the middle of my cabintop. I asked myself if I had totally lost my mind. We had to do this in the neatest fashion possible — the executive officer was already making threats about the consequences if one ounce of fiberglass dust got into the cabin. We practically eliminated that problem by taping plastic trash bags to the headliner outside the area where we were working. Just to be sure, the exec stood by below with a vacuum running. I was concerned that wires for the cabin lights might run through the area I was cutting, so I set the saw blade to cut through the deck only.
Taking the plunge
It was do or die. When I get to this point in a project I go a little crazy. This is major surgery. I ask myself over and over if I could have missed something. Was one small calculation off? Finally, we disconnected the power inside the cabin and fired up the power saw. Even though I used a good carbide blade, Sea Trek was not giving up this section of her deck willingly. Finally the cuts on all four sides were finished. Because the power saw’s blade is curved, the cuts did not go all the way to the corners. I had to finish them with my saber saw, also with a carbide blade.
We removed the section of the deck, exposing the headliner. No wiring was present. (In hindsight, I might have cut out the headliner first, to make sure.) With that, I adjusted the blade of the power saw and cut through the headliner. I now had a perfect 2-foot-square hole in the deck. I was sure that torrential rains would begin immediately and last for days.
I had decided not to use fasteners to attach the hatch to the deck. Because the deck works to some extent and I wanted the hatch to work with it, I elected instead to use a liquid fastener we commonly know as 3M 5200, choosing the mahogany color because it was closest to the color of the teak. After carefully taping off the deck and the frame around the hatch, I applied generous amounts of 5200 under the lip and where the frame went through the deck. Next I positioned the lid (without the hardware) on top of the frame. I placed a 5-gallon bucket of water on top of that to add just enough weight to the whole thing so the frame would be seated solidly in the 5200 but without squeezing it all out. The messy part — cleaning off the excess — followed. She sat like that for a week. I wanted the new hatch to be absolutely undisturbed until the 5200 had completely cured.
The finishing touches
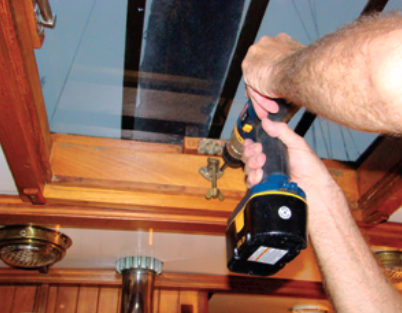
One week later, the finishing work began. Before we attached the hardware, we did the required varnishing. We fitted the interior headliner frame and, since we wanted a screen to keep out the bugs, we worked on that. We built a simple wooden frame to fit inside the opening. Along the length of the inside of the hatch frame at one end, we attached a 3/4-inch strip to support one end of the screen’s frame. The other end of the screen rests on two small 1 1/2-inch strips attached so they can be turned to allow the screen frame to drop right out. I added some molding above the screen frame so it could not be pushed or blown out of the open hatch. Finally, we could attach all the hardware.
Building a hatch of this type is not a project to enter into lightly, but for anyone willing to tackle it, the rewards are wonderful. The design must be well planned, because the modification must not rob the deck of any of its structural integrity. A mistake could be costly.
Our total cost for materials was about $400, not counting the sweat equity. On the other side of the ledger, the satisfaction derived from such a project cannot be calculated. The benefits more than surpassed our expectations. The difference this hatch has made to our comfort below and in the overall appearance to the boat was well worth the effort — and the wait.
Sea Trek’s interior is even brighter than before and the air circulation is vastly improved. How do I know that? These days, if we’re not careful, we have to chase all over the cabin every piece of paper we put down.
Chuck Baier and his wife, Susan Landry, lived aboard and extensively cruised Sea Trek for 17 years on the U.S. East and Gulf Coasts and in the Western Caribbean. They recently, reluctantly, sold her, but are mending their broken hearts by working on Beach House, their new-to-them Mariner 34, in Beaufort, South Carolina.
Thank you to Sailrite Enterprises, Inc., for providing free access to back issues of Good Old Boat through intellectual property rights. Sailrite.com