A clever little box cuts projects down to size
Issue 81 : Nov/Dec 2011
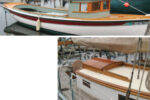
Many sailors do their repair projects or build additions for their boats in home workshops equipped with all the tools required for expert construction. Others, whether by choice or necessity, handle their boat projects on board. With no room for a dedicated workspace on our 35-foot Chris-Craft center-cockpit sloop, I put together a small, open-bottomed box — roughly 10 inches long, 7 inches wide, and 5 inches high — that serves as a portable mini workbench.
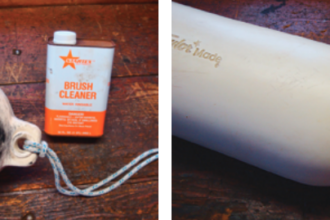
“The little box,” as we call it, with its built-in clamp and a couple of C-clamps for backup, provides a solid base or backing for work while at the same time protecting boat surfaces that might otherwise suffer. I further protect surfaces when I place a cardboard or rubberized pad under the box to add a non-slip factor.
The little box is useful for a surprising number of jobs.
- Do you need to drill and countersink screw holes into components before assembling them? Place a part on top of the box, hold it down, and drill away.
- Glue time? Assemble the parts and clamp them in position until the glue sets.
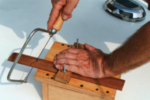
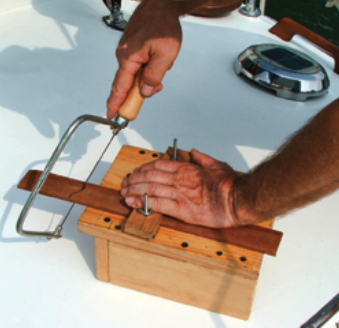
- Want to saw a board or a piece of trim? Hold it tightly against the box or clamp it down and saw away with jigsaw or hand saw.
- Routing the edge of a fiddle or rounding the corner of a shelf? Just clamp, then rout or sand to shape.
- Need to cut a piece of flatbar or a length of continuous hinge? Clamp the metal piece down, cut it to size, and file the cut edges smooth.
New and improved
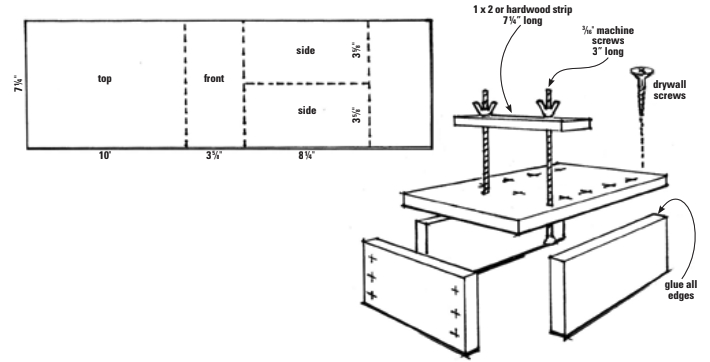
After using my original box for a number of years, I decided it was time for a slightly improved replacement, hence, this how-to. The box size can be changed. A slightly larger box could be made by using a wider board or piece of marine plywood. I made my box from a length of 1- x 8-inch white wood. Because the lumber actually measures 3⁄4 inch by 7 1⁄4 inches, the box width was set by the board width. A 2-foot length of board is large enough to build the box, but if you’re buying new wood rather than using a leftover from a previous job, you’ll probably have to buy a 6-foot length. You’ll also need a short piece (about 8 inches) of 1 x 2.
When assembled, the box will have a top, front, and two sides. The bottom and back are open. I used drywall screws to assemble the box and countersunk them slightly to leave a smooth top surface. A bit of epoxy or polyester putty will cover the screws and level the surface, and a coat of resin over the entire box will help extend its life.
Cut and assemble
Cut four pieces of wood from the board. Top: 7 1⁄4 inches wide by 10 inches long; front: 7 1⁄4 inches wide by 3 5⁄8 high; two sides: 8 1⁄4 inches long by 3 5⁄8 high.
Drill and countersink a row of screw holes near each side of the top piece. Measure in 3⁄8 inch for the screw centers. Also drill screw holes to attach the box top to the box front. From the front edge of the top surface, measure back 1 3⁄8 inch for screw centers. (Once the front panel is attached, the box top will overhang the front by an inch.)
Align the side panels with the back end of the top piece and glue and screw the top to the side pieces. Next, dry screw the box top to the front panel and drill and countersink a screw hole in each corner of the front piece. Finish the box assembly by gluing and screwing the box top to the side panels and front panel, and the front panel to the vertical edges of the side panels.
For the hold-down bar or clamp, cut a piece of 1 x 2 to the box width (7 1⁄4 inches or the appropriate dimension for your box). Position the wood on top of the box parallel to the front edge with the center of the bar about 3 1⁄2 inches back. From each side, measure in 1 3⁄8 inches and drill a 3⁄16-inch hole through both the bar and the box top. The bar will be held in place by a pair of 3-inch, 3⁄16 machine screws and wingnuts.
Put it to work
When using the box, insert the machine screws from the underside through the top of the box and through the 1 x 2 bar. Wingnuts make it easy to tighten the bar from the top to accommodate the thickness of the material being clamped. The 3-inch screws should be long enough for typical little-box projects.
The 1-inch overhang of the top panel provides another option for clamping, perhaps with a C-clamp or two, depending on the project to be held.
When storing the box, insert the machine screws into the box from the top, so the wingnuts will be inside the box, to prevent possible snags or scrapes on other items in the storage locker.
David and Zora Aiken have been meandering by boat since 1974, finding inspiration for painting, and gathering material for writing. Their books include Good Boatkeeping, Second Edition; Cruising, the Basics; and Fiberglass Repair: Polyester or Epoxy. “Home” since 1978 is a good old, now-classic, 1963 Chris-Craft sloop, Atelier.
Thank you to Sailrite Enterprises, Inc., for providing free access to back issues of Good Old Boat through intellectual property rights. Sailrite.com