Leftover home flooring brightens up a boat
Issue 82 : Jan/Feb 2012
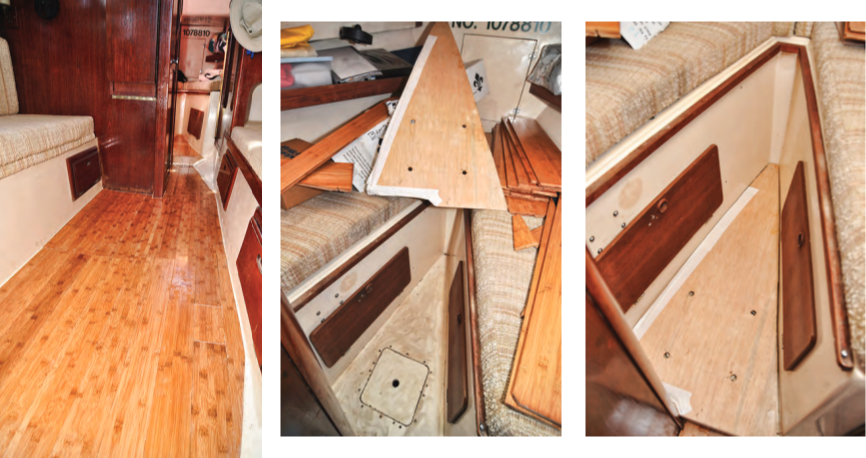
When I bought my Eastward Ho 31, her cabin sole was delaminated teak-and-holly plywood. The first project I took on was to remove that splintery eyesore and clean up the fiberglass base on which it had rested for 20 years. The plywood had been attached with contact cement to the sanded fiberglass of the liner pan and it came up rather easily. I ground down the entire area thinking I’d replace it in the near future. That was 10 years ago. For a decade, we lived with the liner pan until a friend volunteered some pre-finished bamboo flooring left over from a job in his home. He, too, was tired of looking at the ugly liner, apparently.
I had some laminate left over from when I redid my living-room floor and had toyed with the idea of using that. However, the manufacturer told me the laminate wouldn’t work due to the “floating nature” of the floor and the rate of expansion and contraction. A cabin sole must be capable of being glued down and surviving in the marine environment.
The first question, therefore, was whether the bamboo flooring would stand up to the marine environment. My friend tested it by soaking it in water for several weeks and, when it did not show any signs of failure, figured it was good for a boat sole.
Once I decided the material was suitable, I next had to determine if there was enough of the bamboo flooring available to cover the sole in my boat. Although the area to be covered was not large, it is full of angles — and the bamboo pattern and color were no longer available from the manufacturer.
The number of hatches in the sole also needed to be minimized. I eliminated the hatch over the keel as the ballast keel is internal and the hatch was placed there only so the builder could lower the ballast into the keel cavity. As the ballast is never coming out again, I had no need for the hatch. I also have hatches over the bilge pump and one that offers access under the engine, although this latter one does not affect the sole. I thought of using a plastic hatch over the bilge pump but was outvoted by my wife, who wanted a wooden hatch to match the sole.
We determined that 35 square feet of flooring plus a scrap factor of 40 percent, making 49 square feet, would get the job done. It appeared we had enough flooring with some to spare.
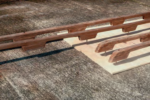
The flooring was called Crescent Bamboo from Crescent Flooring. Each piece was 30 inches x 4 inches x 1⁄2 inch. I had about 72 square feet of material and ended up using most of it. The scrap factor worked out to be much higher than we had estimated.
Leveling the base
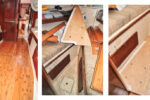
Step one was to clean and level the surface of the liner pan that had been serving as our cabin sole. The mast column had depressed the fiberglass surrounding it and now rested on the top of the keel. Furthermore, the corner between the liner base and the vertical faces of the molded-in furniture is radiused. These problems would have to be dealt with. Either the flooring panels or the fiberglass would have to be trimmed back to t.
Grinding the fiberglass pan would weaken the boat’s structure. The better choice would be to level the fiberglass surface and raise it a little, even though this method would be time-consuming and difficult.
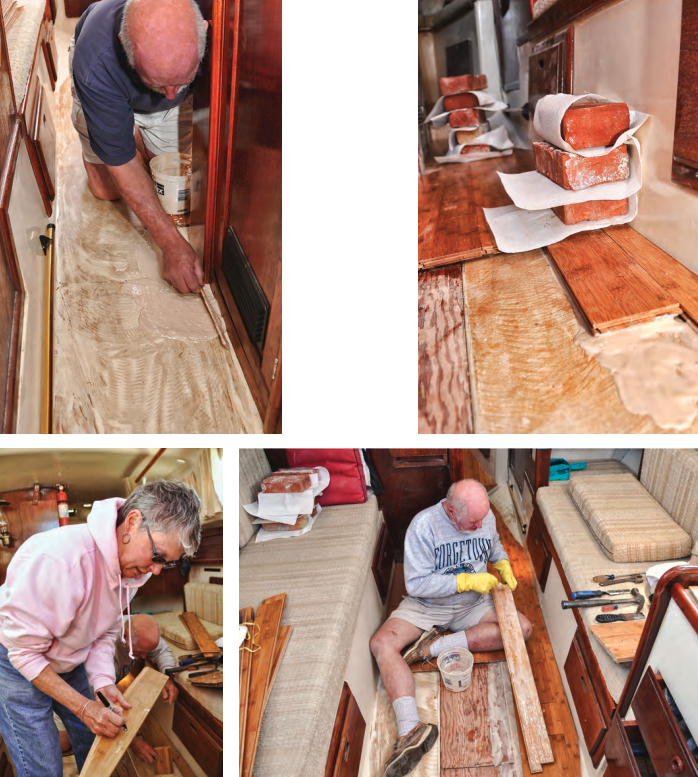
I had considered using urethane glue to stick down the sole, but since I first had to level the surface, I settled on epoxy, which I mixed with high-strength microfiber filler to the consistency of soft peanut butter. In the places where the area to be filled was too deep to use just epoxy, I cut shim material to fill the space and submerged the shims in epoxy. I then used thickened epoxy to bridge the remaining gaps. Before it was over, the entire cabin and I were covered with epoxy dust.
Pattern and dry-fit
The next step was to make up patterns for the various areas of the sole. I was hoping I could work on the project at home and avoid some unpleasant weather. Even though it’s very cool in southern Louisiana in February, it turned out that working on the dock was the only practical solution. I did cut the V-berth sole at home and I brought it to the boat for a trial fit. This worked, but the other areas were too big and complicated to be easily patterned. The boat’s interior has no symmetry; each side of the sole has different curves and angles.
To lay out the flooring, the first thing I did was mark a centerline for each section of the cabin sole — V-berth, head, main cabin — making sure the centerlines corresponded to that of the boat. Starting from each centerline, I fitted the flooring pieces toward one side until I reached a vertical berth front or a bulkhead. I then set the flooring pieces in place temporarily to be sure everything t together. Once they were fitted, I removed the pieces in sequence, troweled epoxy on the sub floor, and re-laid the final sole. When it had cured, I moved to the other side of the area and repeated the process.
Tools for the job
I found I could not work precisely enough with the portable small tools I had thought to use and realized I’d do better with my table saw, a 50-pound “portable” device. I set up shop on the dock in front of the boat. Every night, I put the saw on a two-wheeled dolly and pushed it to my car. In spite of its weight, it was a blessing. With the table saw, it was possible to make accurate cuts and angles to fit the configuration on board.
If I had had a band saw, I could have made a closer fit, particularly in the area outside the head. Here, the shapes are complex and the surface had to be filled, leveled, and laid as in the V-berth area.
The main cabin was another difficult area as the bases of the settees curve inward slightly. I cut the wood to meet a long taper. Although it made sense to work at the boat, where I could test fit every piece immediately after cutting it, I still spent a lot of time commuting from boat to dock and back again. However, I managed to get most of the pieces to fit on the first or second try, so there was little wasted time. As is usually the case with boat projects, the cramped working space was a problem. It’s hard to lay the sole panels in place
while occupying the same space. I found I could kneel on one half of the sole while fitting the other half.
After some areas of the sole were laid, a space remained between the outboard edge of the bamboo and the fiberglass liner along the berth faces. I considered using tan 5200 to fill these gaps, but the softness of the material deterred me (and cost was also a factor) so I used an almond-colored caulking. Since the caulking was designed to be paintable, I thought it would harden quickly but it was slow to harden. Although, given enough time, it did harden and could be painted, I should have paid attention to the caulking manufacturer’s caveat that “joint size should not exceed 1⁄2 -inch wide by 1⁄2 -inch deep.” My joints were about 1-inch wide by 1⁄2 -inch deep.
A satisfactory conclusion
As often happens with boat projects, I made a couple of false starts and learned some tricks along the way. I ended up doing much of the cutting on the dock because moving parts between the boat and home wasn’t practical, and I brought in the table saw after the battery-powered tools didn’t work out. By underestimating the scrap factor, I found myself working with barely enough material. In the end, it took the best part of six days working six hours a day to complete the project. I invested about $200 in epoxy and metering pumps.
The sole looks great and feels solid. As the bamboo was intended for home flooring, it has a non-skid finish and is safe to walk on.
A new cabin sole greatly improves the appearance of a boat’s interior, and as long as you have the time, material, and equipment, it’s well worth doing it yourself. Allow enough time to do a careful job, then double your time estimate. Oh, and be sure to find someone willing to donate some excess flooring to the project.
Bill Sandifer started sailing at age 8 or 9, and through high school and college taught sailing at Sagamore Yacht Club in Oyster Bay, New York. He has cruised the Far East, the Mediterranean, and the East Coast of the U.S. and has had a boatbuilding business. Bill and his wife, Genie, currently sail an Eastward Ho 31 cruising sloop.
Thank you to Sailrite Enterprises, Inc., for providing free access to back issues of Good Old Boat through intellectual property rights. Sailrite.com