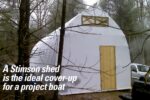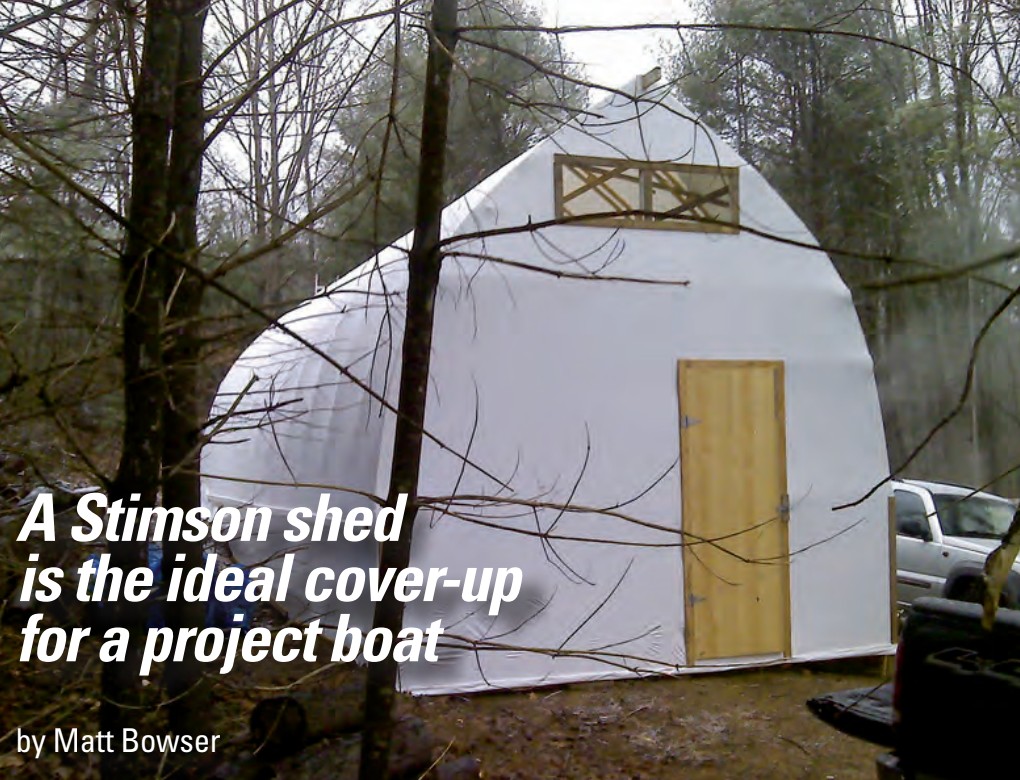
A Stimson shed is the ideal cover-up for a project boat
Issue 86: Sept/Oct 2012
Just about everyone who has ever owned an old boat for any length of time has had to face a frightening word: refit. This is often the culmination of years of deferred maintenance and poorly thought out “upgrades” that inevitably lead to a bunch of major systems going south at the same time.
When I was faced with the cruel reality that the decks on my 1962 Alberg 35 were as wet and squishy as a peat bog, I knew I had to get the boat home to give her some well-deserved attention. I also needed to get a good shelter over the boat so I could work on her without having to worry about the weather.
My track record with shelters had been pretty spotty over the 20 years I’ve owned boats. Most covers never made it through the winter and the vast majority met an untimely demise. I remember one particularly large ice cube that formed when a cover collapsed and trapped 2 feet of water in the cockpit just before a big freeze. Other highlights of my covering career include tearing stanchions off their bases when the wind broke the cover free and fishing a giant blue tarp out of the marina where the boat was stored. (A 30-foot tarp, half submerged and wrapped around a dock, is an unpleasant thing to deal with in February.) I just wasn’t good at the whole covering thing.
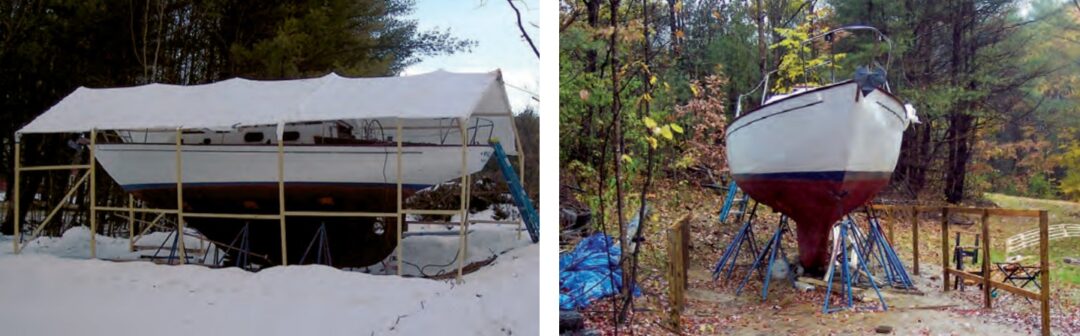
Things didn’t get any better when I had my Alberg hauled to my house in November 2008. I didn’t have much time to get some sort of shelter up before bad weather would make a mess of the boat, so I built a free-standing canopy. I figured the structure wouldn’t interfere with deck work and would keep snow and rain off the boat. I made it with a rough frame of 10-foot 2 x 4 studs with a shrink-wrap roof. Because I didn’t want to pay the extra $2 each for 12-foot studs for the roof, the unfortunate result was that the canopy didn’t have enough pitch and I had to rake the snow off the roof whenever more than 2 inches fell (which happens all too often in central New Hampshire). It wasn’t long before the canopy started sagging, and some of the roof strapping snapped when I didn’t brush the snow off in time.
Needless to say, the canopy did not hold up well and barely made it through the winter. I had hoped to get started on the decks over the summer of 2009, but life got in the way and my boat sat waiting for me. By late summer, I finally found time to get serious about the boat but knew it would be imperative to get a real shelter over it so I could work on it over the winter months. This time I had to get it right.
Discovering the Stimson shed
I spent a lot of time researching possible solutions and found that my options were limited. I didn’t want to spend more than $2,000 and wanted to avoid a building permit if possible. I considered purchasing a shelter from Shelter King (now MDM Products LLC), but the size I wanted would push the budget to the limit. There had to be something else I could build from scratch. I found a few references to bow-roof sheds built from 1 x 3 lumber- yard strapping fashioned into curved I-beams. I finally tracked down a name: the Stimson shed. Once I found the name, I was able to access websites with detailed pictures.
I researched every angle I could think of regarding the Stimson and couldn’t find anything wrong . . . other than the time and labor spent building them. Each reference indicated that they were easy to build, cheap, and very strong. I ordered the plans from Stimson Marine for $18 plus $2 shipping and handling.
I was immediately impressed with what I saw when the plans showed up a few days later. The booklet that came with it gave me all the details I needed to easily construct the bows for the shed.
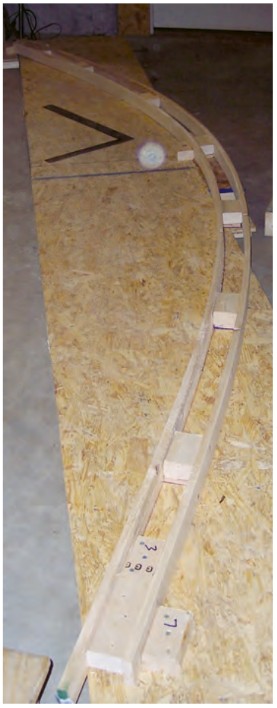
Bending bows on a form
If you have a boat to cover, you might find the Stimson shed suits you too. Basically, you decide how wide you want the shed (up to 20 feet) and then, using a table of offsets in the booklet, build a form on which to make the bows. The length doesn’t matter; if you want a longer shed, you just make more bows. I planned for a shed that would be 14 feet wide by 37.5 feet long.
The form is very simple and the step-by-step instructions made the setup easy. To build it, you need a flat area that will accommodate the length of your planned bows. My bows were 14 feet long, and I built the form on my basement floor using a single sheet of cheap particle board and two 2 x 3s cut into blocks. Then it was just a matter of going to the local lumberyard and picking the best 1 x 3 pine strapping I could find (their length depends on the size of the planned bow). I learned to look for the straightest pieces with few knots and give each a good flex before buying it. Unfortunately, the cheap 1 x 3 strapping boards that you find at the big-box lumberyards are not noted for their quality, so expect some of them to snap when you bend them onto the form. (You’ll soon become expert at selecting the good ones.)
One of the nice features of the form design is that when you build the form, you are actually building your first bow as well. To build subsequent bows, cut the strapping to length and bend two pieces onto the completed form and insert 2 x 3 blocks between them. Screw them together with 2 1/2-inch decking screws and pop the bow off the form. Repeat.
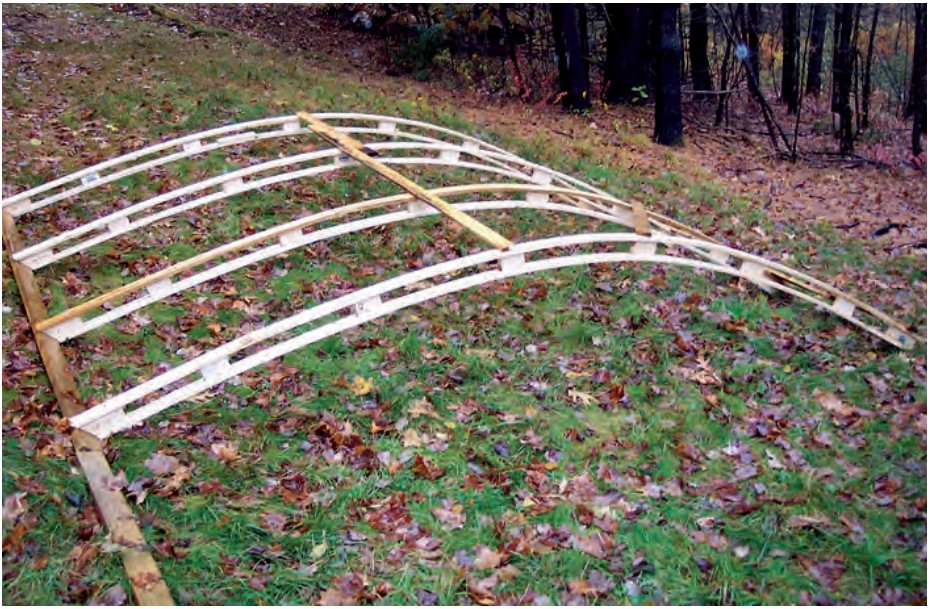
Building the bows gets pretty monotonous after the first few, so I broke it up over a two-week period, spending about 30 minutes a night building two or three bows. All told, I made 26 bows (each bow is half the roof span) to make 13 full bows on centers just under 3 feet apart to make the 37.5-foot shed length.
One issue I had to contend with was that the boat’s deck (where the boat is widest) was about 10 feet off the ground. Because the bows arc inward to the ridge, I had to build a 4-foot knee wall to raise the assembled bows to gain sufficient width that high up.
I sank 12 pressure-treated 8-foot 2 x 4 posts roughly 3 feet into the ground and cut them off to a level 4-foot height (I snapped a reference chalk line and measured from there). I then added a sill along the perimeter of the posts to give the bows a place to sit.
Raising the roof
With the knee wall complete and all the bows built, it was time to put it all together. This was the part I worried about the most (as it turned out, unnecessarily). I began by fastening four bows to a 10-foot 2 x 4 ridge pole with 3-inch decking screws (just under 3 feet on center). Then, to give this subassembly a little rigidity when moving it around, I screwed a few pieces of temporary strapping along the base and midsections of the bows.
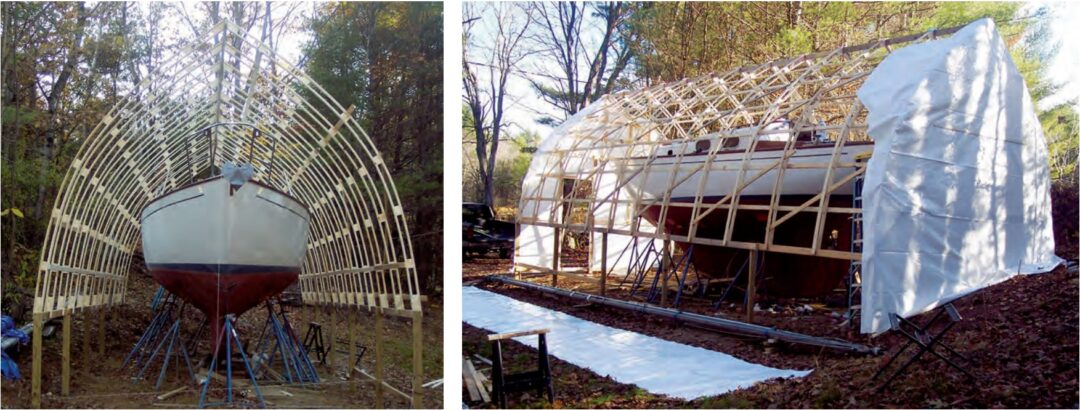
At this point, I enlisted the help of my wife and son to help steady things while we hoisted the assembly up onto the sill. I then had my son hand up a bow on the opposite side, where I screwed it to the 2 x 4 ridge pole. I did the same thing to the other end of the assembly so we had four bows on one side of the ridge and one at each end of the assembly on the opposite side. This is actually easier to do than to describe. It’s a bit awkward and it does use up all your available hands, so getting some additional help at this stage is a good idea.
For the rest of the bows, I did the same thing and completed it all with three four-bow assemblies and one two-bow assembly. All told, it took about six hours to get everything up, but it was very satisfying to see the frames all up (and I think they look pretty slick).
Next came the tedious task of drilling and bolting all the frames to longitudinal stringers and adding a few diagonals to stiffen things up (I don’t live in a windy area or I would have added more). For my shed, I had to drill for and fasten 208 4-inch galvanized carriage bolts to the frame. Once complete, though, the structure was very strong. I weigh 225 pounds and was able to hang unsupported from the ridge pole.
The last carpentry bit for the construction phase was to add end walls. I pretty much cobbled those together with wood I aready had and framed in a doorway and openings for vents. Some people leave one or both the ends open, but I wanted to be able to run a torpedo heater in the shed to take the chill off our New Hampshire winters.
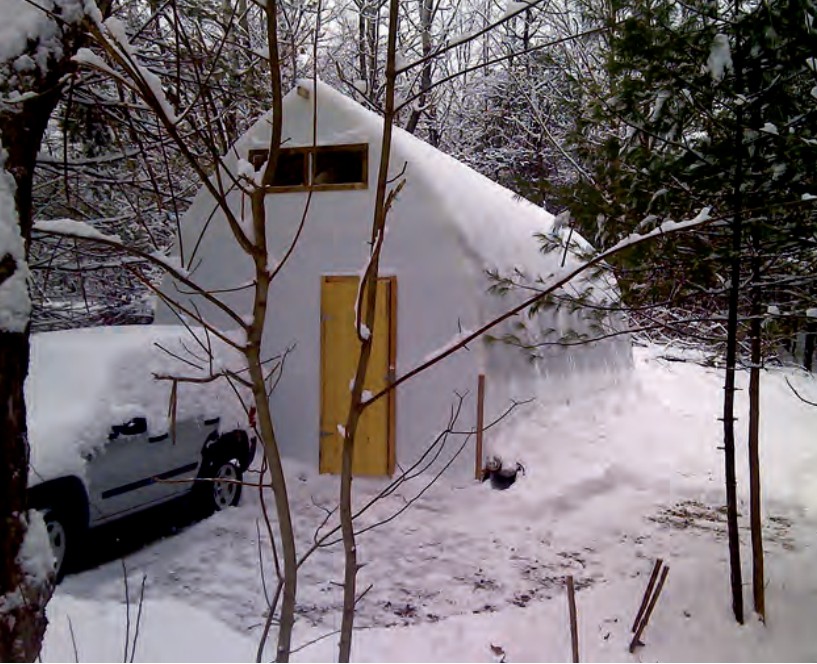
The final step was putting the cover on. I ordered a 32- x 100-foot roll of 7-mil white shrink-wrap and started with the ends, making sure to overlap onto the top of the shed. I held them in place with temporary battens and then pulled the main cover in place and battened it down on the gable ends and along the bottom (I ripped a few 2 x 6s into 3⁄8-inch battens). I rolled up the battens in the ends of the shrink-wrap and screwed everything down and then covered the battens with 6-inch shrink-wrap “preservation tape.” (Preservation tape seems to be a fancy name for tape with UV protection.) After some recommendations from others who had built Stimsons, I added big 2-foot x 2-foot gable-end vents to reduce condensation that forms on the inside from the moisture that comes up from the ground.
I am very pleased with the finished product and, after three years, it still doesn’t leak a drop and snow just slides off because of the pitch. The final tally for the whole project was about $750 and 50 hours of my time. Of course, the refit of my Alberg 35 has turned into a total rebuild, but I’m still plugging away and hope to get her back in the water for her second 50 years of sailing.
Matt Bowser has been sailing since he was a young boy when his father caught the sailing bug and dragged him along. He has owned a number of large and small sailboats and still sails an O’Day Daysailer that he found in a collapsed barn while at a party in college. He bought his Alberg 35, Magic, in 2001. Matt lives with his patient wife, Stephanie, and two children, Jacob and Olivia, in Canterbury, New Hampshire.
Thank you to Sailrite Enterprises, Inc., for providing free access to back issues of Good Old Boat through intellectual property rights. Sailrite.com