A diesel fireplace warms boat, body, and soul
Issue 86: Sept/Oct 2012
On the Chesapeake in October you find cruisers migrating south toward warmer climes. My wife and I must have taken a wrong turn, as we found ourselves north in New York Harbor, tied up and prepping for our first winter aboard our 41-foot sailboat. Heat production was clearly going to be a big part of that effort. Seahawk has a robust heat pump that did yeoman service on Chesapeake Bay, but looking at the weather history and the heat pump’s efficiency curve, I quickly realized that once the water temperature dropped below 38°F, there would be little output. Supplemental heat would be in order and, not willing to rely on marina power, we needed a non-shorepower solution.
Before anything else, we had to determine how much heat we needed. This is driven by many factors, including average temperatures, the degree of insulation in the hull and overhead, and the volume of air to be heated. Seahawk’s saloon would require a minimum of 8,000 BTU per hour, preferably 10,000 or more.
Weighing the choices
Looking at self-contained systems that did not require a generator, I decided we needed a 12-volt system with minimal power draw. This drove us to a combustion solution. Two major systems fit that bill: forced air, in which air heated by a flame is pushed to vents, and the more traditional fireplace. We chose the fireplace for lower cost, simplicity, and ambiance. We have friends with a forced-air system and, while these systems produce great heat, the maintenance input every fall was not minimal. We also quickly dismissed, due to the carbon monoxide hazard, any portable heat source that does not vent combustion gases to the exterior.
Shipborne fireplaces are available with several fuel options: solid (wood or pellets), liquid (diesel or kerosene), LPG (propane), or CNG (compressed natural gas). The manufacturers we focused on were Sigmar and Dickinson.
We had propane on board for our stove and knew it to be clean-burning. The other advantage of propane is the dual chimney that isolates the burn chamber from the saloon.
The advantage of using diesel fuel is simplicity, and I felt more comfortable not having to run an additional propane line. A major factor was that we carry a lot more diesel than propane, which meant we would have to make fewer trips for refills.
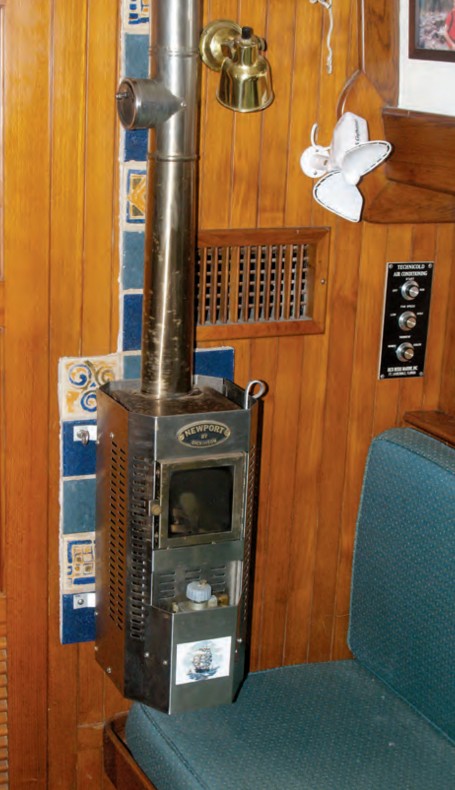
This thought process drove us to a Dickinson diesel fireplace. We chose a bulkhead-mounted unit, since we lacked the real estate on the cabin sole for a standing model. Two weeks later, we picked up two boxes, one with our fireplace and the bigger one with ancillary equipment to complete the installation.
The overall project cost us $1,050, with the major expense being the fireplace at $700, but that was after aggressive shopping. I would estimate the retail cost for this project at $1,300.
Preparation and planning
At first look, the installation process can be daunting, but by diligently following the instructions, making a plan, and breaking the project into manageable stages, I was able to accomplish it in a full weekend (with about eight hours preparation in the evenings the week before). The main stages I used were preparation (designing and building the backing/mounting board), heater installation, chimney installation, and setting up the fuel and electrical connections.
With a diesel heater, the placement and length of the chimney are key to preventing smoke blowdown. Our overall chimney length is just over 4 feet. To prevent poor combustion, we installed a balanced damper 22 inches above the stovetop to ensure the draft remains stable during wind gusts.
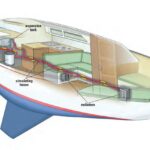
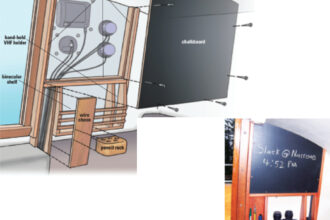
We first built a cardboard mockup that gave us a plan for positioning and the placement of mounting points. On a monohull like ours, the most convenient location for a fireplace is usually on the forward bulkhead in the saloon facing aft. We tried to mount the fireplace as low as possible to reduce the hot-head/cold-feet effect. By placing it so the top was just below and slightly inboard of the air-conditioning vent, we were able to use the fan-only function of the winterized heat pump to distribute the air very effectively. Without good air circulation, a fireplace can become a toasty heat island while leaving the rest of the saloon cold.
Installation
Using pencil ticks on the bulkhead as reference points, I designed the backing/heat shield. A fireplace mounted on or close to a bulkhead will need a heat shield behind the fireplace and along the chimney path. A sheet of stainless steel is often used for this and can be quite attractive, but we opted for a tile shield that blends nicely with our saloon décor. I used 3⁄8-inch backerboard cut to shape, with 4-inch x 4-inch ceramic tiles mortared to it and appropriate grout in the seams. Once it had cured, I drilled the four mounting holes for the fireplace as well as two more for the chimney part of the shield. To mount the fireplace and shield, I used 1/4-inch bolts with washers, to which I added additional nuts and washers to create a 1-inch standoff between the shield and the bulkhead.
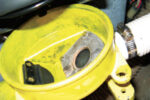
Installing the chimney caused me the greatest anxiety, probably from my strong aversion to drilling a 5-inch hole in our cabintop! A straight chimney is best. To ensure the hole was centered, I drilled a pilot hole from below, using a level to maintain the vertical. This gave me a way to position the deck block we needed, as our cabintop is sloped and the top of the deck plate has to be horizontal to properly accept the vertical flue. I drilled a pilot hole in a block of hardwood, then shaped the bottom of the block to fit the contour of the cabintop.
I attached the shaped block to the cabintop using the pilot holes for reference and glassed it in place. Using a hole saw, I drilled the hole for the chimney in two stages. First, I cut a 5 7⁄16-inch-diameter hole 2 inches deep to accommodate my large ABI deckplate. I then cut a 5-inch hole the rest of the way through the cabintop and the headliner for the flue. (I have a bi-metal hole-saw kit that does a great job through fiberglass and wood. Moderate speed and gentle pressure helps minimize splintering.) When the cutting was complete, I cleared away the exposed core of the cabintop, backfilled the void with thickened epoxy, and sanded and painted the deck block.
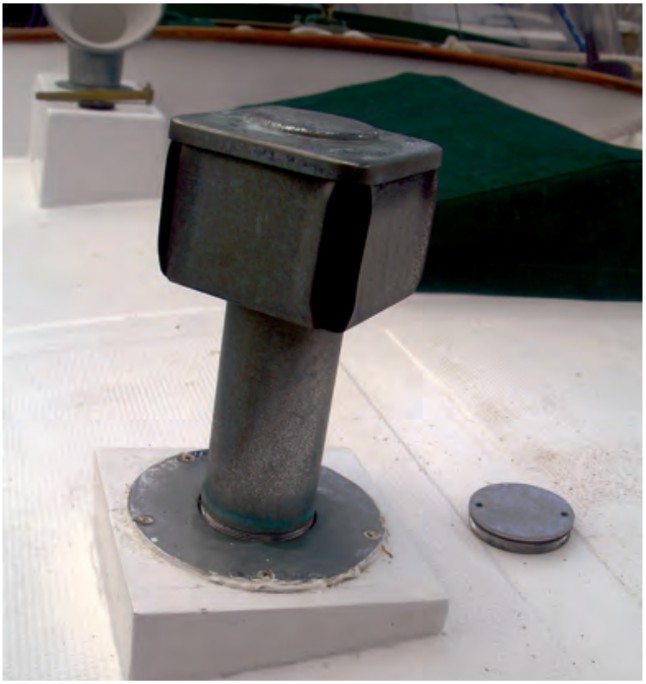
The final stage was to assemble the flues. In my case, this was one 22-inch length of flue, the balanced damper, and another 22-inch length shortened to ensure a snug fit into the deck fitting. Above deck I have a Charlie Noble chimney top on an 18-inch length of threaded pipe that screws into the deck fitting. This cabintop arrangement allows me to remove the stack and replace it with a deck plate, making the cabintop cleaner (no tripping over the chimney during sail changes), and seals the flue against water ingress. I discovered that it’s important to have the dress ring installed onto the cabin liner prior to sealing down the deckplate. This is very difficult to do after the chimney is in place!
Hooking up
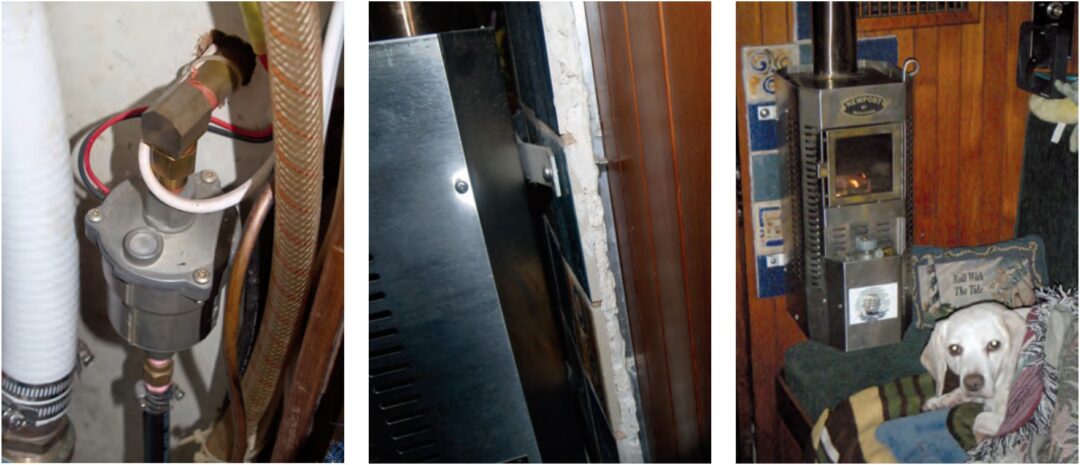
The fuel and electrical connections were straightforward. Fuel can be supplied either from a gravity tank filled manually or by a transfer pump or low-pressure direct-feed pump. We chose the electric pump as it allows us to use the fuel directly from a tank and we had no convenient place for a gravity tank.
I teed off my forward diesel tank to the stove filter assembly with a fuel shutoff. From the filter, an ABYC-approved fuel line runs to the low-pressure pump that has a maximum head of 3 feet and must be mounted at the same height as the metering valve. Two copper tubes are needed, the first from the pump to the fuel-metering valve and the second an overflow line from the metering valve to a small catch bottle. For power, I ran 12-gauge tinned wire from a spare 5-amp breaker on my DC panel to the pump and then on to the fireplace draft-assist fan. The pump is rated at 4 amps and the fan at 2 amps on high, but I have never seen the fireplace draw more than 2 amps.
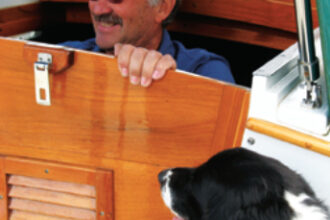
Once we were done with the installation, the only thing left to do was to light the fireplace and enjoy it. I love lying on the settee of an evening, reading a good book while the glowing fireplace negates the whirling wind and snow outside. The dry heat is very comforting and the glow of the flame warms the soul!
Burry Vanderveer and his wife, Wendy, have lived aboard Seahawk since 2008. When he retired in 2010 after 34 years in the Army, they began cruising in earnest: south from New York City to Florida and the Bahamas. He has done many DIY boat projects from major (repowering) to minor (converting to LED lighting) and has replaced or renewed most of the boat’s systems.
Thank you to Sailrite Enterprises, Inc., for providing free access to back issues of Good Old Boat through intellectual property rights. Sailrite.com