Rolling Awlgrip topcoat
Issue 94 : Jan/Feb 2014
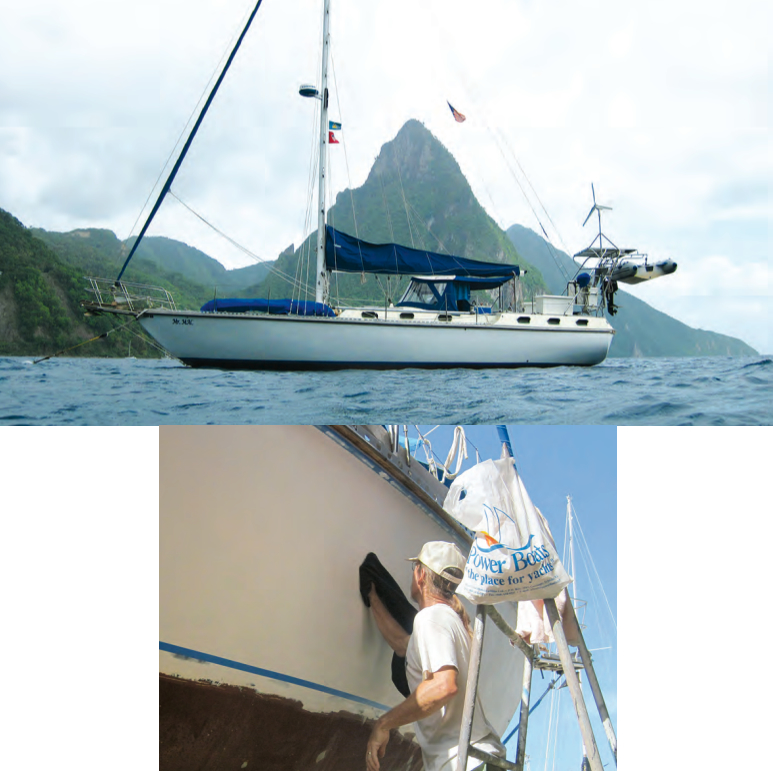
In part one, in our November 2013 issue, Anne and Chris explained the research that went into selecting Awlgrip for painting the topsides of their Bruce Roberts 45, Mr. Mac, and the prep work involved. They also walked us through the sanding, taping, and applying the primer and guide coat. At last, it’s time to paint! Painting the hull takes some advance preparation, and we also had to keep a sharp eye on the weather forecast and conditions in the boatyard. It wouldn’t do to start painting if it looked like rain or if the fellow next to us was sanding his bottom paint (see the sidebar on page 24).
Though this next tip sounds odd, it worked well. One of the how-to documents on the CD of tips, techniques, and advice we’d been given recommended mixing the Awlgrip and refrigerating it overnight before painting, stating that it will stay good for up to four days if kept cold. This might serve to maximize the induction period, during which the base and converter chemically cross-link (the recommended induction period is 15 minutes at ambient temperature). Following this advice, the evening before we intended to paint, Chris (wearing his respirator) mixed paint in a quantity sufficient to apply a complete single coat to the topsides.
The recommended proportions were 2 parts paint, 1 part converter, and 1 part reducer. For our 45-foot boat, we mixed 12 fluid ounces of Awlgrip Topcoat (G8009 Off-white Revisited), 6 fluid ounces of Awlcat #3 Brush Converter (H3002) and 6 fluid ounces of Awlgrip Slow Brush Reducer (T0031) at a time. We used a 32-ounce mixing cup with fluid-ounce graduations on the side. Chris stirred the mixture for two minutes then poured it into a scrupulously clean and sturdy 40-ounce peanut butter jar with a tight-fitting lid. Since our water-cooled refrigerator was out of commission while our boat was out of the water, we put the jar on ice in a cooler.
Early the next morning, Chris cleaned the hull with acetone using the dust/wash/wipe-with-black-T-shirt procedure (see part one of this article in November, 2013). We laid out everything we thought we might need on a towel (the same list of supplies as for the primer) and removed the paint from the cooler. We stirred it thoroughly, adding reducer as necessary.
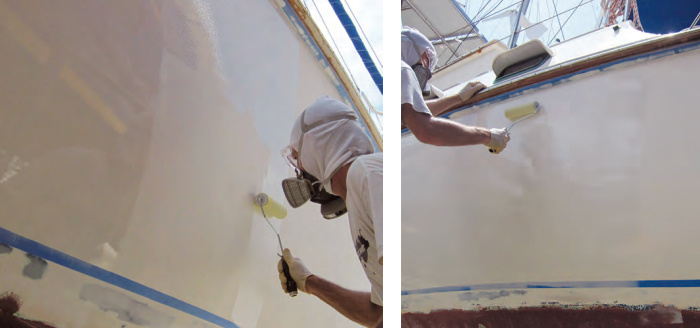
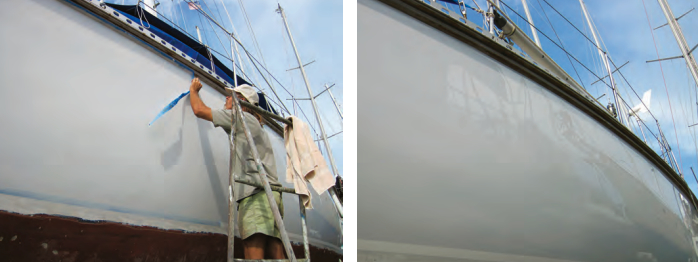
For the first coat, Chris applied the Awlgrip with a roller, then tipped with a brush. (At this point, we did not quite believe the how-to documents on the CD that said tipping was unnecessary.) He used a good-quality badger-hair brush to paint the hard-to-roll spots. I performed all the “as-needed” procedures: handing him the brush to paint or tip, cleaning the brush afterward, refilling the paint in the tray, adding reducer to the paint, helping him move the scaffolding, and maintaining quality control (no missed spots). Chris worked in 3-foot sections, maintaining a wet edge as he progressed. It took us less than two hours to apply a coat of paint to the entire topsides. By beginning and ending at the bow, we avoided an obvious line break.
Paint and painting tips
We developed some specific painting techniques based on recommendations from the how-to documents and on our own observations as painting progressed.
Use plenty of reducer in the paint – The paint should have a very thin consistency, similar to that of milk. After removing the paint from the cooler, we added sufficient reducer to obtain the desired consistency (about a 20 percent reduction) and mixed it in well using a stirring stick. However, the volatile reducer evaporates quickly, thickening the paint. To adjust for this, we poured only a small amount of paint, about half a cup, into the roller pan at a time, stirring well before pouring, and periodically added more reducer to the paint in the roller pan. I added roughly one to two tablespoons of reducer every five minutes and stirred until it was completely incorporated. These measurements are estimates and vary depending on temperature and breeze intensity. During our first coats, we developed an eye for the desired consistency and how much reducer to add to maintain it.
Apply a very thin layer of paint with each coat – Chris would barely wet one side of the roller with paint, then roll it vigorously on the textured portion of the pan to distribute the paint throughout the roller. The correct amount quickly becomes apparent as the paint is applied to the hull, because excess paint will run and has to be spread over too large an area. Applying more paint per coat in an effort to minimize the number of coats will actually add to the work, as the surface will need sanding between each coat to remove runs and sags. This is definitely a case of “less is more.”
Roll the paint thoroughly – For each 3-foot section, Chris applied the paint initially using vertical and horizontal strokes to distribute it evenly. As we had masked it off completely, he went right up to the rubrail with strokes in this area. Once the horizontal strokes were done, he used only long vertical strokes from the top of the section to the bottom and from bottom to top without lifting the roller from the painted surface. He continued rolling, overlapping each stroke, across the entire section and back again, multiple times.
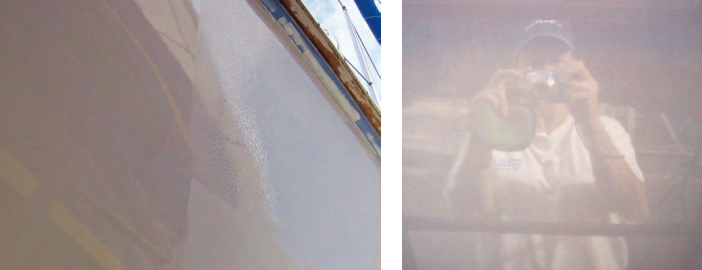
At first, the paint was covered with bubbles. The number of bubbles decreased as he rolled but never disappeared entirely. The first day, we used a brush to tip them out, but that was labor-intensive and left some brush marks that had to be sanded the next day. Chris soon developed a better method. He rolled over the section many times, gradually decreasing the pressure applied, aiming for a consistently smooth, even application of paint with no runs or sags. He found that initial rolling of the paint produced a loud Velcro-like squelching sound but the sound faded as he continued rolling. He stopped rolling when the sound muted (though it didn’t go away entirely), even though there were still some bubbles. Over the next few minutes, as he was painting the next 3-foot section, the bubbles in the previous section popped and the paint leveled into a smooth, shiny coat. If the bubbles don’t go away or don’t level to a flawless surface, the paint needs more reducer. With sufficient reducer in the paint and lots of rolling, tipping with a brush will not be necessary.
Keep a wet edge and overlap painted sections – This is vital to achieving a smooth and even surface. Painting over an edge that has dried or become tacky results in a matte finish that will require sanding and re-coating.
Keep the paintbrush clean – For narrow and hard-to-reach spots, Chris used a badger-hair brush instead of the roller. A little paint on just the tips of the bristles was enough to cover these small areas. Immediately after he painted an area, I would clean the brush in acetone, flick the solvent from the brush, and set it aside to dry until needed again. I did not let the paint dry on the brush.
Practice quality control – The paint takes a lot of rolling to achieve an even surface with no drips or sags. We watched keenly for defects before moving on to the next section and dealt with them immediately. Going back to previous sections to fix a sag or missed spot, even if the paint still looks shiny and wet, just makes the problem worse.
Mix only enough paint for that day’s work – That said, it is better to have more than needed than not enough, since a new batch will require a 15-minute induction period during which the wet edge will be lost. The 24 ounces we initially made were more than enough to cover the hull, since only a thin coat is applied and reducer is added as necessary to maintain consistency.
When finished painting for the day, we threw out whatever paint was left in the roller pan, then tightly capped the peanut butter jar and put the unused paint back on ice. That evening, we made new paint in a new mixing pot and put it in a new jar. The next day, we poured some of the old paint into the roller pan with some of the new paint and mixed them well, until the old paint was used up. The results were the same as if we had used all new paint.
Don’t try to cover defects with topcoat paint – Each coat is so thin it’s translucent. Large or dark defects must be primed before the topcoat is applied, especially when the topcoat is light in color.
Between coats
The Awlgrip application guide recommends a minimum of 16 hours between coats and sanding between coats for a smoother finish. If more than 24 hours have elapsed between coats, then the surface must be sanded before recoating. We tried several methods of recoating: full sanding, spot sanding, and no sanding.
Full sanding – After applying the first coat on one morning, the next morning we sanded the entire hull using 320-grit sanding pads on the random orbital sander, cleaned the hull with acetone, then applied the second coat. Our friends who had painted their 52-foot sailboat said they always did a full sanding between coats, painting one side of the hull in the morning and prepping the other side in the afternoon.
Spot sanding – The morning after painting, we spot-sanded only the few areas with a drip, sag, or dried-in bug, then cleaned the hull with acetone and painted the next coat.
No sanding – We cleaned the hull with acetone and applied another coat within 24 hours of applying the previous coat.
We found no distinct differences in the overall finish using any of these methods. However, it was much easier to keep track of where we had already painted when we were painting over a dull sanded surface versus a shiny unsanded surface.
Number of coats
According to the Awlgrip application guide, at least two coats of paint are required. Since only a very thin layer of paint is applied with each coat, color accumulation is gradual. Don’t despair! The results are worth the effort. It took us less than two hours to apply each coat on a 45-foot hull. To ensure maximal coverage, we applied five coats: one per day for four days, then two days to do the final coat. The morning after applying the fourth coat, we did a full sanding and hosed off the hull. Early the following morning, while we were fresh — and before workers started bustling around the boatyard, kicking up dust — Chris cleaned the hull with acetone and we applied the final coat. Voilà! We were done.
Curing period
The Awlgrip application guide provides detailed descriptions of the curing of Awlgrip topcoats. Briefly, Awlgrip topcoat paint has three cure cycles. After the first cure cycle (12 to 24 hours), the finish appears dry and the painted surface can be exposed to weather or handled (to apply masking tape, for example). The coating becomes much harder during the second cure cycle (72 to 96 hours) with increased resistance to abrasion and chemicals. Full cure is complete only after 14 to 21 days. To maximize the curing time before we went back into the water, we painted our topsides before doing our antifouling and other projects. If we were going to splash soon after painting, it was recommended that we place large pieces of cardboard or wax paper between the hull and the travel-lift straps to avoid damaging the finish.
These cure times apply for a temperature of 77°F and relative humidity of 50 percent and may vary with temperature, humidity, and paint thickness. Since September in Trinidad is hot and wet, we were most concerned with temperature and water exposure. The mixed paint cures more quickly at higher temperatures, so we used the Slow Brush Reducer in the topcoat to maximize the usage time. It seemed to help that we kept the paint on ice overnight. Though we did not keep it on ice while we painted, it remained cool and we had no problem with premature curing. We also tried to paint early in the day, before the sun had heated the hull, but detected no differences between sunny and non-sunny conditions when we painted later in the day.
The Awlgrip application guide warns against moisture coming into contact with the topcoat paint before it has completed its first cure cycle. “Disastrous” is the word used . . . never a good thing with regard to boatwork. The guide suggests covering or shading the work area to prevent rain, dew, fog, or condensation from adversely affecting a newly painted surface. We worked without cover, selecting days with low probabilities of precipitation. On a couple of occasions, it did rain several hours after we had painted; however, we saw no obvious effects in the finish.
The bottom line
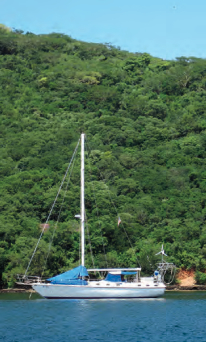
The boatyard had quoted $10,000 to $12,000 to Awlgrip Mr. Mac’s topsides and estimated four to six weeks to
do the job. Our material costs for this project totaled less than $2,000 and we ended up with an excess of topcoat. We bought a gallon of topcoat, a half gallon of converter, and one gallon of reducer and used only half of the topcoat and converter for five coats; this stuff goes a long way. And it took us just two weeks from start to finish. Some days were long, while on others we spent just a few hours cleaning and painting. For our efforts, we saved yard costs of $350 to $700 for the extra two to four weeks it would have taken to have it sprayed by the professionals.
Of course, the job took time and effort, but what boat project doesn’t? The most physically demanding part was the initial preparation of the hull. Chris spent many hours sanding off the old paint and making sure the hull was smooth. The painting itself was exacting, but not difficult. We had developed our feel for the paint and established our painting habits by the time we finished the first full coat.
The real bottom line? An Awlgrip mirror shine is not beyond reach if you have basic boat maintenance and painting skills and an eye for detail. Then you can sit back and smile at the hull envy in the eyes of your fellow boaters as you float by.
Anne McMillen-Jackson is a marine biologist turned full-time cruiser. She and her husband, Chris Jackson, cast off the docklines in May 2009 and have cruised from Maine to Trinidad aboard their Bruce Roberts 45, Mr. Mac. They support their seaborne habits by writing articles about boating and fantasy/science fiction novels for which they have won awards.
Thank you to Sailrite Enterprises, Inc., for providing free access to back issues of Good Old Boat through intellectual property rights. Sailrite.com