Imagination, a little paint, and a few pennies go a long way
Issue 103 : Jul/Aug 2015
I was sitting on the head in my Paceship 26, Pelorus, when I realized that everything in that small space was a shade of brown. The bulkheads were some kind of brown teak-faced plywood or maybe they were fake teak Formica. Who could tell? They just cleared my elbows fore and aft and they were depressing to look at. Even the toilet was resting on a piece of brown-painted plywood.
Across from the head it was the same: plenty of brown teak trim and the locker doors were a brown plywood. It brought to mind Oscar Wilde’s final words as he lay dying in a cheap Parisian hotel room, staring at the ugly, faded, stained wallpaper: “One of us has to go.”
It begins
That winter, I removed the toilet and pulled up the plywood. Under it lay pristine, glossy fiberglass, like new, a thing of beauty. Right off, the smell improved. That plywood had been installed by the previous owner (who liked the color brown well enough that even the boot stripe had been painted brown) and had absorbed more than 33 years of splatters and spills.
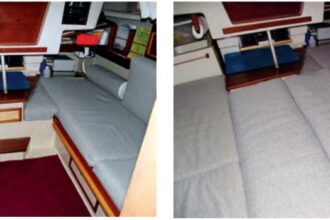
Now that the space under the toilet was nice and shiny, the salt-stained and scratched bulkheads looked like hell in comparison. A friend had painted his main cabin bulkheads a few years ago and they looked pretty nice, so I thought I might do the same. He used Rust-Oleum primer and topcoat, which he swore by, but I had some leftover polyurethane primer and most of a quart of gloss topcoat.
First, I pulled all the fittings off the bulkhead on the port side by the toilet and across to starboard by the countertop and sink. It made an impressive pile: fire extinguishers, granny bars and handholds, mirrors, hatchboards, oil-change pump and tank for the engine, spare foul weather jacket, toothbrush and soap holders, light fixtures, and various other gear had all been jammed in there.
I sanded the entire bulkhead surface and filled in all the dings and scars and screw holes with wood putty. Next, I gave it a coat of primer and two coats of gloss off-white topcoat. I painted the locker doors a nice contrasting light gray. The white really brightened things up.
Gaining momentum
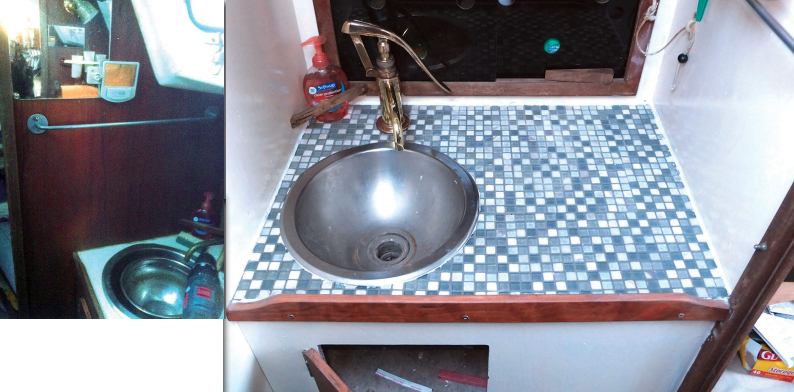
Now, by comparison, the countertop looked like hell. I had never really noticed before, but it was scratched and rust-stained and had 34 years’ worth of crud encrusted in the corners. This would take more than a coat of paint. But I had an idea.
I had watched a mason tiling a shower stall in a piece on TV. About the same time, I found in a big-box store some flexible sheets of mosaic tile, each about 12 inches square and backed with mesh. The tiles came in different sizes and patterns, but the ones that caught my eye were about 1⁄2-inch- square tiles of varied colors and patterns on a single sheet. Although it turned out I only need four sheets, I bought five, at about $10 each. The individual pieces of tile were of slightly different colors randomly placed, but overall they were a shade of pale green.
I also bought a can of adhesive, a can of grout, and a sponge, altogether about $65. The grout is available in different colors and shades to match or contrast with the tile, depending on the desired finished look.
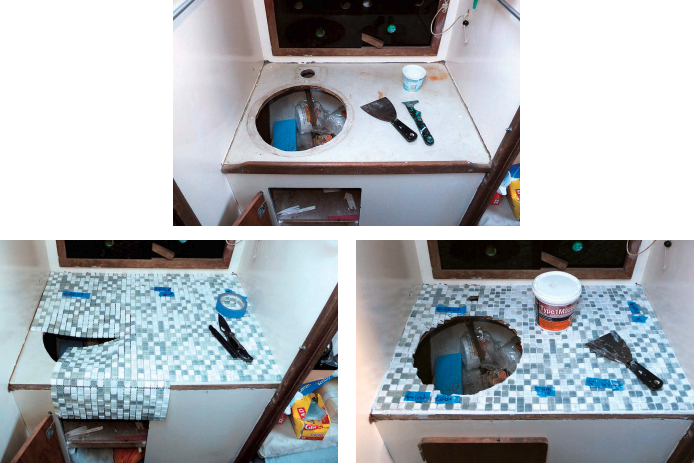
After removing the pump, I carefully released the tabs under the sink — a circular stainless-steel item as old as the boat — and removed it. I placed the tiles on the countertop, marked the sheets with a Magic Marker, and used a box cutter to cut away the mesh where the sink and pump would be located.
After sanding the countertop, I applied the tile adhesive, which was like thinned concrete. At first I thought it might be a solvent-based glue and possibly toxic but, happily, the stuff cleaned up with water. I carefully laid down the sheets of mosaic tile, making sure the holes in the mosaic-tile grid lined up with the holes in the countertop.
After waiting overnight, I applied the grout, which was also water-based. Grout is a kind of thin concrete with sand in it that fills the spaces between the tiles and makes them watertight once it sets up. The trick is to lay it in with a flexible scraper, making sure to force out any air bubbles, then to wipe it off the surface of the tile with a damp sponge as quickly as possible. It looked absolutely terrific.
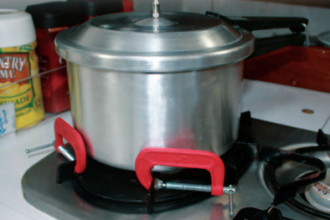
I waited a few days while the grout set up (it only needed overnight to set up, but I have to go to work sometime) then prepared to reinstall the old sink and pump. But now the old pump, a corroded bronze affair with lots of gravitas and a big handle on the side, looked like hell. I polished it before reinstalling it — a job that took more time than it took to grout the tile. It looked great, but I wasn’t happy yet.
Further refinements
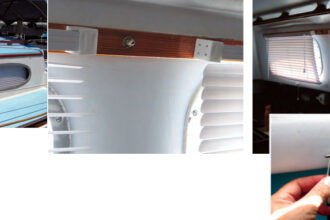
The hatchboards had been stowed against the bulkhead by the toilet, where they were out of the way. If I put them back there, they would scratch the new paint, so I installed strips of cedar planks about 2 inches wide by 3⁄8 inch thick (sold as storage-box liners) on the forward bulkhead alongside the toilet. I screwed them on in a vertical pattern, with each one separated by a few inches from its neighbor.
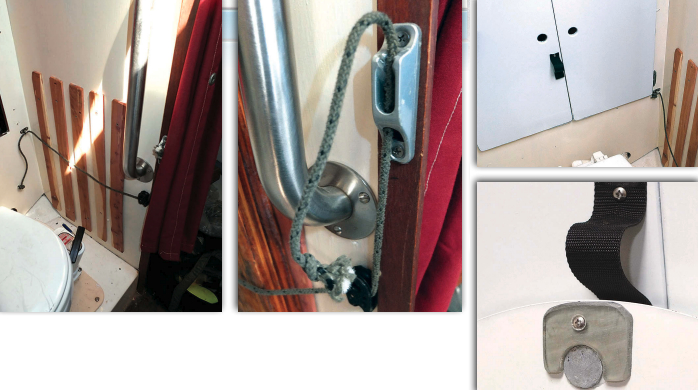
I found a small plastic cheek block and a jam cleat in my box of extra parts and used them with a length of parachute cord to secure the hatchboards against the cedar planks to protect the paint on the bulkhead.
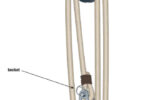
But I still wasn’t done. I secured a rare-earth magnet to the underside of the toilet seat with superglue and used a magnet on a length of nylon strap secured to the locker door to keep the seat up when the boat is on a port tack. That was the grand finale.
Now the head smells more like a gerbil cage than a Parisian pissoir but, as Borat says, “very nice, very nice.”
Cliff Moore’s first boat was a Kool cigarettes foam dinghy with no rudder or sail. Many years and many boats later, he’s sailing a 26-foot AMF Paceship 26 he acquired and rebuilt after Hurricane Bob trashed it in 1991. He is the editor of a community newspaper.
Thank you to Sailrite Enterprises, Inc., for providing free access to back issues of Good Old Boat through intellectual property rights. Sailrite.com