At 50, she gets her long-awaited makeover
Issue 114: May/June 2017
Our decision to purchase a Columbia 29 for bluewater cruising was based on three primary factors. First was her reputation. The Columbia 29 appears on many popular lists of small, go-anywhere sailboats, including that of small-boat adventurer and cruising consultant James Baldwin (see www.atomvoyages.com). Second, the Columbia 29 is a Sparkman & Stephens design, and a sailing instructor and talented racer once told me that S&S never designed a bad boat. Lastly, and very important for our budget, was Tranquility’s bargain price.
Questionable decisions
Having spent part of my career skippering charter sailboats, I have seen how harsh the marine environment is on equipment. I know from experience that an inexpensive turnkey boat is nothing but a mirage. Even a boat just a few years old can give a new owner a lot of headaches.
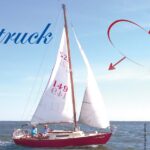
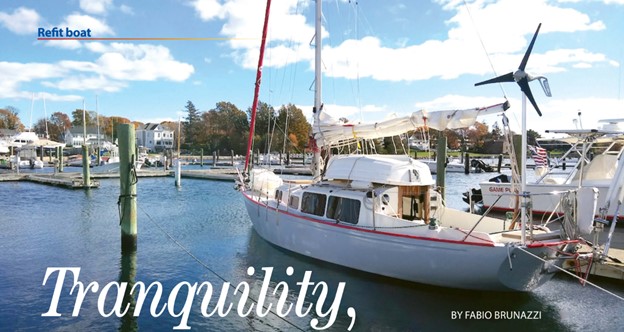
Tranquility was built in 1965 in Portsmouth, Virginia. I should have known what a tremendous effort would be required to bring such an old boat back to life. She had spent most of her years in New England before she was sailed to the Caribbean, via Bermuda, and to Nova Scotia. In recent years, she had deteriorated as she passed from owner to owner. What was left of her when we came along was in need of a serious rehab. We knew that, if we wanted to achieve our goal of living aboard and sailing offshore, we had to expend a lot of sweat and finances to make that old boat good again.
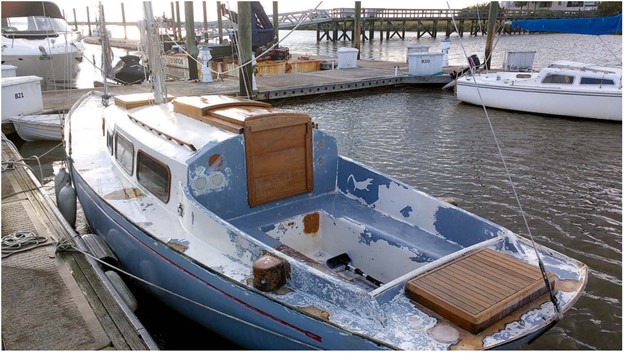
My wife, Kate, and I first saw Tranquility sitting under a plastic tent in a private yard. She immediately sparked fantasies of how we would transform her into a long-distance cruising sailboat we could call home. The bare-naked condition of the boat made her easy to survey, and I was pleased to see that her hull and deck were sound and her mast and boom were in good condition. I felt confident about my assessment and Kate trusted me. While on a trip to visit my family in Italy, we decided to make an offer.
Getting ready to work
On a snowy New England winter’s day, we closed the deal and became the newest owners of a primed hull and deck, a pile of standing and running rigging, and an electric inboard motor with a dubious battery bank. The seller had removed many of the boat’s fittings and fixtures when he attempted a refit, and these were included in the deal. Unfortunately, we soon realized that some of these fittings were outdated or needed to be replaced.
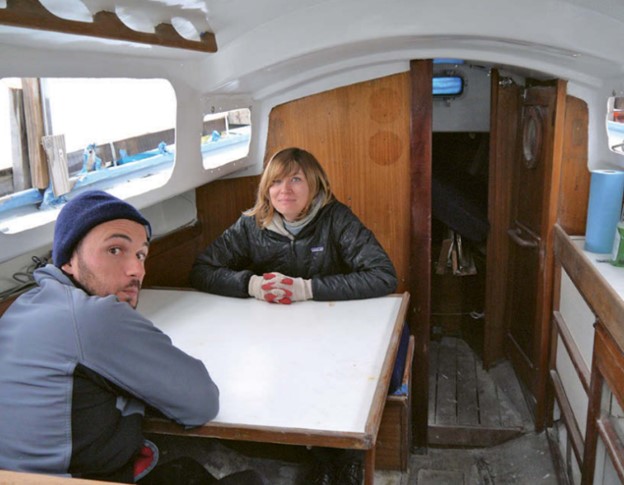
Belowdecks, the galley extended along the starboard side opposite an ample dinette on the port side. There was visible rot on the cabin sole amidships, probably a result of years of water leaking in where the mast wires pass through the cabintop. The electrical and plumbing systems needed a complete overhaul. To be fair, the owner had advised us not to buy the boat in the first place and, when he saw we were going to buy her anyway, he offered some good advice: pick your battles.
Kate and I left Tranquility as she was over the winter, while I delivered a boat to the Caribbean and stayed there to work and Kate returned to New York City to begin the process of transitioning from our lives on land to our future lives afloat. When spring came, we moved Tranquility to a boatyard and set to work on her at a feverish pace. We had planned to spend six months on our refit project, but we soon realized that, if we wanted to leave New England before the next winter was upon us, we would have to cut some corners and make compromises. We had to pick our battles.
First refit
The goal of our first refit, which we began in May 2013, was to do the basics and get Tranquility floating and in sailable and liveable condition with the funds we then had.
The first project we undertook was to replace the wheel steering with a tiller. Fortunately, the rudder stock extends through the cockpit sole so a short tiller can be attached to it for emergency steering. All I had to do was remove all the components of the wheel-steering system and attach a full-length tiller to the stock. On discovering that the rudderstock seal was broken, I glassed in a tube between the cockpit sole and the hull.
With the tiller, we gained legroom in the cockpit as well as space underneath the cockpit sole. Tiller steering would also make it easier to install windvane self steering at a later date.
Tranquility was nearly bare at this point, without even portlights. It was the perfect time to paint the deck and the hull. We used a one-part enamel as we could do the job faster than with two-part.
After painting, we re-installed all the deck hardware and the portlights, then turned our attention to the interior. Because time was short, we left it much as it was, though Kate did her best to infuse some cuteness into the 50-year-old décor. We put together basic plumbing and electrical systems, knowing that we’d likely be making changes after we’d had a chance to sail our boat and live aboard her for a while.
Without giving much thought to what we were buying, we began to purchase all sorts of used and new items on the internet and from chandleries, consignment stores, and friends. While we had a feeling that we were randomly slapping things on the boat, before setting sail, we made sure the rigging, sails, and auxiliary propulsion received enough of our attention and funds.
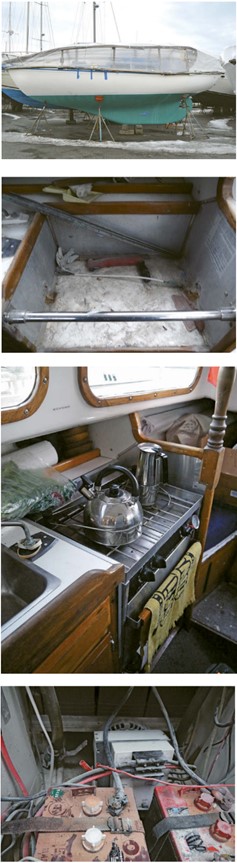
An important purchase was a stove. Tranquility came with a two-burner cooktop but no oven. When I found a great deal on a secondhand Force 10 stove with an oven, I bought it without consulting Kate. She wasn’t happy about sacrificing storage area to the oven, but I was convinced that a high-quality stainless-steel range with an oven would be very much appreciated once we lived aboard. Neither of us has regretted the decision to install it.
Electric propulsion
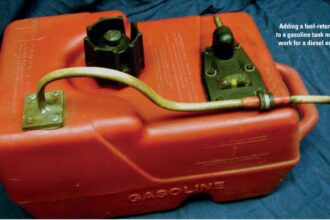
A major gamble with our purchase of Tranquility was her electric propulsion system. It’s built around a brushed 5kW 48-volt DC motor and drive assembly sold by Electric Yacht. The conversion was made in 2007, and we found some interesting videos from that era. I had no knowledge or experience with such a setup and wasn’t sure we should keep it. After spending some time researching, we decided to go ahead and give it a try, knowing that, if we weren’t happy with it, we could always attach an outboard motor to the transom.
My first concern was the battery bank. The eight 6-volt golf cart batteries on the boat when we bought her were spent, and one froze during the winter. We searched the market for the best solution we could afford. We spent nights after work reading what we could find online, and even called some of the major battery manufacturers and distributors. We made cardboard mock-ups of the various batteries and their footprints in an attempt to determine which would provide the power we needed and fit within the available space. The best solution seemed to be a 48-volt LiFePO4 (lithium iron phosphate) battery bank, but unfortunately its price was well outside our budget.
For practical reasons, we ended up buying 6-volt lead-acid golf cart batteries. One benefit of this choice is that, should one of the batteries fail sometime in the future, finding a replacement of a similar size should be possible almost anywhere in the world.
So, after building new battery compartments, one in the engine room and one under the settee in the main saloon, we purchased, transported, lifted, and installed more than 500 pounds of Trojan T-125 6-volt batteries. Connected in series to obtain the 48 volts required by the motor, they give us a total capacity of 240 ampere hours. Although not ideal, the new setup better balanced the distribution of weight on board and allowed better access to the propeller shaft, which had been completely inaccessible before. With this bank, we expected to get a range of 15 miles at 4 knots in flat seas.
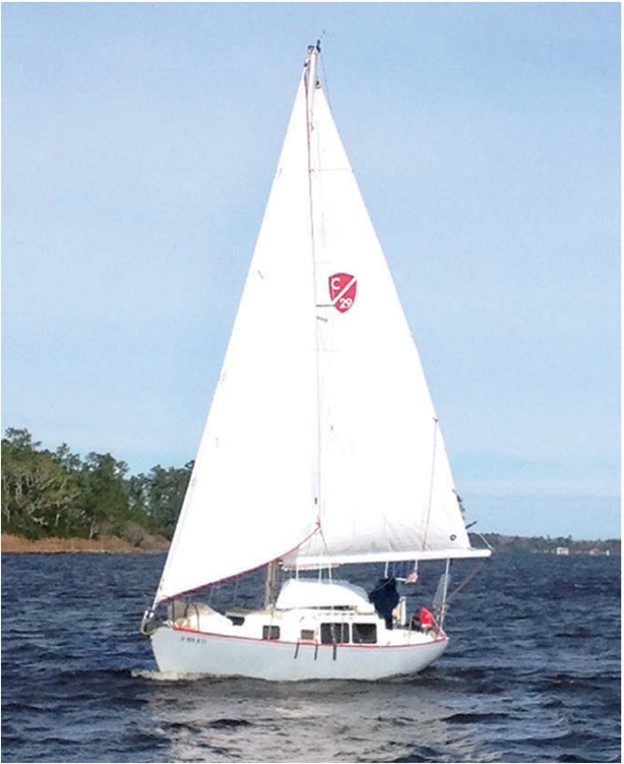
Cutter rig
The Columbia 29 was originally rigged as a sloop, but Tranquility’s rig was later modified by designer Eric Sponberg for a previous owner who wanted a cutter rig. According to the drawings that Eric kindly mailed us, the rig was beefed up with larger-diameter (1⁄4 inch) shrouds and external chainplates through-bolted to the hull and backed with thick stainless-steel plates. Two aft lower shrouds were added, as well as an inner forestay for the staysail.
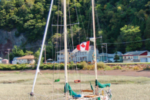
The headsail was on an old Hood roller-furling system in good working order. Tranquility’s mast had at some point been replaced with one from a different boat. We decided that this rig configuration was sturdy, had plenty of redundancy, and was ideal for us. It also had steps for climbing aloft, and I have always thought that the practicality of mast steps outweighs the disadvantages (rig noise, windage, and possible interference with running rigging). We hired a professional rigger to measure and order new cables and fittings that we later installed ourselves.
Sails
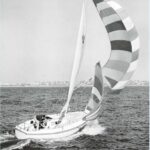
Given the limited range of our motor, sailing performance became important to us. On the recommendation of a friend, we ordered a 100 percent furling Yankee, a staysail, and a full-battened mainsail from Lee Sails in Hong Kong. It was awkward taking measurements with the stick down but, armed with advice from the sailmaker, we ended up with three brand-new sails that were delivered promptly — and fit perfectly. We were so pleased that we later purchased a cruising gennaker and a storm staysail from Lee Sails.
Southbound
Our 6-month refit had stretched to mid-November so, having done the most important work, we quickly put the boat together and sailed away from the south coast of Massachusetts, which was becoming inhospitable to sailors. With an experienced third crew member, my friend Roberto, we sailed to Block Island to wait for a good weather window. We were lucky, and were soon able to set sail directly to Norfolk, Virginia. Roberto left us there and Kate and I continued south, alternating offshore passages with runs in the Intracoastal Waterway while playing cat and mouse with the frequent cold fronts that were making deep incursions south that winter. Due to our limited range under power, we sailed offshore for most of the distance. We eventually found safe harbor in Brunswick, Georgia, where we parked for a while and took temporary jobs to earn the money to continue customizing our little boat.
Second refit
The next stage of our refit began in January 2014. By this time, having lived and cruised on Tranquility for more than six months, we had a clearer view of all the problems we had not yet addressed. In particular, we knew where the leaks were!
The south coast of Georgia offers year-round fair-weather conditions for boat work. What’s more, James Baldwin, who lives there, gave us invaluable input on our ideas for this stage in our refit. Before we knew it, we were landlocked in our new location, but we were motivated to keep working hard on our little vessel, and the company of fellow boaters and new friends made the task less arduous.
It took us more than two years working part time on the boat (full time for the last four months) to reach the point where we were satisfied. By that time, we had replaced, patched, or restored almost everything on board.
Interior
Having a place to live ashore made it easier for us to tackle the more dusty and destructive jobs on board. We began by working inside the boat to fix the most serious issue.
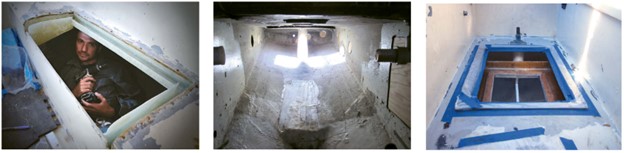
During our passage south, Kate had noticed the cabin sole flexing beneath the compression post under the mast. After tearing apart the rotten plywood cabin sole, we saw that the rot extended to the hardwood beam that supported the compression post. Digging a little deeper, I discovered a gap between the hardwood beam and the bottom of the bilge. To prevent any further movement, I epoxied a solid teak wedge into the void and fiberglassed it to the hull.
While the sole was out, I took the opportunity to address some fiberglass peeling I’d noticed in the bilge and to reinforce the tabbing around the main bulkhead. I also gave the bilge a coat of fresh paint, using two-part primer and two coats of Interlux Bilgekote. I replaced the rotten section of the sole with plywood and epoxy.
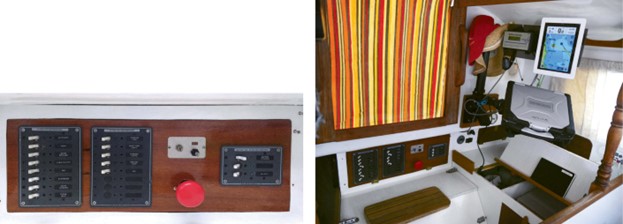
On the port side near the companionway, the chart table area, engine room, and battery storage begged for a more rational design that would use the space more efficiently and allow better weight distribution. I modified the companionway ladder and built new boxes to contain all eight batteries for the electric auxiliary. I made a new, larger chart table with panels around it to accommodate instruments and hide the electrical wiring.
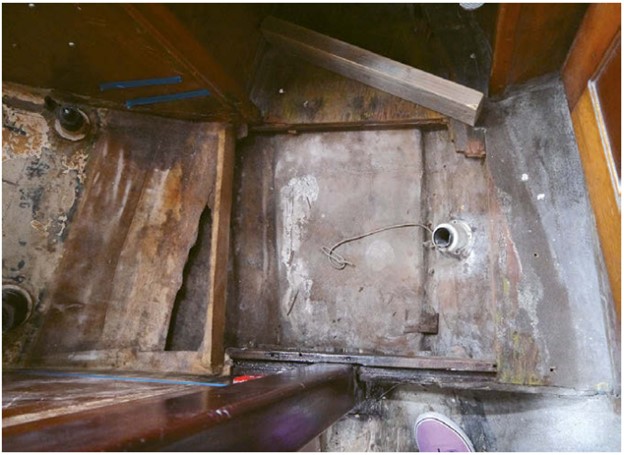
Up forward, we removed the Jabsco marine toilet, the holding tank, and all the hoses. As we don’t use the V-berth as a sleeping area, I installed a composting toilet in the V-berth cutout. We turned the space freed up by this conversion into storage. Later, when the boat was hauled out, we permanently glassed over the two through-hulls we no longer needed. So far, we are very happy with our switch to a composting head.
Deck
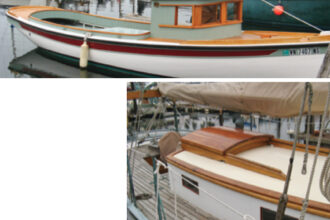
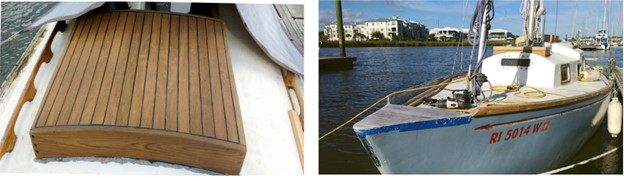
On deck, I began rebuilding the forehatch, the companionway hatch and its sea hood, and the lazarette hatch. These hatches were teak and had all held up during our maiden trip south, but it was clear that none of them had much life left. I rebuilt the forehatch and the lazarette hatch first, using new teak. Later, I tackled the companionway sliding hatch and sea hood, salvaging the teak I could and replacing what I couldn’t. Luckily, most of the teak, although weathered, had retained its strength.
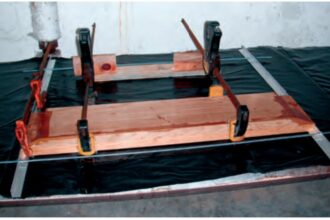
The old toerail needed attention too. The fiberglass bulwark that forms the hull-to-deck joint was covered with a horseshoe cap made up of three strips of teak, which had splintered with age and stress. After purchasing teak at a low price (it was still very expensive!) I decided it was not of good enough quality to leave bare and unprotected. Instead, I took a different approach. I glued a sandwich of teak strips to the fiberglass bulwarks with thickened epoxy, using more than 100 fasteners to hold the teak in place while the epoxy cured, then covered the entire surface with two layers of fiberglass. We later faired the surface and painted it with a two-part marine paint.
The bulwarks are a nice feature on the Columbia 29, as they make a secure foothold when the boat heels. However, rebuilding the hull-to-deck joint presented problems at the bow, where the anchor roller and bowsprit are mounted, and the stern, at the corners of the transom. To rebuild those areas I cut 1 1⁄2 inches off the top of the bulwark and glassed in pieces of solid teak to create a flush surface. At the bow, this made it easier for me to install the anchor roller and the new retractable bowsprit for light-air sails. On the stern, I now had beefier places to attach the mooring cleats.
Cockpit
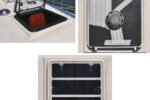
In the space beneath the cockpit, I built an integral freshwater tank using plywood, fiberglass, and epoxy, and installed a sealed aluminum hatch in the cockpit sole for access. Its 32-gallon capacity brought our total freshwater supply to 57 gallons. At the same time, I improved the channels around the seat hatches so they would drain with the boat heeled, and I made the cockpit locker and lazarette watertight and isolated them from the rest of the boat.
Painting
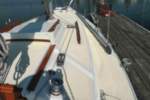
When at last the time came to paint the deck, we chose a two-part marine paint (Perfection by Interlux, in Oyster White) due to its superior adhesion and strength compared to one-part paints. These qualities are especially important given the heavy traffic and stresses a deck is subjected to. We painted the bulwark cap bright red with leftover paint given to us by a friend.
After completing the paint job, we reinstalled all the deck hardware, added new blocks for the staysail sheets, and fitted the new retractable bowsprit I designed for a cruising gennaker. We also installed a new 60-watt solar panel on an articulated mount that allows us to turn it to face the sun.
Boatyard time
We completed the final chapter in our epic refit in a boatyard in St. Marys, Georgia, not far from Brunswick. In this liveaboard-friendly yard, with access to tools, we were able to take care of everything we could not do in the water, plus all the unexpected collateral projects that arise every time you do anything on a boat.
In particular, we fixed a few stress cracks in the rudder area, better sealed the deadwood around the stern tube, replaced the tiller head with a new one with a keyway, installed a Norvane self-steering wind vane, permanently glassed the abandoned through-hulls for the marine head, replaced the propeller, and, of course, much more. After two maintenance coats of one-part paint on the topsides and a new bottom job, we launched a gleaming, fully-refit Tranquility.
Despite all the work we’ve done on our boat, there remain a few projects we set aside for “someday.” But right now is the time to sail, not to do boat work. We trust that, with all our efforts, we were able to set the clock back on our Columbia 29, at least enough to enjoy cruising for a while. We feel incredibly fortunate to have realized our dream of transforming Tranquility into our own small bluewater cruiser that will keep us safe and happy at sea.
Fabio Brunazzi was an organizational psychologist in northern Italy before a chance encounter in Archipelago de Los Roques, Venezuela, introduced him to sailing. From that point on, he made sailing his focus, a profession as well as a lifestyle. He enjoys working as crew on large yachts and living and sailing on his small one with his wife, Kate. He’s the author of two blogs: www.lapossibilitadiunisola.com and www.psychologyofsailing.com.
Thank you to Sailrite Enterprises, Inc., for providing free access to back issues of Good Old Boat through intellectual property rights. Sailrite.com