A suspended zippered bag relieves crowded cockpit locker
Issue 120: May/June 2018
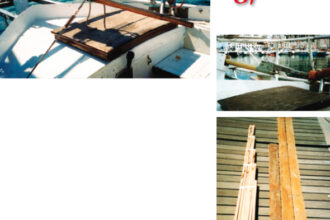
Prepping Sapphire, our Tartan 3700, for a cruise from Lake Ontario to the Bahamas forced us to review our stowage options. The rat’s nest of tangled shorepower cables, docklines, anchor rodes, siphon hoses, water hoses, and fender boards in the cockpit locker cried out for a solution. The 65-inch space between the Dorade guards either side of the sea hood, just forward of the dodger, looked as though it could provide it, as both the room and structure were there for some sort of removable storage arrangement.
In the absence of conveniently placed Dorade guards, any fixed tubular structure on the boat is ripe for exploitation. Granny bars at the mast, stern pulpits, or dodger and bimini frames all have potential.
I decided to build a rectangular bag out of Sunbrella marine acrylic and support it with stainless steel cross tubes mounted between the Dorade guards. I used standard bimini hardware to build the framework. The frame required four 1-inch stainless steel hinged-jaw clamps, sized to fit the 1-inch Dorade tubing, and four 3/4-inch tube eye ends to fit the added 3/4-inch crosspiece tubing. I also needed two 3/4-inch stainless steel tube cutoffs from my favorite canvas maker for use as the cross tubes. The bimini hardware pieces are available online for $12 to $15 each. Anyone with a hacksaw and a screwdriver can build the simple framework.
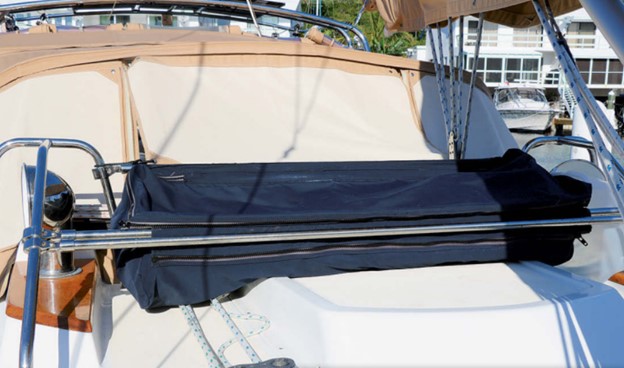
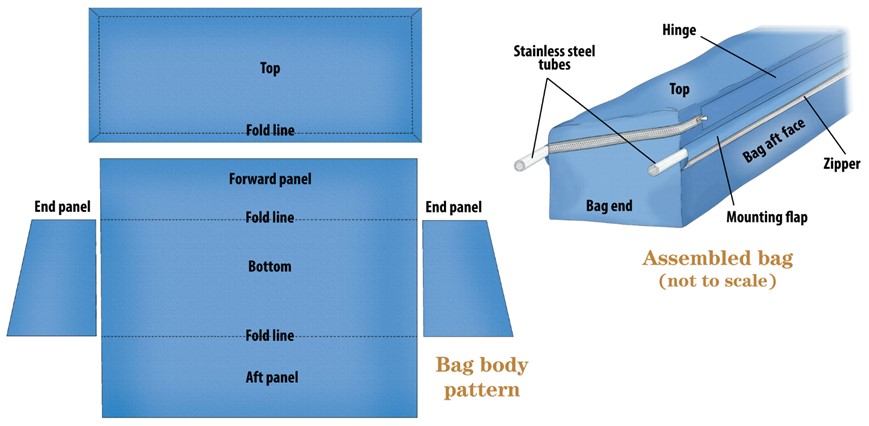
We experimented with the location of the cross tubes until we determined the maximum height they could be without blocking forward sight lines, then built the bag to fit the available space established by the framework. The front, bottom, and back of my bag is one piece of fabric cut to fit the measurements of the length, width, and height of the space between the tubes and the Dorade guards.
Making the bag is a simple project for anyone with access to a sturdy sewing machine. I learned the basic sewing techniques from the library of free how-to videos available on Sailrite’s website and assembled the pieces and sewed the bag on my trusty Sailrite machine. If sewing isn’t your thing, you can still design and build the framework to your specifications and hire a canvas maker to build the bag.
Building the bag
One hands-on sewing tip I can pass on to amateurs is to make a friend of basting tape. It’s available from Sailrite and will hold the Sunbrella together while it’s being sewn. I use it on almost every project. Using it is a little painstaking, but it’s a lot more fun than seam ripping.
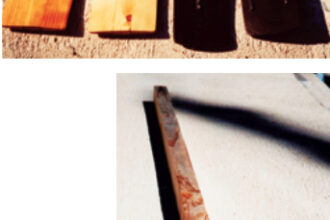
Using a hot knife, I cut out one piece of Sunbrella to the measurements I took from the boat plus 3/8 inch on all sides for seaming. I then cut out two end pieces to the shape of the end spaces plus 3/8 inch all around for the seam. A hot knife is the way to go when cutting marine acrylics, as it keeps the cut edges from fraying under normal wear and tear. I sewed the three pieces together inside out and used matching binding to finish the raw edges of the bag opening all the way around. I would later sew the zipper that closes the bag to this bound edge. I found that cutting a 1-inch radius on the bottom corners of the end panels made it easier for me to sew around the corners neatly.
Tube pockets
The stainless steel tubes that would support the bag would pass through long open-ended pockets on the long sides of the bag. I cut two pieces of fabric 5 inches wide and the length of the bag and dressed the raw edges of the fabric by folding them under, hemming, and sewing binding on the designated lower edge of the flap. I then sewed the upper edges of the fabric flaps to the bag body 1 inch down from the upper edge of the bag. This 1-inch-down measurement left room for the zipper that attaches the bag top. I folded the flaps down over the upper stitching to hide the raw edges and sewed the bound lower edges of the flaps to the bag, leaving a bit of slack to ease the fit for the frame tube that would be slipped inside. I fit the bag body by detaching one end of the frame tubes and sliding the bag pockets over them. Once I was assured that it fit reasonably well, I moved on to the top of the bag.
I made the top by measuring the actual bag opening and adding 2 inches all the way around to make shallow overlapping sides, like a shoebox lid. I darted the corners to emphasize the square shape. When done, my top wasn’t exactly the size of the bag opening, but it still worked out. I used matching binding all the way around the edge to give the top a finished look.
On to the zippers
To attach the top to the bag, I used #10 zipper stock and a fabric hinge. Zippers are easier to sew to fabric when the two zipper pieces are separated. I made a mark 8 inches in toward the center from the two aft corners, then measured the distance between those marks the long way around the bag. I cut the zipper stock to that length with a hot knife.
Next, I made marks midway along the zipper and at the center of the long forward edges of the top and bottom of the bag. I basted and sewed the zipper halves to the top and bottom of the bag, working from the center marks out each way around the circumference of the opening. It’s important to keep the binding edge away from the zipper teeth so the zipper will be easier to operate.
I fitted two zipper slides onto the zipper so they are together at the center when the bag is closed, in the same manner as zipped luggage. Getting zipper slides onto zipper teeth takes patience, but there are some good YouTube videos on canvaswork and zippers that can help.
The hinge for the top
All that was left was the hinge at the back. I measured the distance between the two ends of the zipper on the aft side of the bag and cut a piece of fabric 4 inches longer than that measurement and 2¾ inches wide. I turned this under and hemmed all four edges.
Next, I located and marked the center of the hinge piece on all four edges. With the bag zipper closed, I basted the hinge flap to the top and bottom so it overlapped the ends of the zipper strip. Once sewn, this overlap keeps the zipper slides on the zipper and creates a finished look. I carefully unzipped the zipper up to the overlap so I was able to open the bag, then sewed the hinge flap to the top and bottom pieces of the bag. To prevent the zipper slides from slipping off the ends, I hand-stitched several times across the zipper at the ends of the hinge flap. The last thing I did was to add a few drainage grommets in the bag bottom.
Learned along the way
If I were to do this again, to simplify the project, I would make the end pieces first, measure their circumference, and make the top, back, front, and bottom of the bag one piece of Sunbrella. I would sew the whole thing together inside out, cut an elongated smile shape on the top of the bag for access, turn the bag right-side out through the smile cut, and use a water-resistant zipper to close the smile and create the access.
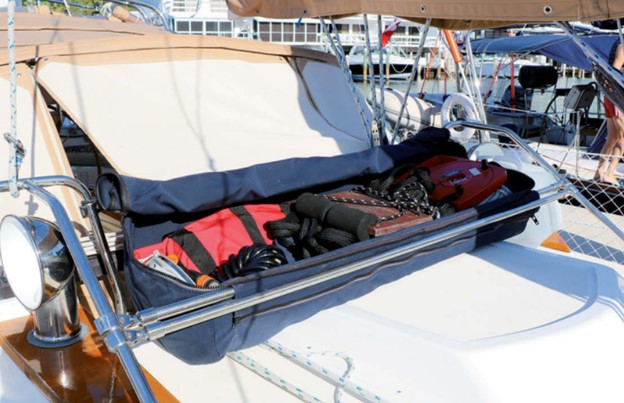
This deck bag works well for us because the stored equipment is out of the weather and easily accessible. Best of all, I am happy to report that, six months into our cruise, the deep cockpit locker was still reasonably organized and I hadn’t yet had to do a headfirst locker dive.
Joe Rosenfeld started working on boats as a teenager when his $100 wooden catboat sank the day after he sailed it home. The craft, christened Diphtheria, mostly floated through Joe’s high school years until a shoreside keg party sent it to Valhalla. Over the next 40 years, the quality of the fixer-uppers went from “left for dead” to “just a little down on her luck” as Joe’s career as a high-voltage lineman progressed. Along the way, he became an award-winning restorer of wooden boats and an avid club racer on Lake Ontario and in East Coast ocean races. Joe, his wife, Mary Beth, and their fox terrier, Flexy, are cruising on their 2003 Tartan 3700, Sapphire.
Thank you to Sailrite Enterprises, Inc., for providing free access to back issues of Good Old Boat through intellectual property rights. Sailrite.com