Hard work eliminates leaks and future hassles

Issue 41 : Mar/Apr 2005
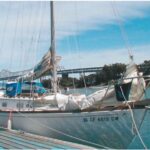
My wife and I were thrilled with the teak decks that came with our now 21-year-old Cheoy Lee sloop when we bought it in 1999. That was five years ago. Today we’re even more thrilled to have all that teak in a trash can and new Awlgrip non-skid deck surfaces. We did all the work ourselves, achieved a professional-looking result, and did so while working in a third-world country with tropical weather and limited suppliers. It’s a project within the grasp of any serious boatowner. Just don’t expect this to be a one- or two-weekend fixit project. It took us eight weeks of nearly full-time work.
Why go through this ordeal? The leaks had reached an intolerable level. When crossing the Straits of Florida in December 2002, we had leaks too numerous to count in spite of many hours spent diligently recaulking. Was the compound the wrong material? Was the procedure inadequate? None of this matters when water is dripping onto your bunk and infiltrating the main electrical panel. The only question becomes what to do about it? We reluctantly decided that the teak deck was at the end of its useful life.
There’s a special moment in cruising: at the end of a long hard day bashing to windward with the anchor set in a nice calm anchorage. You go below to put things back in order only to find your bunk and all the bedding soaked with seawater. Now that’s a test of spousal commitment as well as vocabulary. It took very few of these episodes before we agreed that every other project was going to take a back seat to getting the deck fixed.
We faced limits in terms of materials available and budget. Treadmaster looked like a terrific choice but the cost, including delivery to a location in the Caribbean, caused us to rule that out. Putting teak back down was out for sure.
Superior, durable material
The best material for our purpose seemed to be two-part linear polyurethane paint. We chose Awlgrip since we had most of a quart of white on board along with the converter and hot weather retarder left over from repainting the stern. We would have done better to start from scratch and completely research the alternatives. That confession aside, Awlgrip is a superior and durable material. So while our costs were higher, we’ve gotten a satisfactory result that we expect to last many years. But we did find that type of coating demanding and unforgiving. The spec sheets from Awlgrip state that it should be used by professionals only.
The coconut telegraph in the Caribbean has reports that alkyd house enamel paint has proved to be just as good for a topside paint as Awlgrip and the other two-part polyurethane paints for 20 percent of the cost. I’d recommend further research into that question for anybody contemplating a hull or deck repaint or replacement today. A chandlery manager told me he sells material to a yard in Grenada that, under pressure from customers to save money, has begun using this house paint with excellent results. (Note: Don Casey says in his book, Sailboat Hull and Deck Repair, that alkyd house enamel is OK for decks but not recommended for hulls. –Ed.)
We are happy that we did the job ourselves. It’s unlikely that a contractor would have taken the pains with the project that we did. The finished project cost us about $1,500 in materials. Add to this our marina expense. Our work was done in Grenada, where chandlers and contractors charge about the same as they do in the U.S. or sometimes a little more.
The background
Our grief with this deck started soon after purchasing the boat in 1999. After sailing around Clear Lake, Texas, we noticed that our coachroof was splotched with sticky black blobs. In the heat of the sun, the deck caulking looked like liquid asphalt. It’s anybody’s guess whether the wrong caulk was used by some previous corner-cutting owner or just old age and corruption mtaking the boatbuilder’s material and liquefying it in its death throes. At some point in its past, the deck had been coated with what looked to me like Cetol. I wondered if that had interacted with the caulk to liquefy it. The sanding that preceded the Cetol had left some paper-thin bungs behind, and the nagging chore of gluing in new bungs and then trimming them flush with the deck became a frequent hiccup in our lives.
At the time of our purchase, the surveyor found no evidence of water leakage below. But after we had lived aboard for a few months, we found several places where stains were evident. In spite of that, there were no serious amounts of water . . . yet.
This led to the first complete recaulking, done at the dock under the hot Houston sun in the fall of 1999. Digging out all the old caulk from every seam, cleaning up the mess, and then taping and recaulking the deck with BoatLIFE one-part polyurethane took us a couple of weeks of full-time effort including the help of some unskilled labor we hired. It looked great when we were done and we — naïve new boatowners — thought our deck was watertight forever.
By the time we had reapplied caulk for the third time, it was clear that the teak itself had to be scrapped. By then we were in the Bahamas. It was January 2003. We did a stopgap application of caulk to minimize the leaks while we prepared for the big replacement project. In the course of doing this project, we learned why the water had been pouring in below. The runs for the leaks were sometimes as long as 20 feet between the teak planks and the deck below.
Preparation
A serious weak point in our preparation, due to our cruising itinerary, was the limited access to the Internet and its resources.
Since we were traveling toward the southeastern Caribbean, we attempted to gather the material we would need along the way. We bought the Awlgrip, roughly estimating quantities, and checked our tool inventory for tools to remove the teak. Once we were in Grenada and began working, we realized that we needed major amounts of additional material. Epoxy, sandpaper, non-skid granules . . . the list seemed endless.
A major gap in my preparation was a careful cost workup, using the materials list that I prepared. Had I done that we would have saved some money with better choices and the sticker shock for this job would have been reduced.
The original teak deck was laid down in 1983. Our decision to replace the teak with painted-on non-skid was made easier due to the substantial structure used by the factory. A complete deck had been laid up before the teak was installed. We therefore expected that we would be able to remove the teak, clean and prepare the original deck, and paint it with non-skid. Owning a boat and every project undertaken on it are acts of blind optimism.
The deck composition is a fiberglass underlayment, a mahogany core, and fiberglass with gelcoat applied. Half-inch teak planks were screwed to the deck over a layer of tar bedding. Caulk filled the gaps between the planks. The bronze screws holding the teak planks went well into the core material — the pathway for much of the water that leaked in below. These oddball fasteners looked like stove bolts and had a machine screw thread but were sunk below the deck into the mahogany core. Most of them held for 20 years.
In a journal note, made just prior to ripping off the teak, I wrote, “The boat is stifling hot. It’s got to be 90°+ with high humidity tonight. The rain is frequent; we have not had a day yet here in Grenada without a serious shower. Some days have seen drenching rain. We’re worried about ripping off our deck and exposing everything underneath to rain damage and getting worse leaks as we progress. We’ll cover everything with tarps as the rains appear, but the whole thing could drag out into weeks or months. I’m apprehensive about what we’ll find and how long the whole project may take.”
Removing hardware and teak
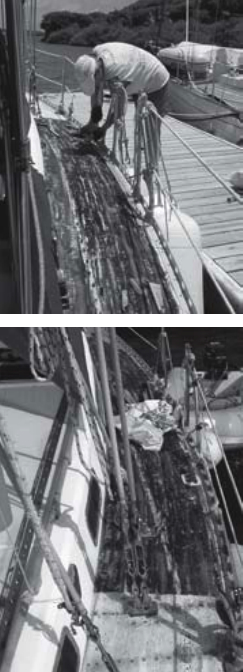
I divided the deck into thirds, literally, using a Dremel tool with a cutting wheel scoring across the teak planking to create three large work areas. That gave us more manageable portions to attack as we set out to remove the teak planking with staggered joints.
All the hardware came off the foredeck quickly although the windlass was difficult to remove and the inner forestay mount was worse. As I removed the base plate for the forestay, I found two bolts with no nuts on the underside. A search below, including removal of the V-berth overhead, cleared up the mystery. Of the five mounting bolts, three were doing their job within the limits of a scrap of teak reinforcement block, but two of the bolts were strictly decorative.
As we removed hardware and fittings, we carefully bagged and labeled the items and stowed them below. My wife is the world’s most compulsive inventory manager, and it served us well on this project.
“Aha time” came when the bow pulpit was totally removed. One of the four legs showed major leakage underneath. The teak was rotted away, and I pondered the amount of water that must have flowed underneath the teak from this point just behind the anchor roller.
As we removed hardware, we filled the holes that remained with silicone if we planned to use them for remounting these items. Silicone is impervious to epoxy and kept the rainwater out for the duration of the project.
After we carefully backed out the bronze screws from the middle teak plank from the coachroof to the bow, the plank popped up easily, revealing a thick tarry backing. After prying with a wood chisel to get a gap started, we introduced a wrecking bar and gave a careful tug, working along each plank to either pry the screws up or tear the wood off the screws. Each time we had a 50-50 chance, and we didn’t care which happened as long as the plank came off. After removing an area of planking, I used the wrecking bar to pull the remaining screws just as if they were nails. They came cleanly away from the fiberglass decking, leaving a tarry mess with hundreds of holes. Occasionally the screws broke off at the surface of the deck, and we had to drive the remainder of the screw below with a nail set in order to backfill every single hole with epoxy.
Diesel wipedown
Cleaning the tarry material used by the boat manufacturer to seal under the teak meant a liberal application of diesel fuel and a final wipedown with lacquer thinner to remove the oily residue left from the fuel. Another cruiser suggested Go-Jo hand cleaner, as they had success with that on their Cheoy Lee when removing the same tarry bedding compound, but that would have been a lot more expense. We used about a gallon of diesel to clean the whole deck surface.
We drilled the screw holes out to a larger diameter and beveled them to give a good purchase to the epoxy filler. We took pains with this step, hoping to avoid having the epoxy plugs pop out later.
The holes were backfilled with epoxy mixed with cabosil for extra strength. I overfilled the holes with the initial application and found that almost all of them needed a second layer as the shrinkage was significant.
Working quickly in order to dodge rainstorms, we removed teak and cleaned off the tar, drilled out and beveled the holes, and filled them as fast as possible to keep the work area dry. The messiest aspect of the job was this tar removal. It was about 1⁄8-inch thick and embedded in the gelcoat in some places. Much of the deck underlayment had crazed or chipped gelcoat. The tar had worked its way underneath the gelcoat.
It was a process of repetitive steps: removing teak, cleaning off tar, filling holes, and moving to the next area. Surprises came often. As we removed the last piece of hardware we found it had been secured with 3M 5200. A large screwdriver worked only if one person pushed down on it while the other turned the shaft with a large crescent wrench to force the bolts to back out. This was a good illustration of why 3M 5200 is a bad choice for mounting anything to a deck.
After eight days of work, all teak was off, the last hole had been filled, and the deck was relatively rain-tight.

Fairing and leveling
In many places the substrate looked like a shattered pane of tempered glass. The gelcoat had flaked off and big patches were crazed. Using a 1⁄4-inch drill with an 80-grit abrasive wheel, I ground away at the gelcoat to remove the loose stuff and allow for removal of the tar that had worked its way underneath the gelcoat.
Our tool kit included an angle grinder, and I resorted to using that in order to strip off the loose gelcoat more rapidly. Once the crazed gelcoat was off we began fairing, using a mixture of epoxy with Microlight (microballoons) additive, which made the filler easier to sand and get to finish grade. (Note: Microlight is the trademarked name for a West System filler made from thermoplastic. Because the filler is thermoplastic, there are cautions on the container about using it under dark-colored decks. Microlight and perhaps similar thermoplastic-based fillers make a relatively weak putty compared to West System 407 and other phenolic microballoon fillers. These phenolic microballoon fillers are still reasonably easy to sand and are a better choice as a fairing putty for this kind of project. Where even greater strength is required, even higher-density fillers should be used, but they will not be as easy to sand fair. –Ed.)
After a last cleaning with lacquer thinner, I applied this fairing mixture in a paste. I troweled it on a bit too heavily remembering, as I later sanded away at the excess, that several thin coats are better than one thick coat.
Hand sanding was required in several places, chiefly around the cleats and stanchion bases. But otherwise we found that a random orbital sander was adequate for most of the sanding except when using the coarse abrasive sanding disc. We washed the deck with water between steps, then vacuumed and wiped it down with acetone.
After that first thin coat of fairing compound, we faired the surface in a rough way. It appeared to be level by eyeball observation. Before applying the second layer of fairing compound, I used a 2-foot-long piece of stainless as a straightedge and went over the whole deck marking the low spots.
Ripples and bumps
Our choice of non-skid material meant that we did not have to have the underlayment surface perfectly smooth. In fact, it still had very evident ripples and bumps after two coats of fairing. I had listened to reports from experienced deck refinishers so I confidently forged ahead. A different type of deck finish might have required a lot more fairing and leveling work.
There were two places, about 4 inches in diameter, with evident delamination. I decided to drill extra holes in these areas and fill them with epoxy mixed with cabosil. Given the amount of leakage we had had, it amazed me how little evidence of structural problems there was to be found in the deck.
A critical structural question was how to improve reinforcement for the inner forestay mounting plate. I had a new backing plate fabricated in a shop out of 5⁄16-inch stainless with a right-angle bend to allow it to bolt underneath the inner forestay mounting plate and to the bulkhead to give maximum strength to this load-bearing part of the rigging.
The joint along the coachroof needed something to make sure this area would be leak-proof . . . an unforeseen step. The fiberglass sides of the coachroof were tabbed into the fiberglass underlayment of the deck but, since we had the opportunity, I decided to reinforce that joint and made a plastic tool to create a concave shape of the proper thickness. It required some experimenting to get a medium-density epoxy mixture to the spreadable consistency needed to fill smoothly and yet stiff enough to stay in place.
Another head scratcher, perhaps unique to our Cheoy Lee, was the problem of chainplate trim covers. The chainplates were surrounded by a fiberglass material when they were installed. The teak butted up to these and a stainless plate had been dropped over top of the chainplate to cover the edges of the teak planking. I could have ground all of that material away to make the chainplates flush with the new deck — half an inch lower than the old one. Instead, I opted to keep these little boxes intact and filled with epoxy around the chainplates where the teak previously tucked under the chainplate base covers. The result looks good and keeps water away from the chainplate bases better than before, when the teak was flush with the chainplate bases (see photo on Page 18).

Loosened tabbing
In the course of mounting the new heavy-duty reinforcing plate for the inner forestay, we found that the tabbing that previously held the bulkhead to the underside of the deck had been loosened by the leakage. Repairing this meant applying glass tape with epoxy to strengthen the bulkhead-to-deck joint. This bulkhead connection is monumentally critical to transmit the loadings from the staysail down to the hull of the boat.
We ground the old loose tabbing away with the angle grinder. Then we mixed straight epoxy and thoroughly wet a 2-foot piece of 3-inch-wide glass tape. A shallow tray made out of aluminum foil allowed us to wet the fiberglass tape thoroughly and carry it up to the chain locker. Lying on my back in the chain locker with glove-covered hands, I brought the wet glass up to the crease formed by the bulkhead and the deck and smoothed it into place with a squeegee. We followed with two more layers of glass tape, overlapped slightly.
With two passes, the coachroof joint had been filled with new epoxy mixture and there were two coats of fill around the chainplate bases.
As we had chosen a contrasting glossy white edging to the gray nonskid, I prepared cardboard templates to use for masking off the stanchion bases and the fill tubes. Using a compass, I traced the shapes onto scratch paper and then transferred the paper cutouts to cardboard.
After 16 working days, the teak removal was complete, and the deck had been sanded and faired. Each of the six chainplate bases also had fill, the coachroof joint had new filler substrate, and we’d completed taping off the toerails and coachroof, preparatory to applying the coatings.
Waterproofing, finish painting
On the advice of another cruiser who’d followed this procedure with good results, we rolled on two coats of epoxy, starting very early in the morning to avoid having it cook off too quickly. Since it was clear, it was hard to tell where I’d applied it, but we had no problems using fast hardener. One coat on each of two successive mornings, and our deck was watertight, albeit ferociously ugly.
After a scuffing with 180-grit sandpaper and a wipedown with acetone, we mixed up the Awlgrip primer and applied a heavy coat without reducer. With some color on the deck, it started to look a bit better.
Early the following morning, we lightly sanded and flushed the deck with water. After a wipedown with acetone, we rolled on the second coat of primer.
Applying white high-gloss Awlgrip to the inside edge of the deck, the outside edge, and the stripes we’d laid out to interrupt the non-skid, we rolled the paint on first with a 3-inch roller and then tipped it lightly with a small varnish-type paintbrush. The results looked excellent. The coating lay down nicely after tipping.
The only serious reversal due to the inclement weather in Grenada came after putting on the second coat of white. We were disappointed to find ugly ridges visible following a rain which fell when the paint was not quite dry. We smoothed the worst of it with 120-grit sandpaper. Then we fine-sanded the rest of the paint. We had enough paint for a third coat, which gave us the results we wanted.
Working with Awlgrip brought challenges. We had days when the temperature and humidity soared . . . with both above 90 by 10 a.m. Worse was watching the cloud formations to the southeast and wondering how long the paint would take to dry if we applied a coat. The finished rolled and tipped job looks as good as a sprayed-on application, testimony to a quality product. While we were working with the mixed paint, we made minor blunders. Even though we stored it in the freezer, the shelf life for this mixture was two to three days.
Masking tape problem
Stripping off the first-stage blue masking tape required frequent heavy scraping, due to the length of time it had been exposed. We immediately replaced it to delineate the non-skid areas. I disassembled the windlass and pushed the base down through the mounting holes. Then I used a compass and taped this off to leave the margin of gloss white.
Taping these edging areas defined the exact dimensions of the white gloss, and we decided it would look better to create rounded corners at every intersection of these edges. Using a small round plastic tub, I put masking tape diagonally across at every one of these corners. Then using the upside-down plastic tub, I ticked off with a pencil where the arc would intersect the straight lines of tape that were coming together. Using a sharp utility knife, I cut the arc so the non-skid area would have the rounded corner.
Taping around the fill tubes and stanchion bases, I used a razor knife to cut to the margin we wanted. Then I used the templates in the shape of the stanchion base and a fill tube in order to leave a white 1-inch area to set off the non-skid. We planned to interrupt the non-skid in three places on each side and down the middle of the foredeck to give our eyes a rest.
The first coat of non-skid was a disappointment. I mixed an entire quart of non-skid silica beads with a quart of Awlgrip and a pint of converter with a bit of high temperature retarder thrown in. Big clumps of non-skid cropped up as I rolled it on, even though Diane constantly stirred the mixture in the tray. After about 4 hours of drying time, I scraped off the worst of the clumps and then used a wire brush on those spots.
Skidless compound
Another painful lesson behind us, we put down a second coat of Awlgrip light gray mixed with a Petit brand of skidless compound mixed to the instructions this time. It went on much better and looked acceptable as it was applied, but inspection the next morning showed too much rippling and too many roller strokes. A third coat made all the difference.
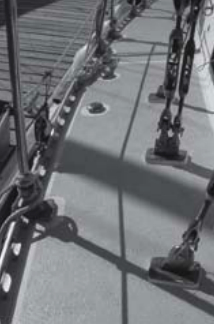
By actual count, our deck now had its tenth layer of coating. The finished job is a much lighter color but has no glare. Whisper Gray is the Awlgrip color name. We thought it looked substantially better and felt cooler to walk on. Once we pulled the tape off, the deck looked terrific. The gloss finish to the white edging made a nice contrast to the matte texture of the gray non-skid areas.
Just prior to reinstalling the hardware, I touched up the gray non-skid and attempted to touch up the white edging paint. The gray paint was useable, barely. There were some nervous moments as it almost exploded when I opened the can and found a foaming, gaseous liquid inside. I was able to touch up a few chipped spots before tossing the rest. The white paint, about a week old, but in the freezer the whole time, was completely set up and hard.
Reinstalling hardware
Beginning where we started, we bolted on the bow pulpit bases, first poking out the silicone plugs. They emerged cleanly. One of us turned the washers and nuts from below while the other held the bolts firmly in place from above to keep the bolt well covered with sealant. The lucky partner down below was usually well covered in white goop by the time we were done. A bit of alcohol and all was well.
After an overnight rest, we tightened the bow pulpit bolts to the final level of tightness. It pays to leave them a bit loose overnight and then do the final tightening after the sealant has had time to harden up a bit.
The trickiest part of the hardware installation was the inner forestay base. Because the new deck is half an inch below the surface of the old deck and the delamination was serious in this area, we had filled these holes and finished the area as though the forestay mount would not be installed. It allowed us to carefully position the new backing plate to sit against the bulkhead so it would bolt securely to that as well as to the underside of the deck.
Measuring above deck carefully from the windlass hole, I located the bulkhead and then used a T-square to mark the spot for the main hole in the backing plate on the deck. After checking these measurements, I drilled a 1 1⁄4-inch hole in the deck. Dropping the large stud on the forestay base through the hole put the acid test to it. Was it in the right location for the bulkhead? It was. What a relief!
The next question: would the aft holes for the forestay base fall behind. the bulkhead or directly above it? The machine shop did not follow my directions as well as I’d have liked, so the lineup looked doubtful. The bolt holes hit just aft of the bulkhead and required only a little chiseling of the bulkhead. We put a washer and nut on each bolt. The aft two are covered by trim.
Thorough testing
In the course of laying down our 11-foot 6-inch genoa car track, we added 45 new bolts and tightened each one just to snug. The next day we did the final tightening and were blessed by an immediate and thorough testing by a fierce rainstorm. After retightening one bolt, we passed this freshwater test.
I found that reaming out the old bolt holes for the genoa track helped greatly with aligning these bolts so the heads were flush in the track and the cars were able to slide easily. Guess how I found this out? I did not do it on the starboard side, but once the track was bolted in place, with 3M 101 oozing out nicely at every bolt hole, there was no going back. I resorted to using the angle grinder to smooth off the few bolts that peeked up above the track and interfered with the slide of the cars. Before doing the port side, I’d learned my lesson and made sure that the bolt holes were cleaned out thoroughly. Who’d have thought?
All the hardware was reinstalled with new bolts. It added roughly $200 to the project cost and involved a lot of chasing around to find the correct sizes, but it will eliminate future rust smears.
It proved timely that we’d removed some of the components of the boat; in the process of reconnecting the windlass wiring I found major corrosion in one of the 2/0 wire conductors and had to chop about a foot off the positive lead. I carefully cleaned and coated every other connection after reconnecting it.
After two full months of constant work, we had the whole thing done and were still talking to one another. The new deck surface was positively watertight and looked great. As a bonus, the boat felt noticeably cooler belowdecks. In the tropical sun the teak would burn our feet at midday. This doesn’t happen with the light gray non-skid surface. And as we did the job ourselves, we know what was done at every step and feel confident that this deck finish will last many years with little or no maintenance required. A special bonus, always notable with do-it-yourself projects, is that we saved money better spent on other items on our cruising checklist.
One small leak
As I write this four months after completion, we’ve sailed 400 nautical miles. I confess that there is one small area in a galley locker where, in a heavy deluge of rain, a few drops of moisture are evident. It’s got to be stanchion bases that need to be re-bedded. It’s the only water that makes it belowdecks now, so in relative terms we are hugely satisfied with the result. And I’m happy that I am no longer spending my time caulking the deck and replacing bungs. And yes, we’ll rebed those stanchion bases — they’re on the list.
A noteworthy side observation: at the end of six weeks of hard toil, the daily toll of which cannot be described, my wife replied, “Yes, definitely” to my question, “Would you do this job again knowing now what’s required?” Now there’s a woman to take out to sea on an older boat!
We can all do more than we think we can. I suppose it’s good to have this tested from time to time; maybe that’s what this boat does for me. The relationship with Diane is even more challenging than this old boat; the durability of both was amply proven to me over those two months.
There’s a rhythm to boats and boat problems a lot like the sea itself. The wind waves are almost always there: the humdrum minor maintenance and repair items. Halyards fray and stanchions rust. Keeping it all in good repair is the basic stuff of seamanship.
Then there are the bigger swells: the rollers that carry us from gunwale to gunwale if we’re not careful. Engines need overhauling, sails blow out, transmissions fail, and still all of this is manageable in the regular procession of events in the life of a cruiser.
I’d compare this deck project, however, with a tsunami or something near to that. If a person ever sees one, he can only hope to live through it.
Thank you to Sailrite Enterprises, Inc., for providing free access to back issues of Good Old Boat through intellectual property rights. Sailrite.com