It ain’t brain surgery, but pampering your head will save your sanity
Issue 24 : May/June 2002
A popular saying goes: “To a man with a hammer, every problem looks like a nail.” Perhaps this is why my friend Rob, a scuba diver, tried using compressed air to clear out a clogged head. For a scuba diver, compressed air can lift underwater objects, dry things out, inflate tires . . . anything. A blocked head must have seemed the perfect candidate for several hundred psi of tactical force.
So Rob rigged his scuba kit to a length of hose that he pushed deep into the head. His friend, Mike, sealed the business end as best he could with rags and muscle power. Rob sat in the cockpit controlling the valve on the scuba tank, and their significant others sat on deck watching for bubbles coming out the discharge.
Rob opened and quickly closed the valve. “Any bubbles?” he asked. “Nope,” came the reply. He tried again. Still nothing. His patience waning, he cranked the air on for a good long time . . . until he heard a muffled “whoomph” from within the boat.
At first there was stunned silence. Then, after a spluttering sound, Mike started screaming. He emerged from below, yelling and sputtering, covered with the contents of the discharge hose. Reeling from the stench and fearing reprisal, Rob escaped to the foredeck as Mike scrambled for a bucket and started washing himself down with sea water.
Keeping your head in working order needn’t be as traumatic as it was for Mike. The standard manually operated heads on most boats are simple, rugged units that, with a little care, will do the dirty work for years to come. What follows is a guide to the maintenance and, if necessary, repair of your marine head.
Head care
Regular maintenance can help avoid some common problems. For manually operated heads, these include leakage around the pump handle and difficulty of operation. For electrically-operated units, they can include weak flushing and electrolysis. Backflooding can affect both types.
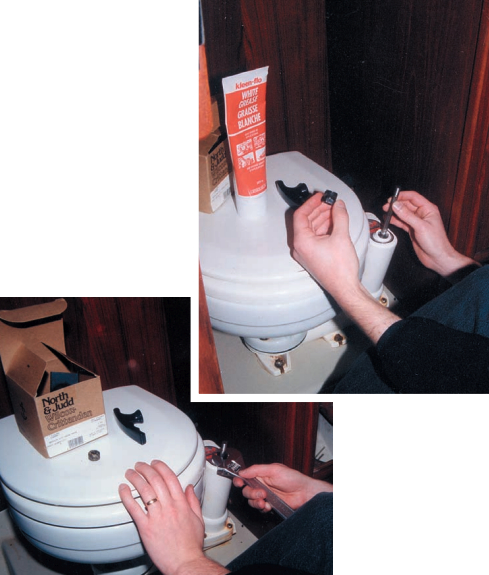
Leaks around the pump handle are typically caused by improperly adjusted or worn-out packing. The packing is found under the packing nut, where the pump rod goes into the pump cylinder. Unscrew and remove the pump handle, then unscrew the packing nut to reveal the packing. If it has disintegrated, it’s easy to order and install new packing. Otherwise, simply apply some waterproof grease to the packing, re-install the nut and tighten it just enough to prevent leakage. Don’t overtighten it, or you’ll make pumping action stiff and increase wear.
Difficult flushing
This can be caused by restricted hoses or a sticking pump. Check the hoses for kinks, and ensure that through-hulls are completely open. Mineral buildup can restrict the hoses. You may need to remove the hoses to remove serious buildup, but you can prevent a recurrence with vinegar or cola (see sidebar).
Keep the piston rod, bearing pins, and packing in the pump handle lubricated with a waterproof grease (such as white grease), and ensure that the packing nut is properly adjusted. Every few months, put a cup of water-soluble lubricant such as Sea-Lube into the bowl, pump it into the pump cylinder and let it stand for 24 hours (you can use cooking oil instead, but never use mineral oil because it attacks rubber seals). A stroke or two is all it takes to pump the oil from the bowl into the pump cylinder.
Electric heads draw a high current when operating, so it’s important to inspect the wiring annually for loose fittings, corrosion, degraded insulation, and other problems. Wiring trouble can lead to poor operation, overheated wiring, or electrolysis. Because the head is connected to a large through-hull (usually made of metal), electrolysis has the potential to sink your boat. If your electric head doesn’t pump well, check the wiring and electrical systems first, then check for restricted hoses, as you would for a manual head.
If your head is backflooding, shut the through-hulls and remove the tailpiece containing the discharge joker valve. It’s here that matches, bobby-pins, and other small debris typically get caught and cause trouble.
Rebuilding
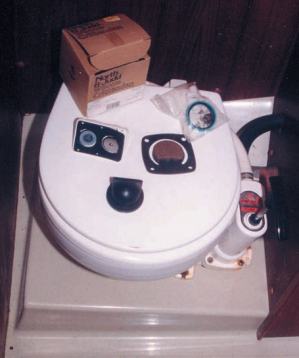
Once you get past the “yuck factor,” rebuilding a manual head is pretty simple. Two steps will help the job go smoothly: first, remove the head from the boat to work on it. Although it’s possible to perform a rebuild with the head in place, the cramped quarters of most boats make an unpleasant task even worse. Second, have plenty of hot water on hand for yourself and for the parts. As you remove each part, drop it into a bucket of hot, soapy water. You’ll find things a lot less distasteful to work on once they’re clean.
Purchase a repair kit and shut the through-hulls before you start. Always have an additional repair kit on board for unexpected repairs. These kits usually come with instructions, but keep the following in mind:
- Disassemble the head by removing the screws and nuts holding the pump cylinder and discharge valve to the bowl. Pay careful attention to how all the parts are aligned.
- Thoroughly clean all parts to remove any gasket compound or sealant.
- Clean and polish the walls of the pump cylinder. Lubricate them with petroleum jelly before reassembling the pump.
- When reassembling, remember that the weighted flapper valves must always be installed with the weight facing up. They should be oriented so that the widest opening faces the outlet.
- The “bill” on the discharge joker valve points in the direction of flow.
- A bit of flexible gasket compound will help seal the bowl and the discharge tailpiece.
- When reattaching the bowl, tighten the nuts evenly to avoid damaging or breaking the bowl. Don’t overtighten.
Holding tanks
Instructions for installing a holding tank are beyond the scope of this article, but the following pointers will help you install a good system and keep existing holding tanks in good order:
- Tank gauges: If you’re installing a new tank, be sure to put in a gauge or tank watch to indicate how full the tank is. If your existing tank doesn’t have a gauge, you can get an externally-mounted system that uses stick-on sensors to read the level and display it on an LED readout.
- Odor reduction: Your holding tank needs an external vent to release gases and equalize pressure. To ensure the vent emits a minimum of foul odors, install an in-line activated charcoal filter. When the tank is in use, consider using a product such as Odorlos, available at marine and RV suppliers.
- Hoses: Where possible, use rigid, plumbing-grade PVC pipe in your system. Wherever flexible hose is required, use the best hose you can get. Inferior grade flex-hoses are prone to odor permeation, and can create quite a stink.
Golden rule
No doubt, you already know the golden rule of marine heads: “Except for small quantities of toilet paper, nothing should go into the head that hasn’t been eaten first.” But chances are your guests don’t know, and educating them is definitely in your best interest.
Too many head problems occur because someone attempts to flush paper towels, rags, baby-wipes, feminine hygiene products, matches, cigarette butts, and sundry garbage. So anytime you have guests aboard, emphasize the golden rule. You may feel uncomfortable giving your speech, but it’s nothing compared to the misery of disassembling the system to retrieve a stray unmentionable.
Just ask Mike.
Thank you to Sailrite Enterprises, Inc., for providing free access to back issues of Good Old Boat through intellectual property rights. Sailrite.com