A cockpit table you can actually use
Issue 19 : Jul/Aug 2001
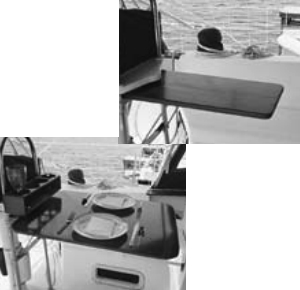
Many boats with pedestal steering systems have small tables mounted on their steering columns. If yours is like the table which came on our boat, you’re lucky if you can get a bag of chips and a bowl of dip on it.
Our table was approximately 1 foot by 2 feet . . . a nice sturdy piece of 3⁄4-inch teak. My goal was to design something low cost, simple to build, and removable so we still could use the smaller table if we preferred. I decided to build a slip-on enlargement of sorts, something that would stow easily in the cockpit, under a bunk cushion, or behind a seat back.
The first step is determining the largest possible size, keeping in mind that you need access to the companionway (to serve dinner of course) and to be able to stow it after use. To visualize this, I cut a large piece of cardboard to the size I wanted and rounded the corners. By positioning the cardboard on the little table, I was able to refine it into the perfect shape and size for our boat.
The second step is selecting a 1⁄2- or 5⁄8-inch piece of wood (teak, marine plywood, or any wood you like) and cutting it to fit the cardboard pattern. After this, place your new wood table on top of your existing table taking care to position the existing table squarely in the center of the larger table. Then draw a pencil outline of the smaller table on the underside of the larger table. This will serve as a guide to position the slot pieces beneath the larger table.
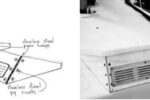
The third step is fixing 1 x 1-inch strips of wood to the underside to build the slot on three sides of the guidelines you drew on the underside of the larger table (see top photo). You’ll need to increase the size of the slot about 1⁄8 inch all around to leave room for cloth buffer material and to make it easier to slide on and off. The slot should be about half the length of the small table so you can lift the add-on table before its forward end hits the main hatch.
The fourth step is gluing a sheet of felt or other soft thin cloth on the underside of the new table and inside the slot where the existing table will rub. After a test fitting, if the table slides easily on and off, screw on two 2-inch wide strips of 1⁄16-inch thick aluminum along the length of the slot.
Test the fit once again and, if it’s acceptable, it’s time to sand the tabletop and stain or varnish it to match the other wood on the boat.
The next time the weather is nice, have your dinner in your cockpit under the stars!
Charles has been an artist and sailor in the Dallas, Texas, area for more than 20 years. He dreams of retiring to paint and sail.
Thank you to Sailrite Enterprises, Inc., for providing free access to back issues of Good Old Boat through intellectual property rights. Sailrite.com