A simple but effective idea to improve a dinghy’s tracking
Issue 40 : Jan/Feb 2005
I have made many modifications to our Hughes 26, Smooth Moves, over the years. Some have been real improvements, some not so much so, and others were abandoned. What follows is probably the single best thing I have done to improve life aboard.
My wife and I have elected to stay with a 7-foot 3-inch Boatex dinghy powered by oars. We like the convenience of its small size and simplicity. In addition to making short trips to shore when anchored, we use the dinghy quite extensively as a pleasant means of exercise and for poking around in anchorages.
Like all short craft with a fairly wide beam, the dinghy doesn’t track well, particularly when the wind and/or waves are approaching from the side. It occurred to me that a longer boat would solve the problem. But wouldn’t a longer keel accomplish the same thing? Yes, it would, and it did. After installing my “extend-a-keel” three years ago, it took about four strokes of the oars to realize how well it worked. The boat will actually glide in a straight line.
I don’t claim that my dimensions and materials are the best ones for this project — they resulted mostly from some odds and ends that I had access to at the time and can be readily purchased at a well-stocked hardware store.
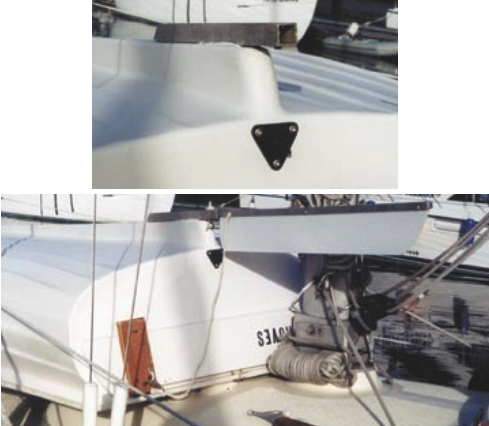
The fin does not protrude any deeper than the existing keel and, because it is easily inserted and removed from inside the boat, it can be taken out when going ashore on beaches to protect it from damage.
Fairly loose fit
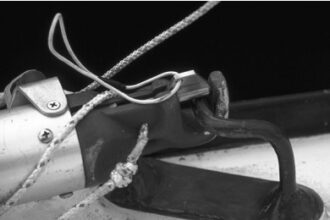
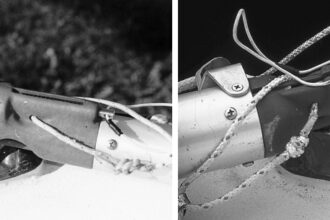
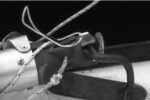
The hollow aluminum tube is 3⁄4- by 3⁄4-inch inside dimensions, while the solid aluminum bar is 5⁄8 by 5⁄8 inch. While this allows a fairly loose fit, the screw heads protruding into the tube take up some of this slack. Also, the loose tolerance allows easy installation and removal of the fin, especially desirable when “sea stuff” grows on it. The 3⁄16- inch locking pin is inserted into 1⁄4-inch holes for the same reason.
The through-holes for the locking pin should be bored after the rest of the installation is complete so they can be aligned with the fin at its natural stop position. This allows for pin insertion without having to peer over the transom to get the holes aligned.
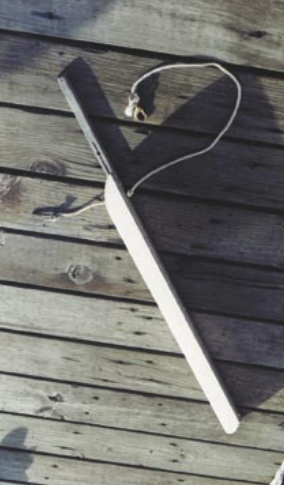
I also included a snap hook on a lanyard that I attach to the transom before inserting the fin. If I happen to drop it, it won’t be lost.
Because I own a table saw, it was a simple procedure to make a 1⁄8-inch by 1⁄4-inch deep dado in the aluminum bar into which the 1⁄8-inch-thick plastic fin fits snugly. I then reinforced this joint with three machine screws and nuts. But for anyone without a table saw, the fin could be just screwed from the side of the bar.
While the plastic fin is susceptible to damage, it can be replaced easily. The rest of the installation is quite sturdy. As I stated, I used materials I had on hand. The fin could be replaced with aluminum stock or perhaps copper or some other material. Except for shallow-water beaching or rowing over rocks, the fin is quite safe. Ours is undamaged after three years of use.
Just seemed right
The actual fin on our boat is 4 inches by 32 inches. The 4-inch width is the same as the boat keel at the stern, but it could be 3 inches or 5 inches. The 32-inch length just seemed right to me — long enough to make a difference but not so long it becomes a nuisance when rowing and stowing.
What are the drawbacks? Not many. Because the boat behaves like a longer craft, it doesn’t respond or turn as quickly, of course. I honestly can’t perceive any extra drag. Any additional muscle power that may be exerted is more than compensated for by not having to continually straighten the boat. As for the extra hassle of inserting the fin in the tube, it’s minimal; however, if we’re just rowing a short distance to the dock or a beach we don’t bother using it. The purpose of our “extend-a-keel” is to better enjoy those longer rows.
Thank you to Sailrite Enterprises, Inc., for providing free access to back issues of Good Old Boat through intellectual property rights. Sailrite.com