Standing Rigging
Issue 6 : May/Jun 1999
The most important rigging maintenance tool is a good notebook. I also recommend the use of a tension gauge. There is some trial and error involved in the initial tuning of a rig. If your boat sails well, document the way the rig is tuned so you can get back to those adjustments later. This is true for all boats, but particularly true for boats that routinely remove their masts during lay-up.
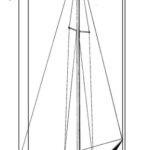
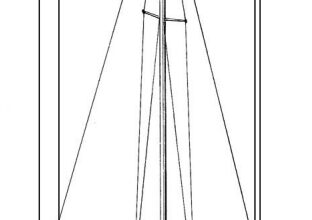
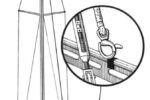
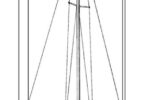
A plumb bob is most useful if your boat floats exactly on its waterline. Many boats do not, and others are sensitive to crew and gear location. Another handy method of determining that your mast is vertical in the athwartship plane is to use your main halyard to measure to the deck edge port and starboard. (See illustration on the next page.)
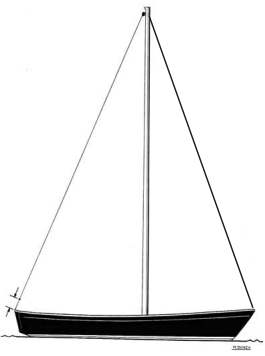
You may or may not want your mast vertical. Some boats are designed with a little rake to the mast, and some need some rake to sail properly. There is never any need to rake a mast forward of vertical. What determines if you need some mast rake is weather and lee helm. A normally rigged and sailed boat should not have lee helm. If you have lee helm at any normal point in the sailing envelope, rake your mast a little more. If you have a lot of weather helm under normal conditions, try standing the mast a little straighter. Some boats, particularly those with full keels tend to have a goodly amount of weather helm when sailed at large angles of heel. Making the mast straighter may not cure this characteristic completely.
The easiest way to measure mast rake is to measure the dimension from the masthead to some point on the stern. If your rig is small enough, you can hoist a 50-foot tape measure up with your main halyard. Two-block the halyard and measure to the same point on the stern. You may even want to mark that point to help you remember where it is. The actual dimension is not as important as measuring it the same way every time, and knowing what measurement is needed to make your boat sail well. If you need to measure more than 50 feet, hoist a purpose-made wire with a loop on one end and a mark on the other, and measure the distance from the mark on the wire to the mark on the boat. When the boat sails well, note the setting in your notebook.
It’s easier to think of adjusting the rake with the backstay and the tension of both the backstay and forestay by tensioning the forestay. If the rake is correct, go by the forestay tension, and let the backstay tension float to be what it will. It will usually be less than the forestay tension because of the angles the stays make with the mast. Just remember that adjusting either one changes the other.
Slack rigging is no favor to your boat. Your rigging will work better and last longer if it is fairly tight. Fairly tight is not a quantitative statement however. With a rigging gauge we can be more precise. In fact with a rigging gauge you can pretty well reproduce previous settings without ever leaving your slip. That is why the notebook is so important.
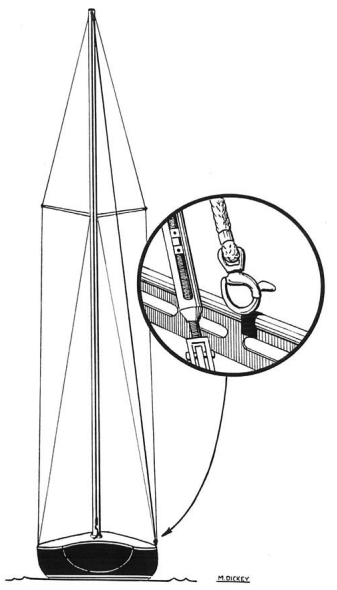
The most important point to understand is that when the sailplan is pretty well loaded and the boat is well heeled, the peak load on a weather capshroud is exactly the same whether the rig was initially tight or loose. The difference is that if the leeward capshroud is slack, under some conditions it will receive high shock cyclic loads as the mast pumps in a heavy sea. This is why it is desirable to set the rig up tight enough so that when sailing in winds that produce 15 to 20 degrees of heel, the leeward shroud is just starting to relax and not flopping around. (Refer to illustration on Page 7.)
Good instructions and advice will come with your tension gauge. Essentially you gauge your wires to determine the diameter, find the breaking strength of the wires in a table, and initially set them up to 10 to 12 percent of breaking strength. That is for masthead sloops. For fractional rigs with swept aft spreaders, it may be necessary to tighten the cap shrouds to 20 percent to get the forestay tight enough. In no case is it desirable to use more than 25 percent of breaking strength.
Final adjustment still requires sailing the boat (at least the first time) to determine if the capshrouds go slack at the desired loading, which is a breeze that will produce 15 to 20 degrees of heel.
The Loos instructions also say that it may be desirable to set the lowers to less tension than the uppers and that forward lowers should be tighter than aft lowers. Again, it is necessary to sail the boat and adjust the lowers so that the mast is fairly straight when the boat is heeled 15 to 20 degrees. Tightening the windward lower pulls the middle of the mast to windward. No tricks there.
Steve Killing says there are two schools of thought on mast bend. One school says the mast should be kept straight under load, and the other says it will bend no matter what you do, and it is better to let the bend be a very slight and uniform curve to leeward. This second school, to which Steve subscribes, contends that if a keel-stepped mast is kept straight above deck (by proper adjustment of the lowers) it will concentrate the bend below deck.
Last but not least. Be careful, and think it through. The instructions and suggestions in Bill Sandifer’s article and in this sidebar are necessarily of a general nature. Your boat may have peculiar characteristics that need to be taken into account. Our 1976 C&C 30 manual, for example has absolute pretension limits for backstays specified at 2,000 pounds. This is on a 1/4 inch wire rated at 8,200 pounds breaking strength. With the backstay set that high, the forestay will be higher yet. (I never set it that tight.) If you can find a manual for your boat, it may have good advice that is much more specific than the comments on these pages.
Thank you to Sailrite Enterprises, Inc., for providing free access to back issues of Good Old Boat through intellectual property rights. Sailrite.com