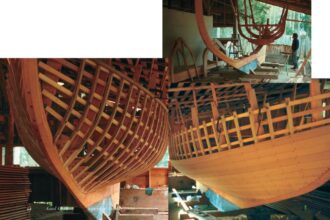
In excerpts from his latest book, yacht designer Dave Gerr explains the finer points of good boatbuilding practice
Issue 11 : Mar/Apr 2000

To be a good old boat, a vessel must be well built. Easily said, but how do you know whether it’s well built or not? What is considered good practice, and what can you tell just by looking at the way a boat was designed and built? If your boat, like most, has a hull and deck of fiberglass, there is, in fact, a great deal you can learn from a close inspection. But you need to know what you’re looking for.
Some history
Modern fiberglass boat construction is based on an ancient principle: adding just 2 percent of a fiber-like impurity to something like clay or plaster of Paris will dramatically increase its strength — especially its resistance to cracking on impact, or to bending. This is why, for instance, you can’t make bricks without straw — at least, not strong, usable bricks. The more fiber you add, in proportion to the binder, the stronger the combination — the composite. As you can see, the first “composite material” application is several thousand years old. Of course, if you try to combine much more than 2 percent fiber (straw or whatever), things get too stiff to mix or work properly. Instead, you have to add the binder to the fiber, rather than the other way around.
Mashed paper
Papier-mâché, for example, is nothing more than another “high-tech” composite that’s been with us for three or more millennia. The ancient Egyptians used it to make sarcophagi; 18th-century Europeans used it to make jewelry boxes and furniture; and during World War II, it was even employed — in a big way, believe it or not — to make airplane fuel tanks! Papier-mâché has its drawbacks — it’s not especially strong; it’s not at all fire-resistant; and, worst of all, it’s unable to stand up to moisture. As long as it’s kept well-painted or varnished, and in a reasonably dry environment, fine; get it wet, though, and it’s finished.
Bakelite
Strangely, it was largely the pressures of the new-fangled electronics industry that encouraged improved composites. The old insulators — gutta-percha, waxed paper, shellac, and ceramics — that had been adequate for the ordinary telegraph-line voltages, weren’t up to the job as we began using higher levels of power. It was the Belgian chemist, Leo Baekeland, who found that reacting phenol and formaldehyde would produce a reasonably tough and some-what water-resistant resin. The year was 1906. Even so, it wasn’t until many months later that he realized that adding fibers (in this case, in powdered form) to his brittle resin would generate superior strength. The result was Bakelite, the very first “modern” high-tech composite and the beginning of our contemporary plastics revolution. Between the two world wars many household appliances and a vast amount of electrical equipment was fitted with Bakelite handles, knobs, cases, and insulators.
Asbestos, too
From here on it was a regular, ongoing process to increase strength, stiffness, and weather resistance in these new, highly moldable composite wonder goos. All sorts of binder/chemical combinations were tried along with all manner of fibers — everything from wood pulp to asbestos. Indeed, asbestos-phenolic composites seemed to have all the answers at the end of World War II. Known largely as Durestos, this material was tough, strong, and quite stiff, rivaling even modern laminates in some respects. Back then, no one was much concerned with asbestos health risks, so I guess we can consider ourselves lucky that Durestos didn’t gain wide acceptance. Think of the multi-million-dollar Durestos clean-ups that would be underway today if it had.
Fiberglass
Today, we’ve settled on glass fibers (nothing more than modern-day straw) in polyester resin (modern-day clay) as the most suitable and cost-effective combination for building large, waterproof, composite structures — boats. The process most builders use is almost identical to the application of papier-mâché employed by the ancient Egyptians. For ancient papier-mâché sarcophagi (highly molded and brightly painted coffins), a hollow female mold was made out of clay or plaster of Paris; it was coated with a mold-release agent (the Egyptians used soap or linseed oil) so the layup wouldn’t stick; next, alternating layers of paste or glue and paper were laid in and pressed tightly down until the desired thickness was built up.
The vast majority of modern production hulls are built-up in exactly this way. If you were building a new boat, Glass Slipper, you’d build a hollow female mold in the shape of her hull. You’d then coat it with a mold-release-agent (today a wax). Next, you’d lay on alternating layers of polyester resin and fiberglass cloth (of varying styles and weights) until the desired thickness was reached. Maybe, “modern” technology isn’t quite as modern as we think it is.
Layup methods
What we’ve described above is commonly known as “hand layup.” It’s the most widely used and one of the most successful methods of forming a hull. There are, however, two standard alternatives. The first is really a hand-layup enhancement: the entire hand-layup process on Glass Slipper is performed as above, but — after the layup and before the resin cures — a vacuum bag (really a sheet of plastic) is taped in place over the fiberglass in the hollow, female mold. Some of the air is sucked out by a pump, causing the outside air to press down evenly on the entire plastic sheet, and thus the laminate, with great force. The result is extremely dense, strong, even layups — considerably stronger than hand layups. This is because vacuum-bagged layups have more glass in proportion to the resin. (Remember, the more fiber you use — if properly applied — the stronger the laminate.)
Atmospheric pressure, by the way, is about 14.7 pounds per square inch (psi). If — using Glass Slipper’s builder’s trusty vacuum pump — pressure were reduced by 25 percent, to 11 psi, the resulting pressure on and through the vacuum bag would be 3.7 psi. Doesn’t sound like much? Well 3.7 psi equals 533 pounds per square foot. And if Slipper were, say, an average 28-footer, she’d have about 480 square feet of hull surface. Net result: 255,800 pounds total force — about equal to a 128-ton hydraulic press! (In practice, pressures of 7 to 9 psi are common.)
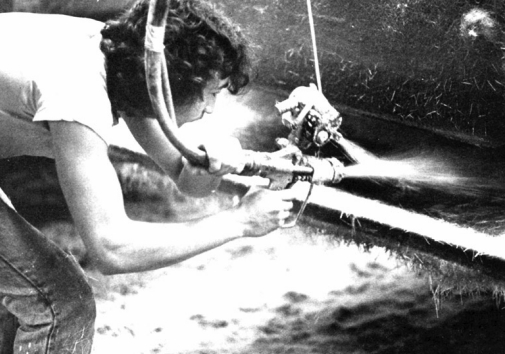
At the other end of the spectrum, is the chopper-gun layup. What the builder does here is to blow small, short glass fibers mixed with liquid resin onto the surface of the mold with a special gun. This is then rolled down by hand. (The short fibers are called “chopped fibers,” hence the name “chopper gun.”) Since the fibers are short, run in random directions, and laid down without precise thickness control, a chopper-gun-laid-up Glass-Slipper hull is less dense and weaker than a hand-laid-up one, and far weaker than one that’s been vacuum-bagged. The attraction of chopper-gun layup is that it’s quick and cheap.
Does this mean chopper guns are bad? No it doesn’t. But, as always, you get what you pay for. Clearly, chopper-gun layups have to be thicker, and thus heavier, for the same approximate strength. And, even so, they still don’t quite reach the reserves of strength and longevity that a good hand-laid-up hull has. Still, if cutting-edge performance is not a major factor, and getting boats out on the water inexpensively is, properly engineered chopper-gun hulls can fill the bill well.
The pros and cons
Knowing all this, we can assess the pros and cons of the three standard laminating methods. Hand layup is the industry standard. A properly hand-laid-up hull has a smooth, even surface inside and out and constant thickness throughout each specific region of the hull. The mechanical properties of the hull will be more than adequate for the large majority of vessels.
Vacuum-bagged laminates are denser, with less resin in proportion to the glass fiber reinforcement. Such laminates have better mechanical properties for the same thickness. Though this technique is not required for sound hulls, designers and builders can reduce weight, increase performance, or both, by using vacuum bagging. The vacuum bagging procedure can add some cost to construction (though often less than expected) and these thinner skins, particularly on sandwich construction, may become too thin for safety on smaller craft or high-speed vessels.
Chopper-gun layups are low cost and — since they have the highest resin content per weight — the weakest with the lowest mechanical properties. Chopper-gun layups are suited to mass production of hulls where weight and performance are not critical. Chopper-gun layups can also be used effectively to fabricate internal and secondary components on otherwise hand-laidup hulls. Of course, these same parts would be lighter if they were laid up by hand or vacuum bagged, but the cost savings in production applications may be well worth this compromise.
Sandwich construction
Contrary to some common misconceptions, fiberglass is neither particularly strong for its weight nor particularly stiff; indeed, fiberglass is rather bendy. To compensate for this, many boats these days are laid up using sandwich construction. Such vessels have cores of end-grain balsa, closed-cell foam, plastic honeycomb, or plastic-impregnated paper honeycomb. In areas of high loads, cores may be of plywood or solid wood with thin fiberglass skins inside and out. This is excellent construction if properly engineered. It increases stiffness without adding weight and — as a bonus — adds built-in insulation.
Core installation
While on the subject of cores, it’s important to note that any of the closed-cell foams from major manufacturers is acceptable. End-grain balsa core is also extremely good. Indeed, it currently provides the highest stiffness for the lowest cost of any core. The critical thing is that the balsa core must be pre-saturated with resin before layup. If it isn’t, when the first layer of fiberglass mat is applied against the new Glass Slipper’s core, the dry balsa will wick away the resin, and this will lead ultimately to a core-bond failure. This is a really big problem, and frequently uncorrectable.
A good bond
The proper core-installation procedure is to lay up the outside skin (inside the female mold), then lay down a wet, resin-rich layer of chopped strand mat, and squish down the pre-coated (or pre-saturated) core onto the still-wet, resin-soggy mat.
Since hulls have compound curvature, almost all cores (balsa and foam) come in sheets cut with kerfs into little squares, which in turn are bonded to a thin, flexible (usually light fiberglass) binder sheet. These kerfs are necessary if the core sheet is to bend and mold into the hull shape. When installed, however, the kerfs also spread open, leaving small voids running along the core. It’s critical that these kerfs be filled with as much resin as possible. For both balsa and foam, the best procedure is to drape the core sheets over the edge of a barrel so the sheet flexes open in two planes. This spreads the kerfs so the builder can spray (hot coat) the core with resin with maximum penetration into the open cuts (kerfs).
Prepared and pre-coated like this, the core must be rolled down hard by hand while both the core and soggy mat are still wet. The purpose of the resin-rich squishy mat in conjunction with the pre-coated core is to ensure a good bond between the skin laminate and the core and to squish as much resin up into the core’s kerfs as possible. Properly, done, this procedure will produce a very sound, long-lasting hull.
Some companies manufacture special core-bond putties to be used in place of the wet mat. These putties are applied or troweled onto the hull and the pre-coated core. Next, a vibrator is used on top of the core to help further press the core down on the putty and to work as much putty up into the core kerfs as possible. Core-bond putties can be used instead of the resin-rich mat as specified by the core manufacturer. Correctly applied, such putties are excellent, but the builder absolutely must use either resin-rich mat or a proper dedicated core-bond putty between the core and the skin laminates to ensure a proper bond. You cannot ever use ordinary Bondo or some home-brewed putty for core bonding.
In a female mold, the core kerfs are almost always laid down with the kerfs facing the mold, however, the builder must still use either resin-rich mat or putty between the core and the inside skins as well. It cannot be overemphasized how critical careful attention to detail in bonding and installing cores is to a successful hull.
The very best method of bonding a core to a hull is to vacuum bag it — even if the rest of the laminate is not vacuum bagged. Most builders report virtually no additional labor in vacuum bagging cores. At the same time, vacuum bagging presses the core down onto the skins with the maximum pressure attainable and sucks resin up to fill all the kerfs nearly 100 percent with resin.
Core failures
Virtually the opposite of high-quality, hand-layup, FRP with foam core, or pre-saturated balsa core, are the inexpensive chopper-gun boats with balsa cores in, say, their transoms as stiffening for the outboard mount. Again, the only, and I do mean only, way to get a good bond between the fiberglass layers and the balsa core is to press down hard — hand rolling or vacuum bagging. Chopper-gun spraying, even after rolling, applies less reliable and predictable pressure. What’s worse, such boats — built in small shops — are often constructed on a lean budget and tight schedule. The builder will be tempted to skimp on (or even ignore totally) pre-saturating the core.
What with the engine-mount fastening gear and the continuous engine and prop vibrations, it’s not a question of whether the transom and core will fail but when. I’ve seen instances of boats with such construction in the shop for repairs. When the transoms were taken apart — often you could peel them open with your fingertips — the rotten balsa inside resembled nothing so much as congealed, decaying pea soup. It’s this kind of third- or fourth-rate construction that’s given balsa a questionable reputation in some circles. Such a reputation’s undeserved. Balsa’s one of the very best cores if it’s been installed correctly. (The proper chopper-gun transom core, by the way, is marine plywood carefully pre-saturated with three coats of polyester resin before it’s laid in and sprayed up or chopped over.)
Water-filled cores
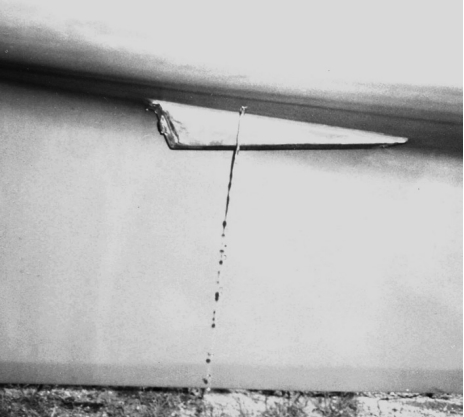
Similarly, I’ve seen boats that were hand laid up with foam cores using ordinary auto-body Bondo as core putty with no mat and no core pre-saturation or hot coating. One of these vessels, a 34-foot fishing boat, leaked through an improperly bedded spray strip. Water was forced, under pressure, so effectively through the screw holes and into all the open channels left by the unfilled kerfs that nearly the entire hull shell — from keel to sheer — was filled with water. When this boat was hauled out, water literally shot out of holes drilled in her bottom. One hole alone filled a one-gallon coffee can three-quarters full in just a few minutes. This was a new boat, and she was never fully repairable. None of this would have happened with proper core-bonding procedures.
Avoid excess resin
Although the mat layers between the cores and the skins should be resin-rich and squishy, this is the only place a layup should be soggy. The sole way to get a strong, light layup is to use just enough resin to get a thorough wet-out and a good bond — not one whit more. Again, the more fiber used in proportion to the binder, the stronger the laminate. Any additional resin actually reduces strength. Strangely, some builders don’t know this. Whether you’re designing or building, it’s vital to keep this principle in mind.
Traditional glass laminates
Since fiberglass was introduced for hull construction in the late 1940s and early 1950s, there have been just three “standard” fiberglass materials, all commonly composed of E-glass (ordinary electrical- or construction- grade fiberglass). They are:
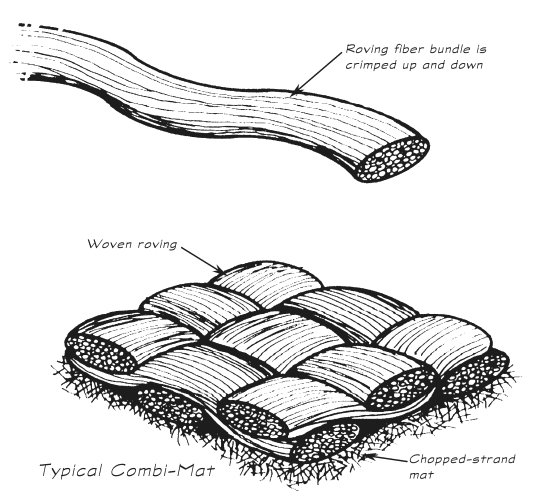
- Chopped strand mat (CSM) — This is frequently known simply as “mat” and is literally that. Strands of glass fibers are chopped into short pieces (about 1/2 inch to 2 inches long) and mashed together with a temporary binder called a sizing. The result is a mat-like material. Because the fibers are short and run every which way, it’s not particularly strong; however, it’s fairly easy to wet out, and — because it’s soft, thick, bulky, and somewhat sponge-like when wet — it’s good for bonding to layers of other types of glass and cores. For this reason, the most common way to lay up a hull is with alternating layers of mat and woven roving.
- Woven roving — This is a heavy, coarse fabric literally woven from bundles of glass fibers. Since the fibers run for long lengths in two specific directions (at right angles to each other), woven roving forms a strong reinforcement. In fact, an all-roving laminate can be nearly twice as strong, for the same weight, as the standard combined roving-mat laminate. It takes great skill and attention to detail, however, to produce a high-quality, all-roving layup. Without soft spongy mat between the roving layers, it’s difficult to make the comparatively hard, flat plies of roving stick to each other reliably. Since the combined-roving-mat layups have proved adequate for ordinary boats, very few builders go to this extra expense.
- Fiberglass cloth — True glass cloth is also quite strong. It is almost exclusively used in small boats and for finish work, though, because it’s fairly expensive. Unlike woven roving, glass cloth has a very fine weave, not dissimilar to the fireproof fiberglass curtains you can get in department stores. Glass cloth is often used as a surface layer to smooth out the roughness of mat and woven roving. For instance, a single layer of glass cloth on the inside of a hull makes a nice smooth finish. Accordingly, lightweight fiberglass cloth is sometimes termed “finishing cloth.”
Standard polyester resin
The most common resin for fiberglass construction is ortho-polyester resin. The liquid polyester is mixed with a catalyst and an accelerator to produce a chemical reaction chemists call polymerization. Boatbuilders — being practical — just call it curing. What this all means is that the molecules in the plastic interlock with each other to form a very rigid unit. Ideally, the whole hull (or at least its plastic part) is just one long-chain (interlinked) molecule. If you visualize this giant “molecule” wrapped around all that glass reinforcement, you get an idea why glass boats work so well.
MEKP — the catalyst
Although there are a number of catalysts available, the most frequently used is methylethylketone reacted with hydrogen peroxide or MEKP. This is tricky stuff. It’s highly corrosive, and if it touches your skin you’d better wash quickly. Even more exciting, MEKP is rather volatile. In fact, if the accelerator used to speed up the curing process were to come in direct contact with the MEKP, you could get an explosion and certainly a fire. Accordingly, most polyester resins used in boatbuilding come with an accelerator already mixed in.
Standard layup
As we’ve seen, over the past 40 years or so, the standard, plain-vanilla hull layup has become alternating layers of woven roving and chopped strand mat. As with the core, the mat between roving layers produces better adhesion between layers (a better interlaminar bond) but, except at the core, the mat shouldn’t be any wetter than absolutely necessary. Most frequently, builders will purchase this combination already stitched together — a woven roving with a mat stitched or glued to it. Such fabrics are often referred to as “fab-mat,” “bi-ply,” or “combi-mat.” They save labor in construction by allowing the builder to apply the two layers as one.
The fiber-to-binder ratio is called the “glass-to-resin ratio,” or “glass content” and for standard hand layup, using alternating layers of woven roving and chopped strand mat, it is about 35 percent by weight. For an all-mat layup, the glass content is about 28 percent by weight, while for an all-woven-roving layup, the glass content or ratio is about 40 percent by weight. Again, it’s important to note that the higher the glass content (the glass-to- resin-ratio), the higher the laminate’s mechanical properties (the greater its strength).

Plywood bottom framing
One fairly common way to reinforce the interior of a hull is to install a framework of longitudinal and transverse plywood panels across the hull bottom. These plywood bottom stiffeners and frames are sprayed with several coats of resin. Then they are tabbed in place to the bottom of the hull, and the whole — both tabbing and ply — are usually sprayed with a finish coat of gelcoat. This method is proven and works. It is common on many smaller production powerboats.
I prefer cored framing because its wider forms spread loads and reduce stress concentrations. Further, there is no partially exposed plywood (not covered all around with FRP laminate) in the bilge, where small scratches and cracks can permit water penetration and potential long-term degradation.
Engine beds
Engine bearers or stringers have to be long and continuous. The bigger and more powerful the engine, the longer and stronger they ought to be. This is particularly true on fiberglass boats. Fiberglass is plenty strong in tension; it has high tensile strength. But it is very low in stiffness; its flexural modulus is low. This is why decks on many fiberglass boats will flex slightly as you walk on them. They’re strong enough to support your weight, but they bend as they do it.
Too much flexure, though, is bad news for any structure. Sooner or later, cracks occur. As the flexing continues the cracks grow, and you have a true structural failure.
To generate sufficient stiffness, engine beds on FRP boats thus have to be particularly deep, wide, and long. On most glass powerboat hulls, the engine stringers should run the full length of the bottom. On sailboats, this is a good idea, but not required. The beds should be a minimum length of twice the distance between the fore-and-aft mount spacing, unless they end at bulkheads. If they don’t end at bulkheads, the beds should be tapered at their ends. It’s also very important that these stringers be shaped in smooth or evenly tapered contours. Sharp corners and hard spots concentrate loads and aggravate vibration, increasing the chance of structural failure.
A proper engine mount should use heavy steel or aluminum angle, through-bolted to the FRP engine stringers and running continuously the full fore-and-aft length of the engines, on either side. A good rule of thumb is to fasten each angle to the stringer with four bolts, whose diameter in inches is: bolt diameter (in.) = engine weight (lb.) divided by 4,000. No bolt should ever be less than 3/8 inch.
If the angles are of aluminum, they should be about the same thickness as the bolt’s diameter. If they are of steel, the angles should be about three-quarters of the bolt’s diameter. The engine mounts should then be bolted to this angle. This system further spreads the loads along the engine beds to reduce flexure and stress concentrations. Even though wood is much stiffer for the same weight than fiberglass, wooden boats require much the same reinforcing at the engines. Long continuous engine beds or stringers are fundamental to sound hull structure and smooth-running boats.
The basic engine beds should be wide and deep. In fact, a common mistake some builders make is to build their engine beds deep (high) but narrow. This concentrates the loads from the engine beds along several narrow strips down the length of the hull. On small lower-powered fiberglass craft, you can get away with this, but as you move up to larger diesels — engines that deliver real torque and plenty of power — you have to be sure to make the engine beds wide to spread the loads even more.
A good rough rule for both fiberglass and wooden boats is that the width of each engine bed or stringer should be at least 1/40th of the overall beam of the hull and at least this same height for most of the length of the bed.
From engine mount to engine mount, the stringer height should be at least 1.5 times its width. In fact, the deeper the better, assuming you have the space. (At the deeper engine stringer section, where the angle fastens, a fir or solid plywood core should be installed to provide a stronger bearing surface for the mounting bolts.) On a twin-engined, V-bottom hull the outboard stringers are the factor controlling depth. Because the hull is shallower here, the stringers are at their lowest. The inboard stringers are usually quite a bit deeper than the 1.5 times rule.
On a wooden boat, these stringers are simply made of solid timbers notched over the floors and bolted securely in place. (They shouldn’t touch the inside of the planking, in most cases.) On a fiberglass boat, the strongest and easiest stringer to fabricate is a foam-core “hat”-section stringer. Foam blocks are easily cut to shape and glued to the bottom inside of the hull. Foam fillets should be glued to the corners of each stringer along both sides where it meets the hull to spread the load even further and to avoid a hard corner in the glass laminate. Then the builder should apply a laminate (about equal in thickness to the boat’s length overall (LOA) in inches divided by 1,600) over the entire foam stringer assembly. At the higher stringer section — around the engine itself — the stringer laminate should be increased in thickness to about equal the LOA in inches divided by 1,200.
This stringer laminate should run out onto the inside of the hull, on either side of the stringer, for about the width of the stringer. What’s more, the stringer laminate, where it lies on the hull, should be tapered away, in progressively fewer layers of glass, so it ends in a feather edge — again reducing stress concentrations and hard spots. A hull laid up with stringers like this and following basic rules for fiberglass hull layups, will last a lifetime without giving trouble.
Avoid hard spots
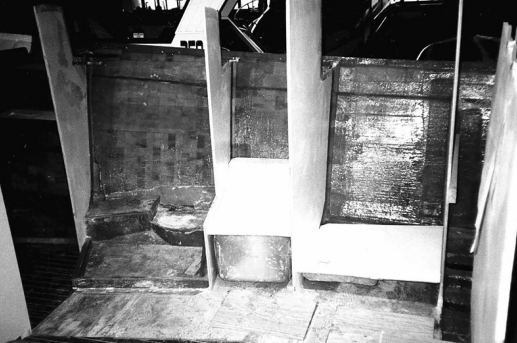
Because fiberglass is quite flexible or bendy, and because most fiberglass layups are also fairly thin, they can flex repeatedly. This happens especially at hard spots, tight bends, machinery mounts, bolt and fastening holes, and so on. It’s vitally important that large backing plates be employed to spread out loads. It’s also important to use extended tabbing/bonding areas to fasten stringers, bulkheads, and other attachments and to gradually taper all transitions in laminate thickness throughout.
It’s also critical that all corners in the laminate and in secondary bonds be made with a radius or fillet. Fiberglass laminates do not work well with hard sharp corners. The builder must use foam or balsa fillets or putty-grout fillets to round over any layup making a sharp inside turn. This is equally true for a transom corner, a stem, tabbing a bulkhead or stringer in place, or bonding in machinery or tank flats.
Core tapering
Since cored fiberglass laminates are even thinner than solid laminates, spreading loads and avoiding hard spots is — if anything — more important. Indeed, the Coast Guard and ABS require that the transition from a cored area of the hull to a solid, uncored area be done gradually with an angle or slope in the core.
Careful timing
On properly manufactured fiberglass craft, the hull is laid up in one continuous process, with no more than 16 hours (less is better) between applying layers.
A still better rule is that no more than twice the resin’s gel time should be permitted between the application of each successive layer.
The resin in each subsequent layer then forms crosslinked chemical bonds with the preceding layer. If this is done, all of these layers, more or less, cure together to form a single unit locked together in a primary bond. Of course, bulkheads, stiffeners, and interior structure have to be added later — after the hull proper has fully cured. The tabbing that attaches such items to the inside of the hull makes a secondary bond, which is never as strong as any primary bond. (There is little significant chemical crosslinking.)
Clearly, this is unavoidable. Happily, it’s also perfectly OK; however, the builder must take proper steps to get a good secondary bond. The area to be bonded must be ground slightly (roughed up to produce a good “tooth” to glue to), vacuumed clean, and then wiped down and cleaned of oil with acetone or styrene. (Styrene is preferable when bonding to laminates that are more than three months old; it softens the old resin more for better secondary adhesion.) Only then can the tabbing/bonding be wet out, rolled, and pressed down. Most builders use ordinary polyester resin for all laminating, including critical secondary bonds. Again — if done with care — this is fine; however, a few of the finest builders use vinylester resin for all structural secondary bonds. Vinylester yields still stronger, longer-lasting secondary bonds.
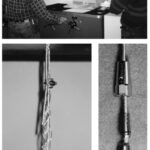
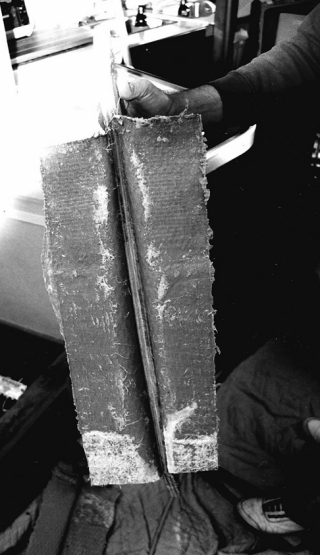
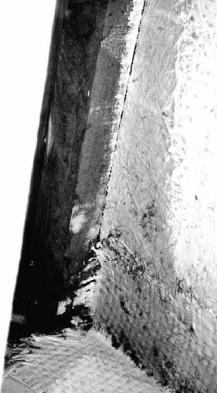
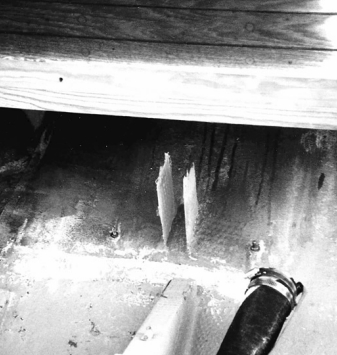
What if these basic secondary bonding steps aren’t taken? The photo at left shows a boat that came to one of my builder’s shops for repairs. (They did not build this boat.) This vessel had literally started to come apart in a storm. The bulkhead/stiffener panel pulled out when it was yanked on with one hand. Not only had this builder neglected to prep for good secondary bond, but — as you can see — he didn’t use foam spacers or even fillets to ease the radius at the corner of the tabbing.
Avoid naked wood
Solid wooden or solid plywood cores are frequently used in fiberglass hulls. Also, wood cleats and panels are almost always found in the interior, whether supporting machinery or for joinerwork. For structural woodwork (as opposed to interior cabinetry) there must be no bare wood in the boat — period! Every single piece of wood simply must be sealed. If it isn’t, not only can it rot but, worse still, it will expand and contract from the constant moisture changes found on any boat. In time — sometimes an amazingly short time — this will cause the wood to split and to separate away from the FRP structure — bad news indeed.
Usually, wood that’s otherwise exposed but is in contact with the glass structure should be coated liberally with resin and sprayed with gelcoat. Unless you’ve got a good eye, it can even be hard to spot timber that’s been so treated. If the wood’s not partially laminated or structurally fastened to the glass structure, it’s OK to set it in marine bedding compound and seal it with Cuprinol or to paint it — but coat it with something, coat it all around, and coat it well.
Avoiding print-through
Print-through is the term used to describe a smooth-finished surface that’s been marred by the weave of the underlying fiberglass reinforcement showing as distinct ridges. The usual layup procedure is to wax the inside of the female mold then spray it evenly with a gelcoat 20 to 30 mils (20 to 30 thousandths of an inch) thick. (More than 30 mils is prone to crack, and less than 20 mils is too thin for adequate coverage and surface quality.) Gelcoat is high-quality resin pigmented to the color desired for the surface finish. The gelcoat is allowed to reach partial cure (about three to four hours, depending on the resin system). Next, a layer of mat is laid down on the partially cured gelcoat. This is known as the skin coat.
For most vessels longer than 25 or 30 feet, the skin coat is 1- to 1 1/2-oz./sq. yd. mat. For boats less than 25 feet, the skin coat is usually 3/4-oz. to 1-oz. mat. The mat skin coat is allowed to cure fully (usually overnight), then the remainder of the structural laminate is applied. Again, on vessels longer than 30 feet or so, this next layer is usually another 1- to 1 1/2-oz. mat, while on vessels less than 25 feet, the next layer is usually 3/4-oz. mat. The purpose of the mat is to eliminate the print-through — showing the rough weave or the structural reinforcing cloth behind it (usually roving). Mat accomplishes this because it’s soft and squishy with a high resin (or low glass) content.
Most builders will try for a total of 2 oz. of mat (or a bit more) between the gelcoat and the balance of the structural laminate (3/4 oz. to 1 oz. on vessels less than 25 feet). This is necessary but unfortunate because — as we’ve discussed — the mat is relatively heavy and weak. You must allow for this mat skin on most average design laminates, however. A factor to keep in mind is that the finer the weave of the structural cloth, the less it will print through. Thus, some of the light stitch-mat styles can use somewhat less mat in the skin coat. Alternately, if most of the laminate is standard 24-15 fab-mat (24-oz. roving plus 1.5-oz. mat), you could make the layer immediately under the skin coat of 14-oz. roving. This, too, would help reduce print-through.
When the resin cures, it generates heat. This is a natural product of the chemical reaction, which is an exothermic reaction, meaning simply “gives off heat.” Many builders refer to the heat as exotherm. The greater the heat or exotherm during cure, the more the laminate will shrink when it cools down after cure. This shrinkage aggravates print-through. Accordingly, print-through can also be reduced by using the slowest-cure resin mixture practically permissible, by keeping the initial layup skins thinner, and by keeping the entire shop cool to reduce temperature overall. All this is truly a delicate balancing act, and it’s critical that the resin manufacturer be consulted as to the best procedure for the exact resin system and formulation you are using.
Final judge
All the processes mentioned in this article have evolved over 30 years or more and constitute what we now believe to be the best methods of building and strengthening fiberglass boats. Your good old boat was probably built this way, and the mere fact that it’s still going strong, like many thousands of others of its age, must prove that these boatbuilding methods really work well. Time, after all, is the final judge.
Dave Gerr is a naval architect based in New York City. His firm — Gerr Marine, Inc., founded in 1983 — designs a wide variety of yachts and commercial vessels. Dave is contributing editor for several boating magazines and is frequently published in many nautical periodicals.
This article was excerpted from two of Dave’s books. It is primarily from his newest, The Elements of Boat Strength, just published by International Marine/McGraw-Hill. The material on engine beds comes from an earlier book, also published by International Marine/ McGraw-Hill, 1992, The Nature of Boats. Gerr is also the author of the well-known Propeller Handbook.
Thank you to Sailrite Enterprises, Inc., for providing free access to back issues of Good Old Boat through intellectual property rights. Sailrite.com