A better way to store that extra fuel
Issue 55 : Jul/Aug 2007
Just about every time I step aboard a sailboat, I learn something. This was the case during our two-week cruise two years ago. The first thing I learned was that no matter how closely you monitor the weather and adjust your itinerary, the wind will most likely be on the nose. The second thing I learned was that, because you’ll be using your engine more often than you had planned, you need to know where you can get diesel along the way. Better yet, you should carry extra fuel on board.
With all that in mind, prior to last year’s cruise I began investigating the ways other cruisers store extra fuel. The majority of them have mounted a plank between two stanchions and then lashed a series of fuel cans to the plank. While that may appear to be a good solution, it doesn’t work in all instances. The length of the boat, the width of the sidedecks, and the location of deck hardware, not to mention the headsail and its sheets, can add complications.
Since our cruise wasn’t going to remove us from civilization for an extended period, all we needed was the means to store an extra 5 or 10 gallons of diesel. It’s possible that I was overdoing it, but I’m an Eagle Scout and I like to be prepared.
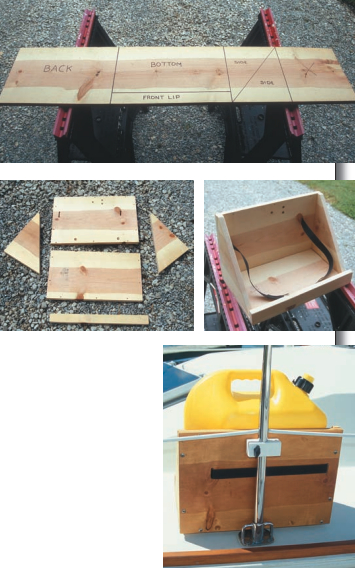
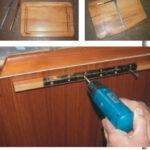
Over the winter months, I had added a series of shelves in our attic to organize all that stuff we keep up there and never use. After the project was complete, I had a leftover 4-foot piece of 1-inch by 12-inch pine shelving. Perfect. I measured my fuel can and I drew out the components of my new fuel-can caddy on the board. This consisted of a base, a back, two angled sides, and a front lip.
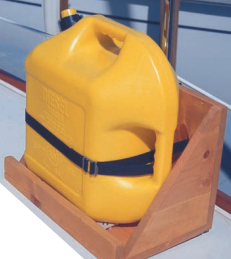
To secure the caddy to the boat, I used a single, quick-release, rail-mount bracket. A belt of nylon webbing was fastened around the caddy and the fuel can to keep it snugly in place. To help with drainage, I set a scrap piece of Dri-Dek under the can and drilled two angled holes at the base of the caddy at the back.
We had a wonderful time on our cruise last year and made several new friends. Our fuel caddy saved us from the potential embarrassment of running out of fuel. And the wind was on the nose.
Thank you to Sailrite Enterprises, Inc., for providing free access to back issues of Good Old Boat through intellectual property rights. Sailrite.com