Maintaining a toasty cabin in freezing weather
Issue 55 : Jul/Aug 2007
Winter weather couldn’t keep me separated from my project boat. I spent a couple of working weekends on Maruska, my Pearson 365, in January and February. One of the projects that I took on when the weather outside was frightful was the insulation of the hull, since so much of the main cabin hull was exposed at that point in my refit.
I figured this step would thermally insulate the boat, allowing for an extended sailing season. It would help reduce the Espar heater’s fuel consumption and make the boat somewhat cooler during the summer. Because Pearson 365 hulls were solid layups, insulating would reduce interior condensation and damp the noise below while sailing.
I had several priorities for the insulation material I selected. It would have to be relatively inexpensive, easy to install, and durable. It could not absorb water and must be fire-retardant. I considered spray-on foams, which typically do not absorb water and have excellent thermal insulating values. The draw-back was that I could not install the foam myself, greatly increasing the cost of the project. I also feared that the spray-on method would not yield a neat end result.
Next I considered fiberglass batt insulation. It has great thermal numbers but retains water like a sponge and would be difficult to attach to the hull. Next I discarded as impractical rigid foam boards since they’re inflexible.
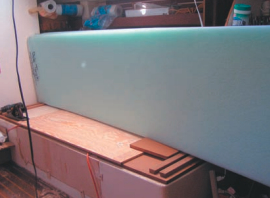
Foams wouldn’t bend
None of the foams I researched would bend to meet Maruska’s hull shape without breaking. The only way to achieve a suitable bend was to add kerf cuts or slots to allow the rigid sheet to bend, similar to what is done with hull-coring materials. Kerf notches would be time-consuming to install and create voids.
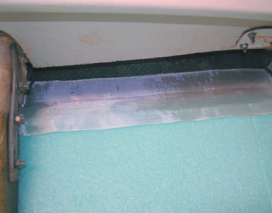
I discovered a polyethylene sheet that would bend nicely, had adequate thermal insulation qualities, would not absorb water, was lightweight, and had excellent fire-resistance properties. It was also available in any thickness in 1⁄2-inch increments and provided an attractive and durable finished surface. This product, called Stratocell, is typically used as a packing material for shipping applications, due to its resilient properties and its relatively inexpensive cost. Stratocell weighs 1.2 pounds per cubic foot and is a polyethylene foam board manufactured by Sealed Air Corporation.
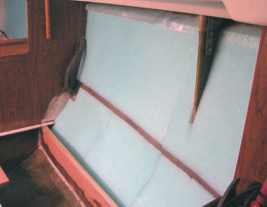
Because I was very concerned about fire resistance, I tried to light a sample using a propane torch. When I did so, the Stratocell simply shrank away and gave off a pleasant crayon-like smell. Thermal Foams of Buffalo, New York, provided the material in 48-inch by 108-inch sheets, 1 1⁄2 inches thick, for $46 each. Thermal Foams was able to slice the sheets lengthwise so they’d fit inside my vehicle for transportation to the boat and then down the companionway once I got there.
Contact cement
I tested several methods for affixing the foam to the hull and settled on contact cement. This cement is typically used to glue high-pressure laminates, such as Formica, to your kitchen countertop. I also tested and considered using vinyl floor tile cement, but had concerns about the drying time in the cold weather. Even though the interior of the boat was shirt-sleeve warm, the interior surface of the hull was only a few degrees above the cold outside temperatures. My tests showed that both adhesives provided a one-shot, super-sticky, permanent bond that did not attack the foam.
An advantage of the flooring adhesive was that I only had to apply it to one surface, allow it to dry, and press to stick the foam into place. It also created a lot less smell and was not flammable. Contact cement must be applied to both surfaces, is very flammable before it dries, and in a small space like a boat, is a respirator-only product. For my application, however, the advantages of contact cement outweighed the off-chance that the floor glue wouldn’t set up in time during my short work weekend. I have used floor adhesive in the past for its intended purpose and have waited for hours for it to properly dry at room temperature. If I were doing this installation during warm weather, I would have gone with the floor goo. Both adhesives are available at big-box home-improvement stores.
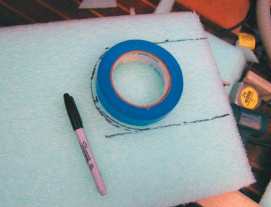
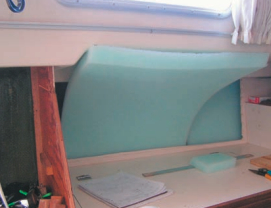
Stratocell proved to be excellent to work with. It cuts like Styrofoam with simple woodworking tools or a sharp utility knife, but it does not flake, break, chunk out, or rip. For the majority of the big cuts, I used an electric jigsaw. For little adjustments I hand held a hacksaw blade. Both methods made smooth, fast, and accurate cuts.
Pre-cut sheets
I dry-fitted everything in each section before opening the glue can. The sheets had been pre-cut to 24 inches wide. I cut the tops of each panel on a 45-degree bevel where the hull met the deck. I kept it shy of the deck by about an inch, since I hoped that the bevel would direct any water that might come from a leak at the deck joint or rail fitting down the front of the insulation sheet, instead of finding its way behind it. I spread 6-inch fiberglass cloth tape over the foam’s top bevel and on the hull to provide a waterproof cap. I wetted this tape cap with epoxy, pleased to see that it did not attack the foam at all.
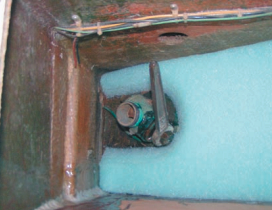
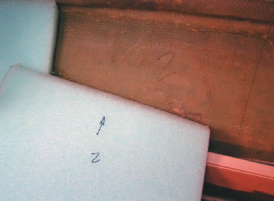
One word of caution: label every foam panel on the back side with a permanent marker and identify its corresponding location on the hull. While you’re at it, do not forget to show an “up arrow.” I even marked the location of each foam joint on the hull by simply drawing a line along each panel as I dry-fitted it. Because contact cement is a very sticky one-shot adhesive, it is impossible to rotate a panel or slide it over an inch or so once it has come into contact with the hull. Therefore, the labels on the back side become very important. Because the foam is compressible and resilient, similar to the spongy feel of a school gym mat, I made each piece a bit larger and “sprung” it into place for a nice tight fit to the bulkheads and the next corresponding foam piece.
Hour to complete
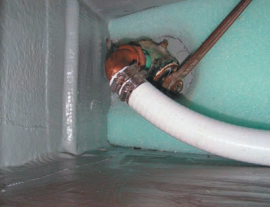
Cutting and fitting the foam on the port side of the main cabin took me approximately an hour to complete. I completed the dry-fit on the port side, applied the glue to the back side of the foam and hull surface, took off my respirator, slid open the hatch, and took a walk around the marina for about 15 minutes while allowing the glue to dry. When I returned to the boat, I pressed the foam panels into place in less than five minutes. Total material for the port side was 1 1⁄4 full-sized sheets. The result was a safe and cleanable surface that greatly enhanced the thermal insulation properties of the hull.
After I had completed both sides of the main cabin, I compared the surface temperatures between the uninsulated bare hull and the surface of the foam using a hand-held infrared digital pyrometer. The temperature differential averaged 17° F between the surface of the foam and the surface of the bare hull, with an inside cabin temperature of 71° F, an outside temperature of 26° F, in about 10 knots of wind.
Now, even on the coldest days, the Espar heater throttles back and maintaines the interior temperature with ease. I would recommend this project to anyone with access to the boat’s hull surface. The only cold part of the boat’s interior now is the cabin sole. If I could figure out a way to slither under the sole to insulate it, I gladly would.
Thank you to Sailrite Enterprises, Inc., for providing free access to back issues of Good Old Boat through intellectual property rights. Sailrite.com