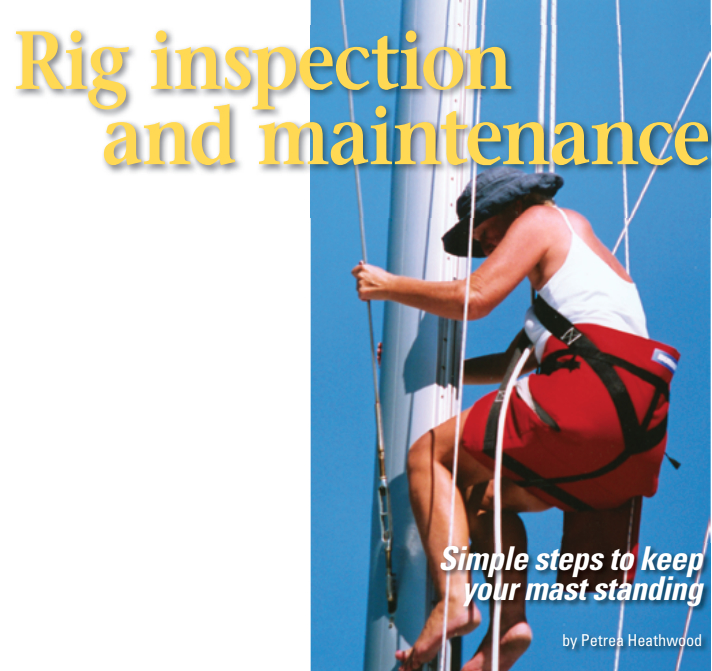
Simple steps to keep your mast standing
Issue 59 : Mar/Apr 2008
A strong, seaworthy rig is an integral part of any cruising boat, but inspection and maintenance of the rig is often overlooked. This is more likely due to lack of knowledge than intentional neglect. Based on my experience as a professional rigger, I’d like to suggest some practical steps for a rig inspection and maintenance program for the typical sailboat owner. Following these steps should help you determine whether your rig is in good general shape. This discussion is meant as a guide; if you have any doubts about any component of your rig, please seek a professional opinion.
I’ll focus on the vast majority of production boats that have aluminum spars and stainless-steel wire rigging, and I’ll assume that you leave your mast standing and must do your maintenance tasks on a vertical spar. I’ll also assume the rig is correctly specified and constructed with appropriate materials.
Apart from neglect, the main threats to rig integrity are wear and tear, fatigue, corrosion, and UV degradation. I sail in the tropics, so corrosion and sun damage figure more prominently in my experience than for people in higher latitudes. It’s important to keep the effects of hot weather in mind if you will be heading south in your good old boat.
Running rigging
Running rigging consists of all the parts of your rig that move, such as halyards and sheets. All running rigging is prone to wear and chafe. Each part should be inspected regularly and the reasons for chafe should be eliminated. Chafe is caused by movement and will occur wherever a line rubs against something. Lines should lead fair and run over adequately sized, well-lubricated sheaves. Get into the habit of checking all visible components whenever you’re sailing. Train yourself to notice if anything is amiss: a line leading incorrectly, a twisted block, a sheet caught up, and so on.
End-for-end your lines
To improve the lifespan of running rigging, it’s worth end-for-ending each line at least once to even out the wear. This is easy with sheets and furling lines but it’s also fairly simple to do the same thing to internal and external halyards and reefing lines.
Use a rug hook to thread the end of a strong cord through the end of the line you’ll reverse. Tie it with a secure knot, like a bowline, and then tape the join so it won’t catch on anything. If you tape toward the direction of the pull, the overlaps on the tape will cover each other, rather like the way you install roofing material from the bottom up to allow the overlaps to shed water. This helps to prevent the tape from catching as it’s pulled through.
Carefully pull the line out, leaving the cord in its place. Swap the cord to the other end of the line and reverse the process. If you have a spliced eye on your halyard, it will have to be re-done at the other end. You’ll need some extra length available for this. (Note: Splicing old line is difficult. –Eds.)
Caution: always keep tension on both the line and the cord to prevent them from snagging. This is especially important with halyards as the weight of the heavier line will drag the cord away from you too fast and could cause it to snag somewhere.
All-wire and rope-to-wire spliced halyards
Check wire halyards carefully for meat hooks, or broken strands in the wire. Run a rag along the wire rather than risk injury to your bare hand. It’s worth flexing the wire sharply in the wear areas. This will pop any hidden breaks into view. Meat hooks are an indication that the wire needs replacement. The areas most prone to fatigue are:
- where the wire bends over the masthead sheave in the hoisted position;
- right above the swage sleeve; and
- at the apex of the thimble.
If the wire is still supple, it will return to shape when you straighten the bend. If it remains kinked, it has reached the end of its useful life and should be replaced. You can actually feel the difference between “dead” and supple wire.
Rope-to-wire spliced halyards obviously cannot be turned end-for-end, but if the rope is still in good order, it’s possible to splice new wire to its tail. Providing they have a little extra length, you can end-for-end all-wire halyards. The end on the winch will have acquired permanent kinks and flat spots from being wound around the winch drum. Because these kinks won’t run past the masthead sheave, you’ll need to cut back to good wire.
If you can, use proper cable cutters to cut any wire. Alternatively, tape the wire tightly at the point of the cut, hold it in a vice or use Vise-Grips and cut it with a hacksaw, using a fine-toothed blade (about 24 teeth to the inch). Do this away from your deck since fine steel particles from the saw blade will turn to rust spots wherever they fall. Steer clear of bolt cutters, which will mangle the end of the wire. If the wire strands spring apart when the tape is removed and resist being re-formed to shape, the wire is fatigued and should be replaced.
Thread a strong cord into the wire using a hollow splicing fid. Tape it securely into a neat parcel that won’t snag on its journey through the mast. Pull the wire through as described previously. The swaged eye will have to be cut off and re-made on the other end of the wire.
To replace the swaged eye, be sure to use the correct type and size of swage sleeve. Sleeves for stainless-steel wire should be copper or tin-plated copper. Sleeves for use with a hydraulic swage press are oval. With a hand swager, the sleeves should be a figure-eight shape. I’d recommend having the swages done with a hydraulic machine to ensure their strength.
Halyard end-fittings vary from the bare end of a rope to spliced- or swaged-on shackles or snap-shackles. Now is a good time to check whatever fitting you have. Ensure that it is undamaged and working smoothly. Snapshackles may benefit from a drop of light machine oil applied to the spring mechanism. Be frugal here — you don’t want your snapshackle to fly open because it’s over-lubricated.
Next the standing rigging
Standing rigging includes all the fixed components, usually 1 x 19 wire, which hold the mast or masts in place. Standing rigging generally fails first at the lower ends, so this is the logical place to begin your inspection. If the lower ends are in good shape, it is normally safe to assume the rest is OK also. This doesn’t let you off from inspecting aloft, but unless you are about to set off on an extended voyage you don’t need to remove each piece of rigging for inspection if the bottom ends are satisfactory.
Working on one piece of rigging at a time, release the lock nuts or pins on the rigging screws (turnbuckles). Mark the rigging screw thread with tape so you can replicate this setting after checking the wire. Turning the barrel or adjusting nut clockwise will loosen the tension. Unscrew them until you can release the wire from the rigging screw. Rigging screws tend to seize if not lubricated regularly so if there is resistance, apply penetrating oil or WD-40 to the threads and allow time for it to work. Caution: do not loosen any piece of rigging completely unless you are certain there is something else holding the mast in its place.
Having visually checked the wire for rusty or broken strands, make a sharp bend at the lower end just above the terminal fitting. This may reveal broken strands hiding just within the end fitting. Straighten the wire again. Supple wire in good condition will return to its former shape; fatigued wire that needs replacement will retain the kink.
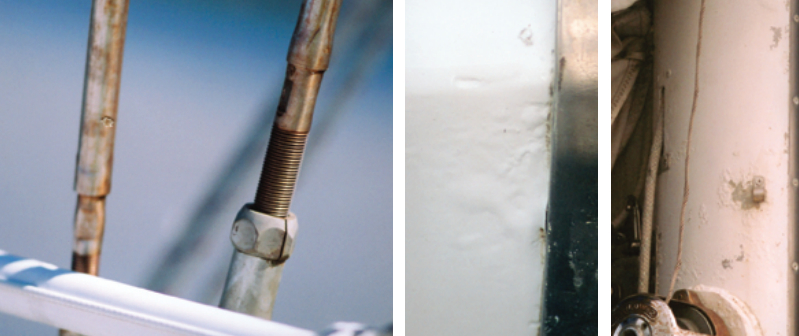
Next, inspect the terminal fitting on the wire. It may be a roll-swaged end, Norseman or StaLok fitting, or a spliced or swaged sleeve made around a thimble. Check for rusting cracks in the fitting, uneven wire strands, or (in the case of an eye around a thimble) broken strands of wire at the bottom of the eye.
The rigging-screw assembly should turn freely and the threaded part should be perfectly straight. This is a problem area on trailerable boats since the rigging screws can get caught and bent while raising the mast. Check all clevis pins and replace any that show signs of wear or corrosion.
While the rigging is disconnected, have a look at the chainplate to which it was attached. Signs of trouble here include cracking, rust stains, and elongated clevis-pin holes. Any of these warrant further inspection of the chainplate, both above deck and internally, especially if there have been leaks in this area.
When re-assembling the rigging screw, lubricate the threads with marine grease. A little goes a long way and is only useful where the threaded part contacts the rigging screw barrel. Cotter pins that have been correctly installed can be re-used, but since their cost is infinitesimal in the scheme of things, it’s a good idea to replace them with new ones.
Black and red stains
Telltale black and red stains are hard to miss. Black stains emanating from any part of your rigging indicate metal grinding away, usually a working part like the gooseneck or sheave boxes. Rust stains show stainless steel breaking down in some way. Check for cracks in the fitting. Even international brands sometimes use inappropriate grades of stainless in parts of their fittings. Rigging-screw clevis pins are a common culprit. Be wary also of inferior brand-name copies. I’ve recently seen Asian-sourced copies of a major U.S.-brand rigging screw that failed in less than a year.
Mast and boom
Once you’ve worked your way around all the rigging, have a close look at the spars. Check that the drain holes at the mast base are not blocked with debris and that the mast base itself is clear of accumulated detritus. If the mast is keel-stepped, remove the mast boot and check the spar for signs of cracking and corrosion.
Aluminum mast and boom sections should be free of corrosion. Corrosion is mostly found where there are dissimilar metals, in this case stainless-steel fittings on aluminum. Once pitting has occurred, it is difficult to repair and beyond the scope of this article. Remedial treatment to prevent worsening of the problem is within the ability of most owners, but major corrosion significantly weakens the spar and should be dealt with professionally.
To prevent further corrosion, remove the offending fitting and brush off the corrosion using a stainless-steel or brass wire brush. Never use an ordinary steel wire brush; it will shed small particles that will rust and stain your deck. You may need to use a revolving stainless-steel or brass wire brush attached to an electric drill to remove corrosion in areas of pitting. The idea is to get as close to shiny metal as you can. If the fastening holes in the aluminum are enlarged from corrosion, you’ll need to rebuild the area. This is usually a job for professionals. If the pitting is minor, re-bed the fitting using either a physical barrier like thin rubber sheeting, Duralac anti-corrosion compound, or a combination of the two. Use Duralac or an equivalent barium chromate paste on the thread of all stainless-steel fastenings.
If you have to remove frozen machine screws, here’s a tip: if the fitting has caused corrosion, you will usually find the fastening screws are also seized in place. Instead of forcing them free, which results in damaging the head or breaking the thread, try a generous application of WD-40. Allow time for it to soak in — maybe overnight. If this doesn’t work, judiciously applied heat should do the trick.
Depending on the size and position of the fastening, this can be done with the tip of a soldering iron or small butane burner. You need concentrated heat; the idea is to heat the fastening and break it free from the surrounding corrosion. A combination of heat and WD-40 can be very effective. Be careful not to melt internal halyards or concealed electrical wiring. Another tool worth trying is an impact screwdriver. With any of these methods, the first step is to soak with WD-40.
Paint and corrosion
On painted spars it’s common to see corrosion under the paint. This appears as chalky bubbles in the paint. The problem will continue until the corrosion is removed. This type of corrosion is usually found in conjunction with fittings of dissimilar metal to the spar or where the aluminum has been inadequately prepared for painting.
The short-term remedy is to scrape the paint away from affected areas. It will look unsightly, but cosmetics are less important than preventing further corrosion. Eventually, the corrosion must be cleaned up, its cause removed, and the spar repainted (see article in Good Old Boat, January 2005).
Going aloft
To complete a thorough check of your rig you’ll need to go aloft. The options for maintenance aloft range from a basic inspection to removing each piece of rigging to check its condition and attachment point. If you feel the latter is necessary, it’s probably better to pull the stick out and do a thorough check at ground level.
The first consideration in going up the mast is who will go up. Obviously, the lightest member of the crew will be easiest to hoist, but there is no point sending your teenager up to check the rig unless he or she knows what to look for. The safety of the rig is the skipper’s responsibility, so the skipper should usually be the one to go up.
Your first time?
Climbing a mast can be daunting if you’ve never done it before. I disagree with the conventional wisdom not to look down. Once you’ve sorted out the safety aspects and the method you’ll use to go aloft, my advice is to take it in small increments, getting used to the height as you go. Use your safety line at every stage so you can’t fall if something goes wrong on deck.
Your bosun’s chair should be strong and in good condition. Even if it’s new, don’t assume it’s safe. There have been incidents of stitching giving way on new, brand-name chairs. Inspect and test the chair before trusting it. Even in my old faithful bosun’s chair, I like to bounce a bit just above deck level before climbing any higher.
Use a conventional cloth-type chair with a solid seat. Soft-bottom wrap-around designs are promoted as having a snug fi t, and this is certainly true. While they’re light and compact to stow, for extended work aloft these chairs are uncomfortable and restrict circulation to the legs. Worse still are the adapted rock climbers’ harnesses used by professional sailors on the pointy end of big racing yachts.
Choose a chair that fits you, neither too small nor too roomy. It should have large tool pockets. Make sure the hoisting point is low enough to allow you to reach the masthead. My own chair has secondary lifting rings at hip height. To get right to the top of a mast, I can cinch these together with a spare line and use it to hoist myself the last few inches.
Going up and down
Climb the mast only when the boat is afloat. Most boatyards ban the practice of climbing the mast of a boat on the hard. A keelboat propped up ashore is defying gravity to begin with, and your weight jerking around aloft can cause it to lose balance. Since older painted masts are usually chalky, wear overalls or similar gear. Some people like the feel of climbing barefoot, but I protect my feet with shoes and socks.
Attach two halyards to the chair using separate shackles or knots. Don’t trust snapshackles for this job. Use a safety line from the chair to the mast at all times. Three to four feet of 1⁄4- or 5⁄16-inch line tied tight round the mast can be slid up or down manually but won’t slide down if weight is thrown on it suddenly.
Assign two people you trust to control and keep the halyards taut. The people tailing the halyard must look up at the person in the chair instead of down at what they are doing. Keep the area below clear. Don’t allow anyone to stand beneath a person working up a mast.
Once the chair is set up for hoisting, climb in and try it under your weight. I prefer to climb up and have the halyard tailers keep the halyards tight as I go. It can help enormously if they coordinate their pull on the halyard with your upward pull. Alternatively, you can just sit in the chair and have them winch you up if you’re not fit. Either way, take it easy; don’t overexert yourself. Halfway up the mast is no place to have a heart attack.
At each stop on the way up the mast, keep your safety line attached and have your assistants tie off the halyards. While you are at the top of the mast, your assistants should flake down their halyards, ready for the descent.
When you are ready to come down, the halyards must be untied without losing any tension. It’s disconcerting to be dropped even a few inches when the halyards are released.
The primary halyard should take the weight while the secondary halyard is kept slightly slack. The reason for this is friction. As you descend, the halyard is eased out smoothly. It must be released under full control without sticking on the winch. Two turns on the winch is the maximum needed; one is usually enough. Too many turns will cause the halyard to stick, resulting in a series of surprising bounces as you are being lowered.
Doing the job
I check the rig as I climb. It makes the climb easier and seems logical. What to look at depends on the layout of your mast. I’ll try to cover a “typical” mast. You’re looking for much the same things as you did at deck level: corrosion of dissimilar metals, cracked fittings, seized sheaves, worn pins, stranded wire, and bubbled paint.
Just above the gooseneck may be a group of sheave or exit boxes for halyards. Check that fastening screws are tight but not seized and that sheaves turn freely and are not worn on one side. If you have mast steps, check their fastenings. Spinnaker or whisker pole tracks should be well secured and not bent or damaged. Slides should run freely.
The attachment points for the lower shrouds will be just below the lower spreaders. Ideally, you will have someone loosen each shroud so you can check the clevis pin and tang for wear. The bolt holding the tangs should be straight. Check that the nuts are sitting flat and not tilted slightly toward the mast at their top. This would indicate a bent bolt, which needs to be replaced. Caution: when replacing bolts that go through the mast, take care not to dislodge the compression sleeve inside the mast. It will be visible when you remove the nut and tang.
If T-balls are fitted instead of tangs, check the T-ball for cracks and that the receiving plate is sitting snugly against the inner mast wall. Black marks around the rivets here indicate movement, which could be serious.
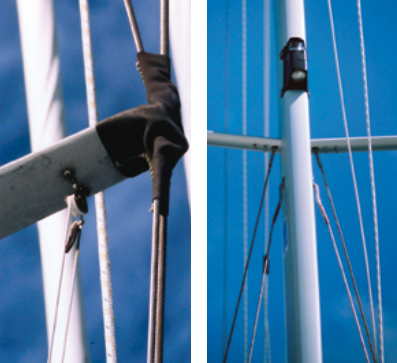
From this position partway up the mast, check the base of the spreaders for cracks and signs of movement. Move out to the spreader end and remove the spreader boot or covering tape. The cap or upper shrouds should be held to the spreader ends in some way. This could be a wire seizing, or a clamp welded to the end of the spreader arm. Undo the clamp and check for corrosion where the wire meets the aluminum. Apply Duralac paste, if necessary, and re-clamp the spreader end. Replace the boot or tape. If you have intermediate or diagonal shrouds terminating here, undo and check them as described earlier.
Often, the lower spreaders are the site for a steaming or deck light. If it works, leave it alone. If not, now’s the time to take it apart and find out why.
As you climb farther up, there may be a second set of spreaders to be dealt with in similar manner to the first. Somewhere between the lower and upper spreaders there may be a fitting for a spinnaker pole topping lift and a tang for an inner forestay or babystay. Check these and lubricate any exit box associated with them.
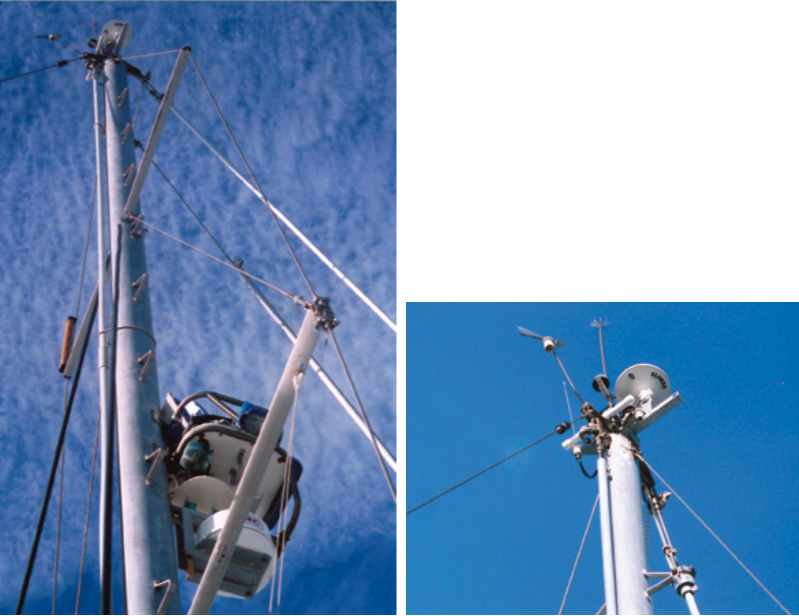
At the top of the mast, check the pins for the forestay and backstay and the tangs and bolt for the cap shrouds. If you have a furler, check that it is not wearing the wire of the forestay and that its top cap, if any, is in place. By moving spare halyards over the sheaves, you can see if they, or their pins, are worn. Alternatively, poke the sheaves upward with a screwdriver. Movement here indicates a worn sheave hole or pin. Check that the sheave pins are straight. If they’re OK, lubricate them with WD-40. I say WD-40 because it comes in an aerosol can. Light machine oil is better but much harder to apply in this situation.
Up at the top there may be all sorts of antennas and lights. Leave them alone unless there is a known problem. Try reaching up to whatever lights you have there just to find out if your bosun’s chair makes this possible. Many chairs leave you just short of the top. In that case, you need to cinch yourself up higher on the safety line.
Now you’ve completed the work, relax and have a look around before preparing for the descent. You will have briefed your deck crew to lower you slowly and steadily. If they are new to this, remind them to look up and watch you as you descend.
The verdict
Once you’re safely back on deck, you can be satisfied that you know the condition of your rig from top to bottom. At this point you may still decide to enlist professional help. If you do take that step, the work you’ve done will help you evaluate the advice of your rigger.
Petrea Heathwood is a yacht rigger and long-term liveaboard cruising skipper. She has been involved with cruising and racing since 1967. She operated her own yacht-rigging business in Brisbane, Australia, before retiring to cruise full time. These days she enjoys gunkholing along the Queensland coast in her Norwalk Island Sharpie 31, Talisman.
Thank you to Sailrite Enterprises, Inc., for providing free access to back issues of Good Old Boat through intellectual property rights. Sailrite.com