Gearing up to build a catamaran at home
Issue 71 : Mar/Apr 2010
In the last issue, Dave Martin wrote about the chain of decisions that led to his building a catamaran in his garage. In this, the second of two articles, he examines the “time factor” and explains why he chose to build it in plywood.
In the spring of 2008, I purchased the building plans for a James Wharram Tiki 30 catamaran. There were many facets to the process by which I chose this design but, in the end, I basically wanted a strong, relatively inexpensive boat that I could build in about a year.
I focused on building time because, more than a lack of money, lack of time is often the reason a home project founders. It’s a huge commitment, and puts building a boat into the same category as running a small business. If I don’t show up regularly, remain focused, and make sacrifices, the project will fail. When distractions come along, I must set them aside, just like at a real job. For me, progress is addictive.
Each designer whose boats I researched provided estimated building hours for completing the project. Bear in mind that the actual hours taken will vary, depending on an individual builder’s experience, the type of tools available, work-space constraints, and the level of finish desired. However, these estimated hours do help define the time commitment relative to each design and the building methods employed.
My Tiki 30 takes an estimated 1,000 hours of building time. From experience, I’m confident that I can maintain an average of 20 hours per week without getting burned out or feeling as though I’m missing out on other activities. Organization is important. Before I begin any task, I ensure that all the materials are on hand so I don’t waste valuable hours running around town or waiting for the UPS truck to bring supplies.
Just like finding the money to buy materials, finding the time to build takes careful budgeting. Consider a 35-foot boat that will take an estimated 3,000 hours to build. This equals a year-and-a-half of dedicated 40-hour weeks. If weekends and the occasional evening are the only time available, 20 hours a week is realistic. The build time is now three years . . . and that excludes any allowance for “free” time. This type of scrutiny might tarnish a little the romance associated with building a boat yourself, but your success relies on a firm understanding of the huge time commitment needed to see the project to completion.
To stay motivated, I try to complete something each day. A step forward, no matter how minor, is progress. On days when I’m not able to devote much time to the boat, I set micro goals that are realistic. During the tedious moments of sanding and other repetitive tasks — when it seems the boat will never be finished — I step outside, take a breath of clean air and think about the tangible date of completion. Anticipating the finished boat keeps my energy flowing.
Calculating costs
Designers’ websites typically post enough information to interest a home builder but never give enough detail to allow you to figure all the costs involved in completing the job. To get to where you can calculate the bottom line, it’s essential to purchase study plans at nominal cost. These include a materials list. Actual building plans can cost many thousands of dollars, so it’s wise to find out what’s involved before committing.
Study plans are an essential step for other calculations in addition to project costs. Armed with accurate information, you’ll find it easier to compare the various designs and building methods. For example, after evaluating several boats, I was surprised to learn that a 35-foot catamaran requires roughly three times the materials of a 30-footer. As a general rule, that also means it will take three times longer to build.
Calculating costs for hull materials, rigging, sails, and systems is straightforward. But remember to include peripheral items such as fillers, brushes, rollers, solvents, fasteners, tape, sandpaper, primers, and paint. Also include tools, workshop improvements, and heat. A prudent builder will tack on a 20-percent waste factor for materials to ensure there are no financial surprises or shortages.
Watching weight
Another poignant consideration when choosing a catamaran design is knowing how much weight the boat can carry. Catamaran designers provide two figures for displacement. The first is the boat’s “empty” weight: the weight of the hulls, mast, rigging, and engine. The second and most important figure is often called the maximum load limit: the allowance for people, personal gear, systems, provisions, and liquids. It all adds up quickly, making it important to calculate the weight of everything you plan to have on board.
If you want a well-appointed interior with loads of trim and complicated systems with multiple batteries, inverters, watermaker, water heater, and refrigeration, the extra weight will cut into the maximum load limit. This will drastically reduce the boat’s ability to carry essential cruising gear and provisions. A longer boat will usually support more weight, but it’s not necessarily that simple; sometimes two boats of the same length will have different load limits because of their hull shapes.
Monohulls have more leeway with regard to overloading. Although weight is essential to increase a catamaran’s ability to resist a wind-induced capsize, an overburdened cat quickly loses performance. Safety and comfort are also compromised if the narrow hulls are hogged down below their designed waterlines.
Choosing a design is an exhilarating exercise, but it becomes an economic balancing act that demands careful thought and a clear vision of the final product.
Material choices
A home builder has many established building methods and a variety of materials to choose from. Each has advantages for the amateur builder relative to time, cost, and maintenance. Ignoring science, I believe building materials and methods must also be evaluated on a scale of enjoyment. The boat is going to dominate my life for thousands of hours. If I dread the daily labor, chances increase that I’ll rush the project and end up with an inferior product, or even abandon it.
One option for the home builder is to use a core material, such as Core-Cell, Klegecell, or end-grain balsa wood, and sheathe it inside and out with fiberglass fabrics and resin.
Cored hulls are moderately lightweight, extremely stiff, require little long-term maintenance, and typically have higher resale values than non-cored hulls. Cores also provide insulating values that help deaden sound and provide resistance to interior condensation. Unlike balsa, synthetic core materials will not absorb moisture or rot if water infiltrates.
However, a cored hull will be labor intensive and expensive to build because of the need for temporary molds and jigs. These take time to make and use an abundance of wood.
Cored laminates have structural drawbacks in that repeated stress cycling can cause the cores to shear and cored hulls are prone to severe laminate failures after a collision.
But the biggest disadvantage to constructing a boat using laminates is the serious impact that these materials can have on the health of the home builder. In almost every stage, the air in the workshop is charged with harmful toxins, particulate matter, and odors.
Cutting fiberglass cloth with scissors is simple, but it creates millions of tiny glass shards that float in the air and stick to every surface. These are impossible to vacuum away and can permanently contaminate a workspace. Wetting out fiberglass cloth with resin is labor-intensive, tedious, messy, and will dominate the majority of construction.
Sanding cured resins and cloths is infinitely itchy and will coat the inside of a workspace with a fine layer of toxic fiberglass dust. Hundreds of hours of grinding and cutting will introduce these particles into every recess. An exhaust fan helps, but it simply moves the material outdoors where it flies with the wind and pollutes the yard. Elaborate vacuum systems, air exchangers, and dustless grinders can help cut down on the fumes and debris but these systems are not cheap. On top of all this, styrene-based resins reek. Polyester resin is pungent and vinylester resin makes polyester smell like roses.
When I evaluated the possibility of using laminate construction, I thought back over the years I have spent in shops where fiberglass boats were under construction. Each day, I had to put on a paper suit and respirator and tape gloves over my hands. Even with all this preparation, my clothes and hair would become saturated by fumes, my car stank, and I had to strip off my clothes before entering the house at the end of a workday.
With these wonderful memories, it didn’t take me long to reject fiberglass construction. Despite the advantages, I wanted to enjoy the entire process of construction and absorb the magic that comes from a hull that is taking shape. For me, this is as fulfilling as using the boat later on.
The plywood option
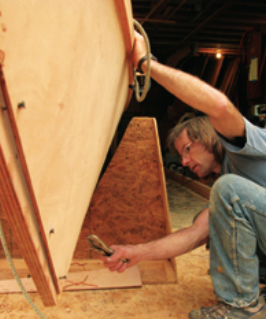
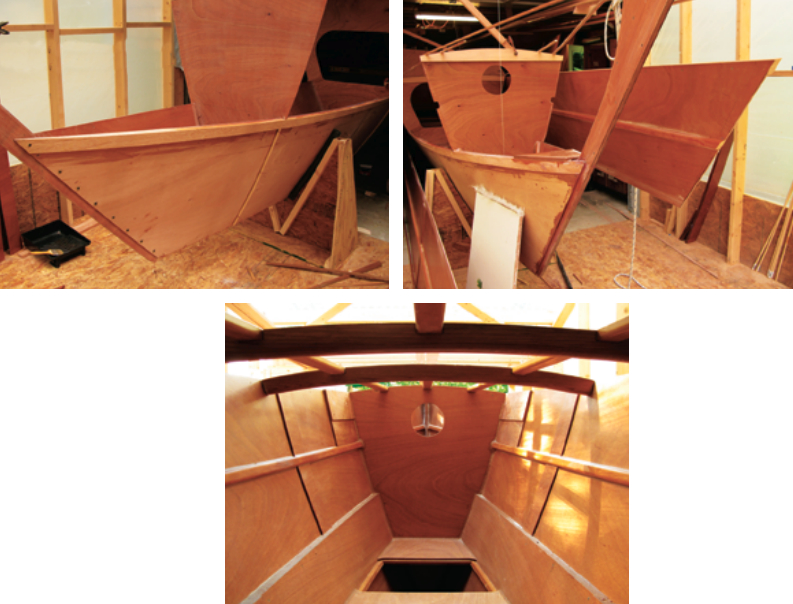
Plywood construction offers perhaps the quickest and least expensive way to build a boat. I chose the stitch-and-glue method to build my Tiki 30. Compared to cored laminates, plywood has superior point-loading characteristics, which makes it more durable in a collision. Delamination problems are subsequently less severe.
Other techniques suitable for constructing a catamaran of wood include strip plank and cold molding. Both methods produce fine hulls but they require more skill, more expensive materials, and more time. Just like cored hulls, they require the construction of elaborate and precise frame molds.
Unfortunately, plywood-built boats have a bad reputation. This is mainly a result of poor building techniques employed prior to the advent of epoxy resin. Early plywood boats utilized polyester resin, which does not bond very well with wood in a moist environment. This leads to delamination, water infiltration, and rot.
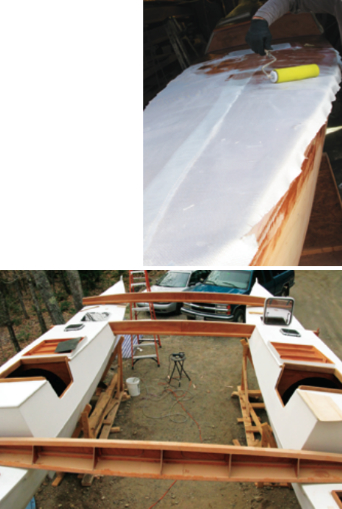
A modern plywood boat would more accurately be termed a plywood/epoxy boat. This is because every surface, even the interior, is completely saturated with at least two coats of epoxy resin. Most of the plywood is coated with epoxy before it’s even fitted into place. This is done to ensure that there will be absolutely no raw wood exposed anywhere.
Epoxy stabilizes the wood by sealing off the air, thereby preventing the wood from absorbing excessive moisture. To provide abrasion resistance, the external surfaces of the hull are sheathed with a layer or two of relatively lightweight fiberglass cloth. Although we are back to the fiberglassing argument, the level of cutting and grinding is minimal. A properly built and faired plywood hull will be indistinguishable from its fiberglass cousins and will last decades when properly cared for.
Quality counts
Any well-built boat starts out as a pile of top-notch materials. Don’t underestimate the value of good-quality plywood; it will enhance longevity and increase resale value. I did extensive research before purchasing my raw materials.
Expensive marine-grade plywoods use waterproof, boil-proof (WPB) glue and often have a fungicidal additive to resist rot. The surface veneers, where all the bonding takes place, are thicker. The internal plies are all of the same species to ensure stability. Some degree of moisture is natural in wood, and different species might contract and expand at different rates, creating internal stresses. Using a single species in the manufacture of the plywood is therefore important.
High-grade marine plywood sheets are also guaranteed to contain no internal voids, fillers, or plugs. Voids in a sheet create weak spots, which could undermine the overall structural integrity of the hull. Since catamarans are built with an eye to lighter scantlings, each piece of the boat must be of the utmost quality.
On my boat, I used Lloyd’s-registered okoume plywood (also known as gaboon). It is lightweight, has a tight grain, and finishes well when left bright. This is a huge timesaver for interior finishes. Other quality grades of ply, although heavier, are sapele and meranti. Marine-grade fir plywood is adequate, but the surface is very difficult to sand completely smooth and is not attractive for natural interior finishes. Over time, the grain of fir plywood can even leave print-through and be visible in exterior paint despite being covered with fiberglass cloth.
On my Tiki 30, the cost of the plywood is roughly one-seventh the price of the finished boat. Yet plywood accounts for 90 percent of the structural integrity. Trying to save a few hundred dollars at the outset will not pay off in the long run.
The other 10 percent of hull integrity is derived from wooden stringers and bracing. Sitka spruce has long been the gold standard of weight versus strength but it’s expensive. Instead, I chose to use clear, vertical-grained fir, which is equally as tough and was within my budget. Its disadvantage is that it weighs 18 percent more. I calculated that using fir instead of Sitka spruce would add around 100 pounds to the boat but would provide an $800 savings. So it was a tradeoff: I combined heavier, less-expensive fi r with lighter-weight more expensive okoume plywood and, the way I see it, came out even.
Finding quality wood to build with can pose a problem in some regions. Construction lumberyards and home-oriented hardware stores seldom carry an adequate selection of boatbuilding-quality stock. I found many companies on the Internet that sell and ship quality lumber and plywood, but the freight costs must be considered. Here in coastal Maine, all species of lumber and marine plywood are readily available. I bought 24-foot long, kiln-dried, rough-sawn fir boards and was able to save quite a bit of money by milling the wood myself.
Workspace and tools
Anyone who plans to build a boat would naturally want a large, dedicated workshop with plenty of space to build both hulls at the same time and still have room for floor tools, gluing tables, and workbenches. I fantasized about building a dedicated workshop like that until I calculated it would cost more than the boat.
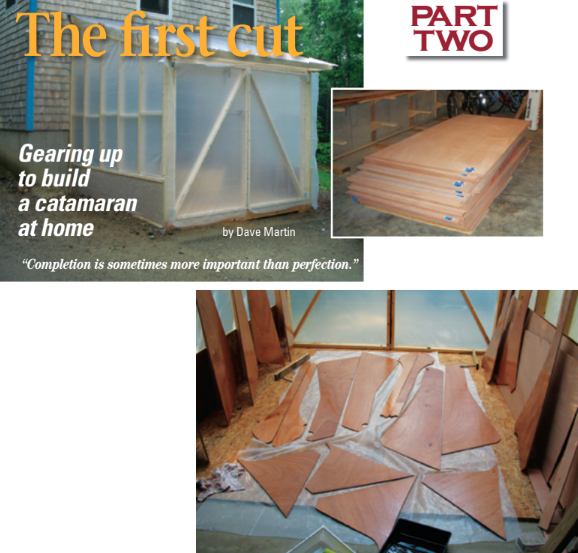
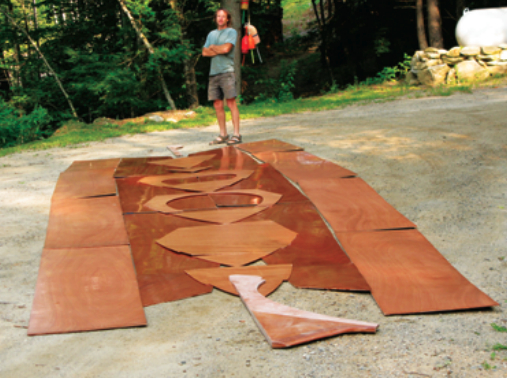
That’s when I happily cleaned out our garage and added a 10-foot temporary extension over the door. There is just space enough to build one hull at a time. Before I started, I precut all the major hull pieces and stringer stock and did all the major glue-ups while I had plenty of room.
For this project, I purchased an average-quality table saw and a 12-inch portable surface planer. These two tools are invaluable for milling stringer stock to exact design specifications. Electric hand tools that I consider mandatory are a jigsaw, router, palm sander, drill, power plane, and an 8-inch disc grinder. Power tools create better work, allay frustration, and save time. Time — there is never enough to go around.
Postscript to completion.
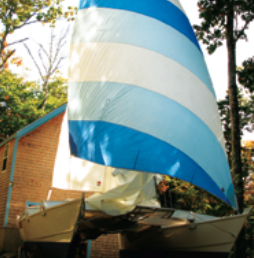
I began writing this two-part article in January 2009 when I deemed the boat to be about about 75-percent completed. The sub-zero temperatures outside my shop had made it too expensive to heat it adequately, so I gave myself a 4-month “vacation’” from the project. I had logged 1,000 hours of construction time between June and December 2008. Both hulls were built and faired, the beams were roughed together, the mast was finished, and the tillers were laminated. I figured I’d “git’er done’” in a total of 1,500 hours. That left me dreaming of a launch date in August 2009.
Wrong! In the end, I logged 2,000 hours. I underestimated the time required to fi t the beams into place, sew all the trampolines, and complete the rigging. I also came up against a major “time-versus-cosmetics” decision at the painting phase. I could have painted the hulls quickly and saved six weeks of laborious sanding. That amount of time saved would have represented launching “on time” but would have been a sorry conclusion to the enjoyment I’d derived from creating a boat from a stack of wood and a barrel of resin. I did not want to rush, just for the sake of meeting my arbitrary “deadline.” I was also not interested in a late fall launch and a hasty shakedown.
We will launch the Tiki in the Spring of 2010, with fair winds at our backs and an entire summer season to look forward to.
Dave Martin is a contributing editor with Good Old Boat. He and his wife, Jaja, and family live in Bremen, Maine, in a solar-electric house they built themselves. Dave is currently building a 25-foot Phil Bolger sharpie schooner (using plywood and epoxy) for Pemaquid Marine and Boatworks in New Harbor, Maine.
Thank you to Sailrite Enterprises, Inc., for providing free access to back issues of Good Old Boat through intellectual property rights. Sailrite.com