Seeing and feeling full-size is believing
Issue 89 : Mar/Apr 2013
What would you do if you had the chance to start all over and rebuild the interior of your sailboat? I would encourage you to do it. Before you build, however, you can avoid conflict and find consensus by taking advantage of full-scale mock-ups of the furniture.
I learned a valuable lesson while resurrecting our 35-year-old sloop.
The project was clearly my passion. After 30 years of marriage, Nancy and I are comfortable in our chosen roles. She would not be joining me during the construction phase but, since we would eventually be sharing the space on board, I wanted her to share ownership in the decisions. The opportunity presented itself once the hull was finished with her forest green topsides and ivory deck and it was time to fill the empty space below.
It is easy for a designer to prepare two-dimensional floor plans of a boat’s interior but, for many people, interpreting them is not so easy. The curvature of the hull and the various levels above and below deck produce surprises when the space is physically experienced. The knots on top of my head are proof. Whenever Nancy and I made plans to remodel our home, flat level floors and plumb walls were easy to follow on the drawings. Even then it helped to have a scale model or a full-size mock-up of the proposed space. It was fun to walk through a room design laid out in the driveway.
In one of those eureka moments, it occurred to me that I could do the same thing in Destiny’s hull where we could experience the awkward spaces and shapes as they are. It would also make it easier for Nancy to remain engaged in the process. First, I had to design an interior that would invite her participation.
Life in a small space
Cruising sailors manage to combine individuality and functionality within spaces smaller than college dorm rooms. My transformation to “cruising sailor” began long before I could call myself one. It began when I discovered the joy of sailing our 1986 Cal 25-II, Holoholo, on Penobscot Bay, Maine. Most of all, I enjoyed slipping into a quiet anchorage after a vigorous day’s sail.
Short of my adding the latest gadget that would do nothing to make us sail faster, be safer, or be more comfortable, the technical side of the 25-foot boat had reached its zenith. As a majority of our time spent on the water is on the hook, I had gradually converted the interior of Holoholo into a more comfortable home-away-from-home. That change of attitude led us to look farther afield and to the dawning of a newfound sailing enthusiasm in my spouse. It also led to the conclusion that we needed a bigger boat. This decision gave me the opportunity to create a living space that represented our individual personalities as a cruising couple.
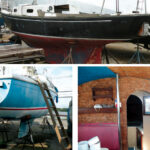
Our newly acquired Destiny had once been a liveaboard cruiser, extensively sailed on the East Coast and in the Caribbean. She’s a classic 40-foot double-headsail sloop with a centerboard and center cockpit, all features I felt were desirable for our purposes, gunkholing the coast of Maine and eventually cruising in the Caribbean. She had been custom-built in 1975 in Maine during the fiberglass revolution in boatbuilding. Even though she had fallen on hard times and not been afloat for several years, her hull and deck were solid as a rock. Fortunately, I was in no rush to complete the restoration, so I built a temporary shed and enclosed the long-term project under tarps.
If I was going to have confidence in the platform that would be our home for extended periods and under challenging conditions, I wanted to replace every wire, hose, and marginal mechanical device. My background as a technician and then cabinetmaker during a lifetime of sailboat ownership has provided me with the skills to do all of the work myself. To gain access, everything inside had to go, clear to the hull, leaving only the structural components in place. In the end, the intimate knowledge I gain will give me the confidence to take Destiny across oceans.
Paper plans
Every design begins with paper, and my experience making technical drawings has helped. In boat design, it’s critical to make layered drawings on translucent drafting paper. By indexing the drawings, one on top of another, you can coordinate the features on the different levels.
The first and most important step is to render the yacht’s profile, top view, and cross sections. Those outlines form the reference points for all that follows.
To begin the actual interior design, I referred to the renderings of the deck layout. Then I drew views of the space beneath the sole to locate the mechanicals, tanks, and through-hulls. Everything in between is the part where “necessity is the mother of invention.” It is the part where imagination is critical, where the “big picture” dictates decisions, but also where personality emerges.
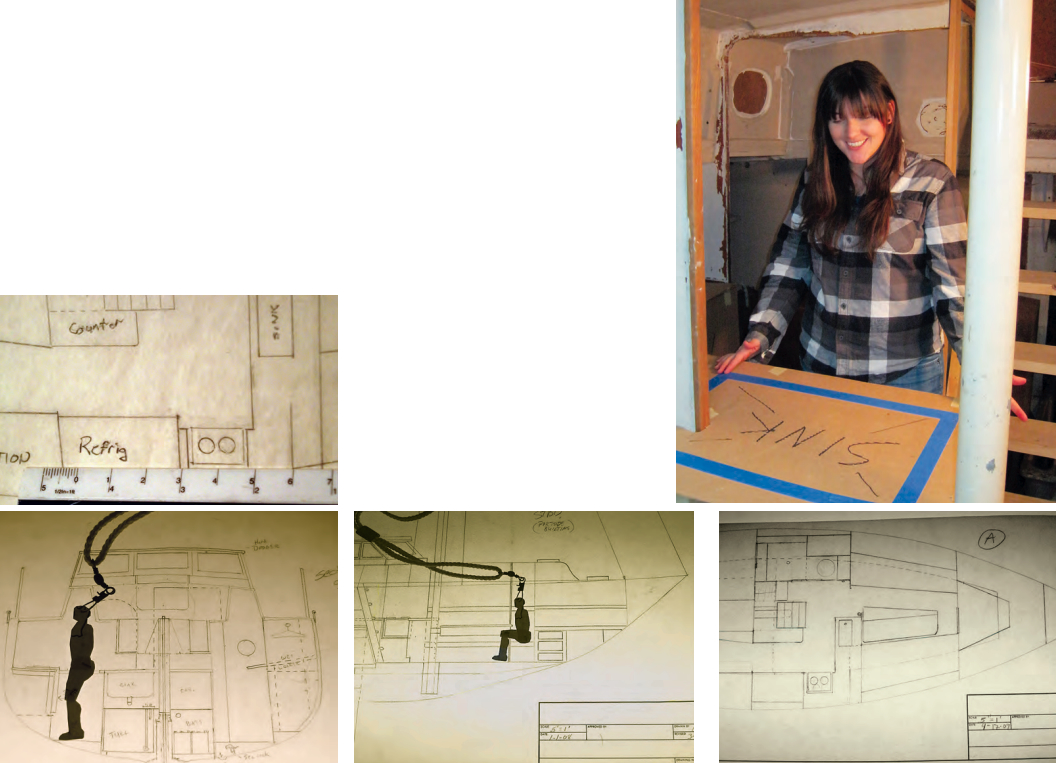
I established the locations of all the bulkheads, along with anything unmovable that had to share space with the proposed built-ins. I created a set of scale templates of the stove, head, shower, sinks, and other elements that might be moved during the design process. I used a copy of the hull profile to render port and starboard views of all of the internal features. I also made cross-section views at key bulkheads that showed the shape of the hull and how itwould affect the layout.
During the initial design stage, I was able to fine-tune the drawings to reflect discoveries made along the way. Since Destiny has a full keel, there’s plenty of space in the bilges for tanks. There is room below the cabin for 130 gallons of water. That weight (more than 1,000 pounds) is best kept as low in the boat as possible. The curvature of the hull made it challenging to accurately calculate the volume. It was easier to pump the space full of water and then extract the liquid into measured containers.
I would need to maintain access to those tanks and to later run vents and fills and feed tubing through the cabinets I am designing. In addition, I needed to push the sink cabinet and countertop partway past the saloon bulkhead to create an acceptable landing at the bottom of the new companionway ladder. To accomplish that, I designed a nook at the aft end of the starboard settee big enough for an occupant’s head and shoulders. That newly created space will contain a recessed light for the berth and accommodate plumbing and electrical runs. One idea often leads to several more.
With layered drawings, I can easily draw concepts on tracing paper and move them around to establish a good fit. Nancy compared the process to doing a giant jigsaw puzzle one piece at a time until everything fits together.
She was impressed when I created an articulating scale model of the human body. We enjoyed moving “Elmo” into place on the drawings to verify headroom and seat heights. Elmo allowed her to visualize the spaces and participate more fully, yet I knew she needed to see the design up close and personal. After years of design, I was ready for the full-scale mock-up.
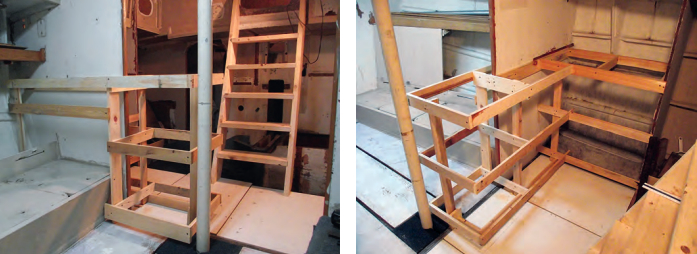
Full-size furniture
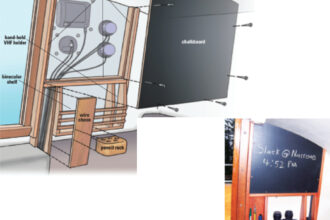
At that point in the restoration, the interior was empty except for the temporary sole and companionway steps. To build the mock-ups, I used a variety of widths of 1-inch pine. The cardboard 4- by 8-foot sheets commonly used to protect the higher grades of plywood are great for pattern making and creating artificial surfaces. Old cardboard boxes also provide useable material.
When only mocking-up the built-ins, I didn’t spend time scribing things to fit the curvature of the hull as we were more interested in their locations and our ease of movement through the interior. What will it be like for us to stand at the stove or the sink? Can Nancy get into the icebox easily? Maybe it would be better to have the opening on the front of the box. What is it like to walk from the V-berth, past the table, through the galley, and down the passageway to the aft cabin? I can also check for access to through-hulls, wire chases, and hose locations. It is better to discover these things before taking on the expense of construction and long before heading out to sea.

I used a framing square, tape measure, and straightedge to lay out the parts. Instead of using a level, I squared components off the permanent structure. Unless the boat has been placed on the stands exactly as if it were sitting on the water, a level and a plumb bob are of no help. A cordless drill and saw and a box of sheetrock screws were all I needed to work with the wood, and a razor knife, straightedge, stapler, and rolls of masking and painter’s tape for the cardboard. I consider the effort to be a cross between a feasibility study and sales tool; the more accurate the representation, the better the chance of closing the deal.
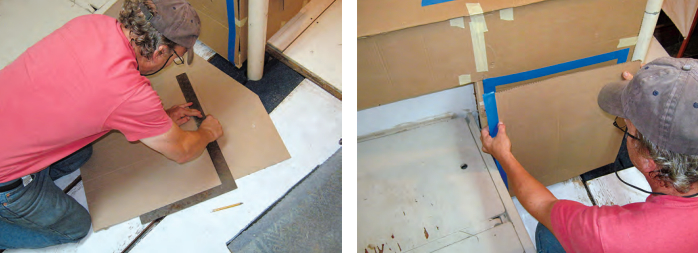
With copies of the half-inch-scale drawings close by, I began by laying out the converted dimensions of the proposed built-ins on the floor using masking tape. I transferred the measurements to the boards, cut them to size, and started screwing things together. I then rough-cut the cardboard, held it in place, scribed and finish-cut the panels, and stapled or taped them to the framework. I used painter’s tape to mark out the sink, appliances, doors, and drawers and labeled them with a marker. I made a cardboard door with tape hinges to check clearances in a tight spot. To simulate the head partition and door, I hung an old sheet — whatever works.
Nancy had not seen the progress for several months. Her approval was an integral part of the process and the mock-up exercise made it possible for her to share in the experience at the most critical time — before it was too late to turn back. The best part is I only invested four hours of construction time to reap the long-term benefits.
Just like Christmas
When the day came to reveal the final mock-up, it felt like Christmas. We climbed aboard and I led Nancy down the companionway stairs. Her eyes lit up with excitement as she headed directly to the sink location, placed both hands on the cardboard countertop and said, “This is perfect.” She could instantly see where the cabinet doors, drawers, and appliances would be located. A glance around, and she knew where the head enclosure was. She had been concerned that the drawing indicated only 20 inches between the bottom of the steps and the facing cabinet. In the mock-up, she could see for herself, full-scale, that the angle of the ladder left plenty of “hip-room.” The experiment had resolved her first concern: she could move around freely in the galley.
We walked through the boat and pretended we were heeling at 20 degrees while sailing to another exciting destination. Nancy used the cardboard countertop to prepare lunch. While we ate, she suggested an overhead rack for the wine glasses and dishes.
It’s great when a plan finally comes together. Since I achieved my goal and received her blessing, it will be easy to take the next step and begin building the cabinetry and do the fun work of personalizing the details she helped envision. Her transformation to “cruising sailor” had taken another giant step forward. The aft-cabin suite is next.
Carl Hansen spent summers in his youth sailing a Penguin dinghy his father built. He graduated to cruising sailboats and now sails his beloved Cal 25-II on Penobscot Bay, Maine. He is restoring a 1976, custom built, 40-foot center-cockpit sloop, a design attributed to Philip Rhodes. He has worked as a musician, European-car technician, home designer/builder, and cabinetmaker, and is currently completing his first novel. Carl lives in Sandwich, New Hampshire.
Thank you to Sailrite Enterprises, Inc., for providing free access to back issues of Good Old Boat through intellectual property rights. Sailrite.com