Protection and lifting handles all in one
Issue 96 : May/Jun 2014
When my husband, David, suggests I do some sewing, it’s usually for a project he’d really like to have done and one I’d rather not tackle. I’m a reluctant seamstress. When, after a sufficient delay, he further suggests that I should show him how to sew, it gets my hackles up and I begin the project. So it happened that he wanted a cover for the new outboard we’d just bought for the dinghy and I eventually set about making one.
As the new 4-horsepower Yamaha outboard was exactly the same as the one it replaced, I thought we could use the old cover. It was a loose-fitting affair that tied underneath and worked just fine when the motor was mounted on the stern rail on Nine of Cups. This was not, however, the type of cover David wanted this time. He envisioned a cover that fit snugly, had a built-in lifting harness, and could be left on permanently. The cover would protect the motor from UV and the usual bumps and dings it receives during normal use, and it would make lifting and lowering it easier. This was a tall order.
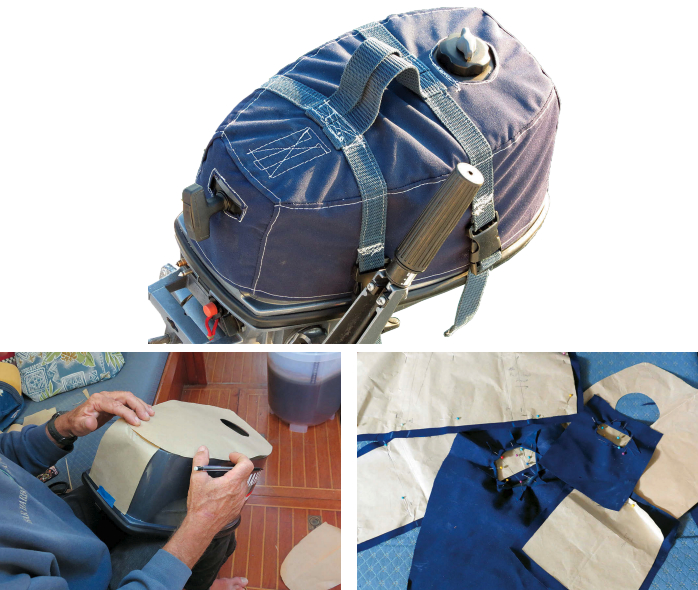
I needed a pattern. As long as the captain was so specific in his request, I figured he should make the pattern. Being an engineer, he’s a much better (more precise) patternmaker than I am. He placed rectangular pieces of oversized brown craft paper on four sides of the engine plus the top and drew the actual outline of each side on the pieces of paper, making sure each location was marked accordingly. He cut them to size, taped them to the engine to check the fit, and drew in cutouts for items such as the pull cord and fuel fill. He also marked where the lifting harness was to be attached. I now had a template from which to work.
Recycled cover
The old outboard cover was oversized, made from Sunbrella, and still in reasonably good shape. It made sense to reuse that fabric since there was enough of it and nothing would be lost if I messed up. I pinned David’s pattern to the fabric and traced it, adding 1⁄2 inch extra fabric for a seam allowance on all sides and an additional 1⁄2 inch on the bottom edge to allow for a wider hem. So far, so good. When I let it sit for a few days, David offered to set up the sewing machine and I banished him from the boat.
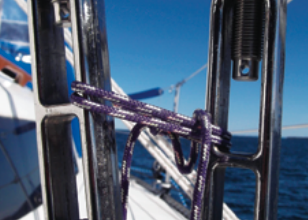
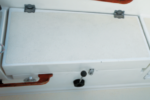
I tackled the cutouts first, finishing them before I sewed the two sides to the top. This allowed me to work on a flat surface when attaching the lifting straps. With a wax pencil, I’d marked the spots on the sides and top where the hoisting straps would go. I salvaged old heavy-duty webbing (previously used to retain jerry cans on deck) as straps and sewed them in place from side to side over the top. For a handle, I sewed a double-wide loop the size of David’s hand in the center of the top, overlapping the two hoisting straps, and reinforced the areas around the handle with triple stitching. I sewed buckles on one end of each strap and left sufficient excess at the other ends so the straps could be cinched tight. This would, in theory, hold the cover in place and provide the support needed to accommodate the weight of the engine.
Sewing the end pieces into place was a bit frustrating. The odd, contoured shapes of the engine’s back and front made the sewing process a challenge, but with patience (of which I have little) and several trials, I finally completed the fit to the satisfaction of the captain. I hemmed the bottom edges and called it done.
A little readjustment
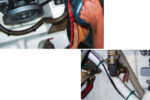
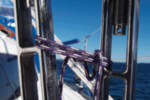
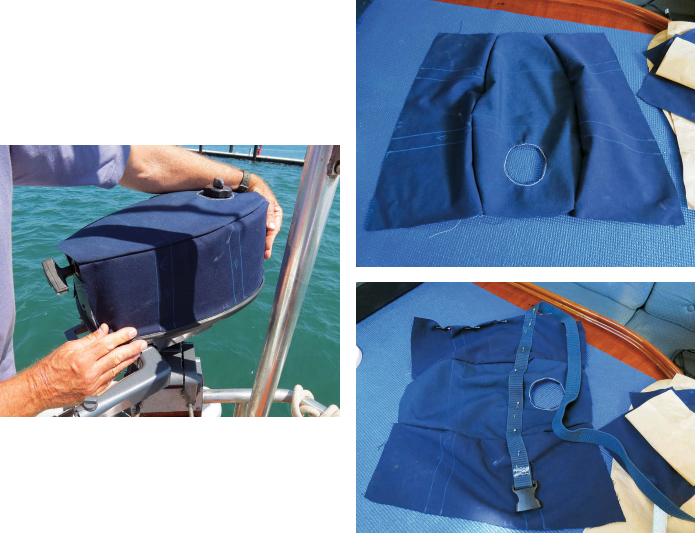
The big test came when we fitted the cover over the engine, buckled it into place, and cinched it tightly. David put a rope through the handholds, lifted the engine up, and lowered it to the dinghy. Oops! Even though the buckles and straps were tight, the fabric could not support the weight of the engine. It bunched up and looked as if it would pull out with very few “lifts and lowers.” Back to the drawing board.
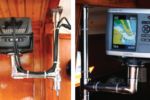
We decided that the straps and handles needed more reinforcement. Now that the cover was sewn together and the straps in place, it was more difficult to maneuver. However, without ripping it all apart, I managed to sew additional pieces of webbing onto the underside of the fabric, attaching it firmly to the webbing strips on the top. Had we anticipated this problem, this step would have been much easier to do while the pieces were still flat and before I sewed the handle in place.
Despite the hiccup, the final product with beefed-up reinforcement was acceptable and does the job. I hope it will last as long as the new engine. I hate do-overs.
Marcie Connelly-Lynn and David Lynn have lived aboard their Liberty 458 cutter, Nine of Cups, since 2000 when they sold up and sailed off. They have since put more than 70,000 nautical miles under the keel, visiting more than 30 countries on five continents, and are currently cruising the coast of western Australia. They post a daily blog at www.justalittlefurther.com and maintain a website at www.nineofcups.com. Marcie’s new book, Nine of Cups: Caribbean Stories, is available as an ebook at Good Old Boat’s downloads site: www.audioseastories.com.
Thank you to Sailrite Enterprises, Inc., for providing free access to back issues of Good Old Boat through intellectual property rights. Sailrite.com