Banish bugs at the point of entry
Issue 96 : May/Jun 2014
Like most sailors, I hold a healthy respect for Mother Nature and accept most of what she has to offer as an interesting challenge. Storms, tides, and headwinds are all part of a sailor’s day. There is one exception — the midnight mosquito attack. I’m a light sleeper and, by spending most nights on the hook while cruising, I already sacrifice enough precious hours of sleep to checking our position or responding to boat movements in shifting winds in the night. Mosquito attacks simply have to be minimized.
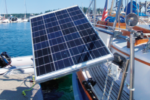
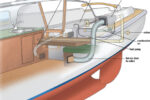
The recent project of replacing the overhead panels in our C&C 37 provided an opportunity to look inside the Dorade boxes, and I noticed that the cowl vents were essentially scooping mosquitoes out of the air and directing them belowdecks. In the original design, a pair of small screened openings in the overhead liners let air from the Dorades flow into the cabin. The screens were aluminum and had corroded through. What’s more, there was also no easy way to reduce airflow on cold damp days. The shortcomings with the existing system got me thinking about more elegant and functional solutions.
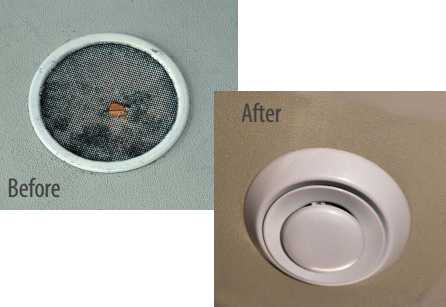
To replace the interior vents, I found some 4-inch PVC air diffusers at a hardware outlet. The diffusers look great, allow airflow to be restricted or even shut off, and are made entirely of non-corroding materials. Their drawback is that they do not include insect screens. However, instead of just capping the back sides of the diffusers with screening as before, I wanted to block out insects at the source. The original screens blocked mosquitoes from entering through the overhead liner panels, but did not prevent determined mosquitoes (and they are tenacious) from finding a path around the back of the liner. The solution was to bar them entry at the exterior openings, the cowl vents themselves.
The design
This project had to meet the usual list of design criteria: corrosion-resistant, aesthetically pleasing, functional, and durable. For aesthetic reasons, I wanted the screen installation to be hidden. To be functional, the screening had to be installed into the bases of the cowl vents themselves. To ensure durability and corrosion resistance, I chose fiberglass mosquito netting along with PVC and stainless-steel components. The trick would be to come up with a way to anchor the netting to the bases of the cowl vents. The design inspiration came from C&C Yachts.
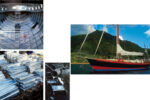
C&C built a quality line of racer/cruisers from the early 1960s through the mid-1980s and, while the company was respected for numerous innovations, owners who do their own maintenance are often amused by the occasional “re-purposing” of simple components to uses for which they were not intended. Simple screws used for sail slide stops and rubber stoppers used as flexible spacers are a couple of examples. In my case, I needed something that would clamp a pre-formed mosquito-netting cap inside the cylindrical base of the cowl vent.
My solution was to re-purpose a stainless-steel hose clamp by turning it inside out so the tightening screw was on the inside. After tightening it so it fit inside the base, I could then loosen the clamp to expand it and secure the screen cap against the inside of the base. I was careful to avoid applying too much force on the hose clamp screw (as it was not designed to be used in this way) and the completed design worked perfectly. The result was pleasant nights without the company of unwelcome intruders.
Step by step
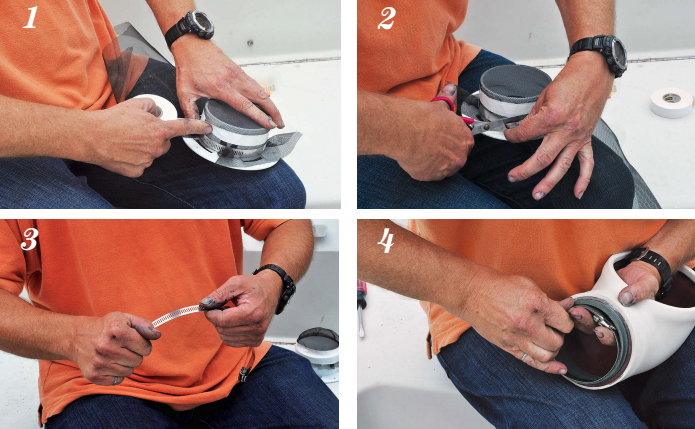
The first step was to form a “cap” of mosquito netting. You could use the outside of your cowl vent, but I used a short length of 4-inch pipe as a form. The smooth surface made it easy to slip the completed cap off the form.
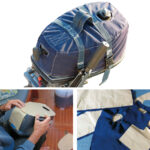
Fit an oversized patch of netting over the end of your form and lightly secure it some length along the form with your hose clamp, leaving enough room for a ring of electrical tape. Make a couple of loose turns around the clamped netting with the electrical tape. Hold down the end of the tape firmly. I found that the tape stuck well to itself, but it did not stick well to the netting (PHOTO 1).
Trim the formed cap with scissors, then loosen and remove the hose clamp. Once the hose clamp was removed, I added a second ring of tape to the base of the cap to hold the screen in place more securely (PHOTO 2).
I found that it was best to leave the cap on the form until all the parts were ready to be inserted into the cowl vent base. This kept the tape in place and the shape of the cap intact.
The next step is to prepare the hose clamp for insertion. Loosen the hose clamp all the way and turn it inside out. Try to reverse the bend in the hose clamp strap to better match the shape of the cowl vent base (PHOTO 3).
Realign the hose clamp ends and pick up the threads while turning the screw with a screwdriver or nut driver. Roughly tighten the hose clamp to match the size of the inside of the cowl vent base. Work the shape of the hose clamp in your hands to make it as round as possible. It’s tough to shape the hose clamp under the tightening screw and I didn’t find this was necessary. Test the fit and size of the hose clamp to make sure it’s an easy fit inside the base of the cowl vent (PHOTO 4).
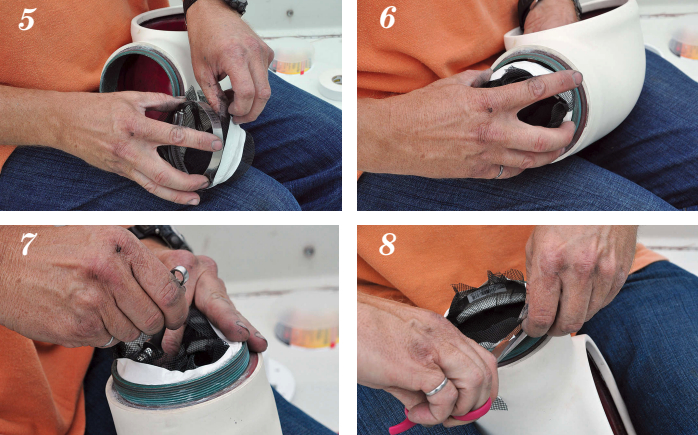
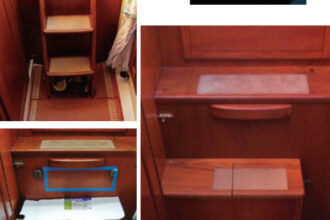
Now you’re ready to fit the netting cap and the reshaped hose clamp into the cowl vent base. I tightened the hose clamp screw a couple of additional turns to loosen the fit. Gently push the netting cap off the form. Then quickly insert the hose clamp into the cowl, pushing against the ring of tape.This is a bit tricky, as you have to take care not to force the tape off the netting (PHOTO 5).
Position the hose clamp snugly into the cap, then insert the complete assembly into the base of the cowl vent with the top of the cap facing upward (PHOTO 6). This will allow access with the wrench from the bottom to expand the hose clamp screw to secure the assembly in place. (Remember, this is the loosening direction.) Be careful not to over-loosen the screw as the hose clamp may spring apart (PHOTO 7).
Trim loose netting from around the base so it won’t interfere with the threads (PHOTO 8).
The final step is to reinstall the cowl vents. Goodbye, mosquitoes.
Mark Baker is a semi-retired electrical engineer who was introduced to sailing 35 years ago when he worked in Kingston, Ontario, commissioning and rigging yachts. Mark and his partner, Ann, moor their 30-year-old C&C 37 in Rhode Island, which serves as their coastal cruising base each summer. By completing upgrades each year, they hope to prepare 3Cats to serve as their winter home in three years’ time.
Thank you to Sailrite Enterprises, Inc., for providing free access to back issues of Good Old Boat through intellectual property rights. Sailrite.com