Solo voyager fits out a mini-lifeboat from a Fatty Knees dinghy
Issue 39 : Nov/Dec 2004
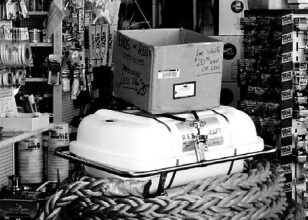
I am a sailor who believes we have no business sailing offshore for recreational purposes if we do not make ourselves as self-sufficient and safe as possible. Once you’re offshore, if trouble strikes you must have a Plan A backed up with a Plan B (and at times a Plan C). For me, Plan A is to have a reliable life raft tough enough to take the challenges of the sea with its harsh environment. Plan B is having some method of making headway toward land. Floating with the sea currents, setting off flares, or waving a T-shirt at distant ships does not appeal to me.
An inflatable life raft is a safe haven of sorts, but it’s not really meant for long-term living, and it is no more than its name proclaims: a raft. A vessel you can propel forward and steer is a boat. I decided to put together a “lifeboat.”
There are many reasons why a sailor would get into a life raft. The assumption is that the mother ship is sinking and all attempts to prevent its demise are exhausted. If an inflatable life raft is all you have, you should stay with the mother craft as long as possible, since it’s easier for rescuers to spot. On the other hand, if you have equipped yourself with a lifeboat/sailing dinghy, you have a hand in your own rescue. Staying with the doomed sailboat becomes just another option.
Took their advice
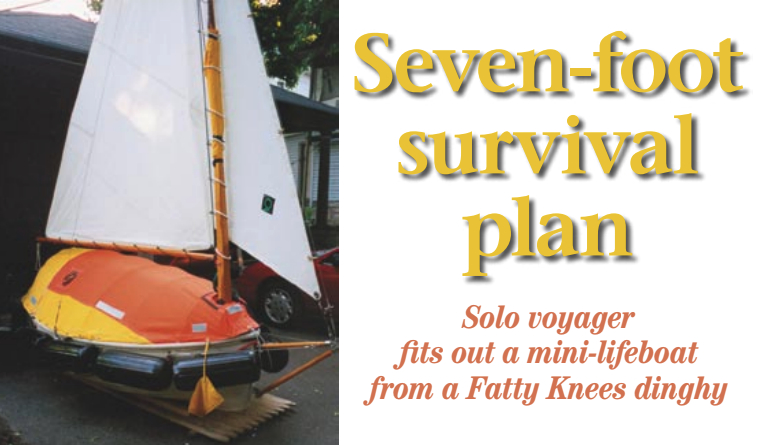
I read most of the books by Lin and Larry Pardey and took their advice in choosing the 7-foot Fatty Knees as a lifeboat. I borrowed their fender-arrangement idea also. Each fender (8x 20 Taylors) provides a little more than 25 pounds of flotation. Having 10 fenders adds 250 pounds of positive flotation to the boat.
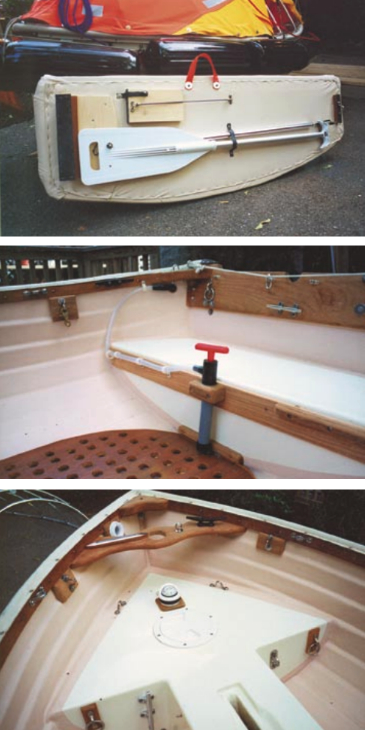
The fenders are attached to the dinghy with large stainless-steel eye straps installed back to back with large washers. These washers are mounted over teak backing plates. The eye straps on the inside of the vessel give me multiple places to clip on equipment. Everything on the lifeboat has its own little lanyard and snap-shackle. There is an easily accessible strap, ring, or cleat to place a lanyard or tie a line everywhere you look. Inside forward, I placed a large stainless cleat with a backing plate. I can tie my 8-foot para-anchor there. Along with the para-anchor is a 200-foot 3-strand 1⁄4-inch line.
Most of my provisions will be stored in the large forward compartment. I estimate I can squeeze enough food in this dry compartment for 50 to 60 days. I also mounted a compass aboard. This is indispensable if one is able to make headway.
I made up a floor from 3⁄4-inch plywood to help avoid saltwater sores. I also installed a small bailing pump and mounted four large watertight storage bags on the transom.
Depending on how long I might be out on the sea in this small vessel, I find it vital to stay healthy and alert and to fend off fatigue. So I installed a narrow sleeping bench that snaps into place. This will make it possible to sleep on a flat dry surface. This project was assembled with a solo sailor in mind, of course, although two or three people would have some relative comfort aboard.
Learning experience
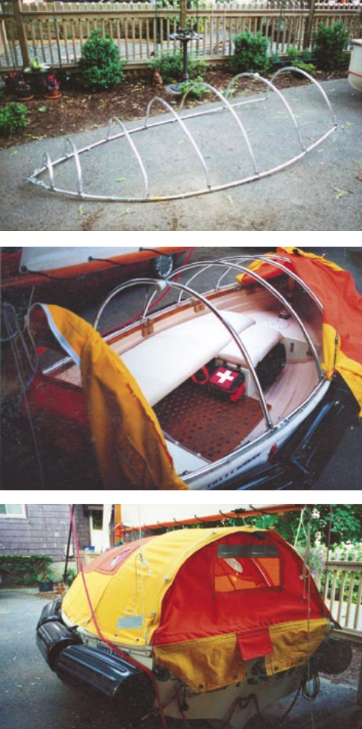
The canopy top was assembled with aluminum tubing. I used a standard electrical conduit bender. Bending the tubing was a “learning experience” that had me making repeated trips to the marine store for more tubing. The tubing can be broken down and stored in a long bag with the dinghy mast, sails, board, and rudder.
I used Sunbrella for the cover. After wasting yards of material while teaching myself how to sew, I had to settle for a two-color look and buy yellow cloth. The distributor had run out of orange. I have since learned that a liner should be added to the inside of the raft to cut down on incoming light. If I had to do this project over, I would make the ports much larger and place one facing forward. The material is fastened to the tubing with eyelet socket and stud snaps. I wanted optimum strength so the lifeboat could take a breaking wave or rollover.
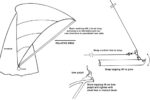
The rigging was the fun part. I modified spars from another sailing dinghy. I added two swept-back side stays running to the top of the mast and a forward stay. I even assembled a small bowsprit so I can use a jib to keep the dinghy closer to the wind and increase my options for landfall.
Outfitting
Most life raft manufacturers barely consider long-term survival. They expect you to be rescued in short order. I intended to make long-term self-reliant survival possible. The gear list in the sidebar includes most of the things I will be carrying on a solo trip I’m planning to make to the Madeira Islands with stops along the way in the Canaries, Cape Verde, and the Caribbean.
Once the lifeboat is lifted over the lifelines and into the water, it will be tethered to the mother ship with a snapshackle and a large 3-inch stainless-steel ring. All items that are not already on the lifeboat will be tethered to this ring before being tossed into the lifeboat. If an item falls into the water, at least it will be securely lashed to the dinghy for hauling inside once I’m aboard. I will even tether myself to the ring before attempting to board the lifeboat. Every bag already inside the dinghy will be attached with a short permanent line.
That’s my plan for salvation. If you think the accompanying life-raft gear list is long, you should see my boat’s list of gear and provisions.
Lifeboat inventory
Food and drink
- Five-gallon jug of water, along with some small bottles down in the hold
- Vitamins
- Laxative (dried prunes)
- Canned food (especially fruit)
- Dried fruit, raisins, chocolate (for watching my sodium intake and very little protein)
- Cheap canned soups with lots of broth
- Spoon, fork, can opener(s)
- Fishing gear
- Watermaker (Pur Company, small hand held called Survivor 06)
- Plankton net
Signals
- Small personal strobe
- VHF
- Signal mirror
- Three smoke flares, 5 or 6 rockets
- Pistol with 12 shells
- Small radar reflector (only works with a sailing rig)
P.S.: In case you’re wondering, I will not be carrying an EPIRB. The entire idea, after all, is to save myself. I will carry flares, rockets, and a radio to signal passing traffic. But I will carry nothing to initiate a land-based rescue.
(Note: Some long-distance sailors believe it’s not fair to request or expect rescue by shore-based rescue teams. For this reason they do not carry an EPIRB. We understand and respect this decision, but must nevertheless endorse the use of all means possible to enable the rescue of a vessel and crew in distress, including the use of an EPIRB. First do what you can to make the voyage safely, eliminating the need for rescue. Then do what you can to make rescue possible, quick, and effective should it become necessary. –Ed.)
Navigation
- GPS
- Bearing compass
- Binoculars
- Chart of area
Safety
- Life jacket (should have been wearing it)
- Para-anchor and 200 feet of line
Other provisions and supplies
- First-aid kit including seasick meds and eye drops
- Sunscreen
- Change of clothes
- Sunglasses, hat, rain gear (at least the pants, since I may be sitting in a wet boat)
- Space blankets
- Pen flashlight
- Dental floss, toothbrush (paste not needed; water is sufficient)
- Rubber gloves (to make it easy on hands for rowing, handling the para-anchor line, just keeping them dry)
- Small hacksaw
- Duct tape, small roll
- Notebook
- Pencils
- Spare batteries for VHF, light, strobe)
- Wire ties, string
- Sewing needles
- Small notebook with calendar
- Passport and $100 cash
- Dry towel (in dry-clothes bag, a small cloth cooler)
- Knives
- Leatherman tool
Lifeboat equipment
- Oars
- One paddle (the longer the better.)
- Small bailing bucket (large enough to be used as toilet)
- Rudder, board, all spars, and sailing gear
Thank you to Sailrite Enterprises, Inc., for providing free access to back issues of Good Old Boat through intellectual property rights. Sailrite.com