 An old galley gets a new view
Issue 128: Sept/Oct 2019
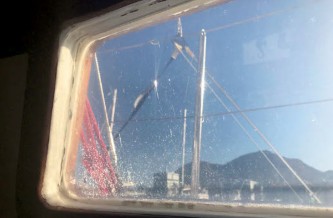
“Take a look at all these small cracks in the window, it looks like frost.”
“I don’t think the Sea of Cortez gets frost, Hon,” was my wife’s distracted response.
“Just take a look.”
Heidi put down her book and stepped up to the galley window.
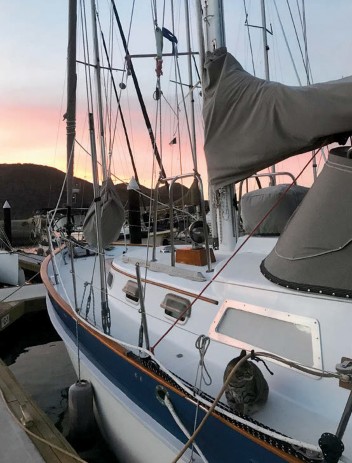
“I don’t see any frost or cracks.” “You’re too short, trust me, they’re there.” We had just experienced sunup in a quiet anchorage aboard Cetus, our 1980 Fantasia 35, and the light illuminated all the cracks and crazes on the main galley windows. “We’ll need to do something about that, soon.”
I’m sure I heard Heidi mumble, “Oh no, here we go again.”
Even having owned and sailed Cetus for nearly a quarter century, replacing the main cabin windows had somehow never made it onto the many lists of things to repair or replace. We got close, making simple teak window frames in 1994 to cover the screws and washers that attached the windows to the cabin (obviously not a factory installation). After several offshore passages and the ensuing years, the teak frames showed their age.
The old and worn topside gelcoat had long ago been covered with polyurethane paint, that we recoated only a year ago. So before removing the exterior window frames, I carefully scored around the frame edges with a razor knife to ensure that when I pulled the frames off, topside paint wouldn’t come with them.
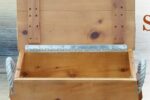
Next, I drilled out the bungs covering the screws that held the teak frames in place. A small fabricating shop in a nearby town was noted for their work with aluminum, so we made the decision to scrap the teak and go with new low-maintenance brushed-aluminum frames. Knowing the old frames would make very accurate templates, we took our time during removal to keep them intact.
Under the teak frames, the screws attaching the old acrylic windows to the cabin sides were hidden by globs of silicon, but once exposed they were easily removed. When I removed the last screw attaching one window, it fell out on to the deck.
Well, that could explain the leak.
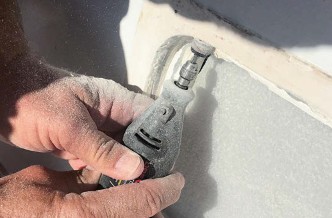
Of course, the toughest part was cleaning off the globs of old silicone that were left after the windows and frames were removed. Razor blades, a Dremel tool, and sandpaper were the tools of choice. Here I must acknowledge our neighbors’ patience during the three-day clean-up phase of this project because they endured hours of the dental-drill sounds from the Dremel, the fingernails-on-chalkboard sounds of scraping, and the moans and groans from me as I painfully contorted my body to complete this work. Eventually, I removed all the silicone and left behind was a clean recessed edge onto which the new bedding compound would have no trouble adhering.
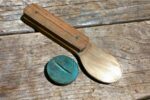
One of the challenges of completing a DYI project in a small Mexican town is the difficulty we sometimes encounter trying to find a source for the materials we need. This brings us to butyl tape, a synthetic rubber-based sealing material that comes in a roll, and in a variety of sizes and thicknesses. I have bedded deck hardware with butyl tape and it’s proven to be a great alternative to caulk, with half the mess. I was hesitant to use something that I knew little about and that might need replacing sooner rather than later.
So, my mission was to find some butyl tape. After dropping the old teak frames off with an aluminum fabricator, I spent the rest of a day searching at hardware stores, auto parts stores, and a glass shop for butyl tape. I came home empty handed. Then, I was surprised and relieved to find that a fellow cruiser, right across the dock from us, had a whole roll on board that he was happy to let us use. The gifted tape was just what I was looking for: ½-inch wide, about 1⁄16-inch thick, and a nice grey color. Another problem solved.
Before starting this project, I assumed the small local glass shop would stock something like Plexiglas, but I came to find there was nothing even close. This was about the time I conceded that my planning of this project, in terms of local availability of materials, was lacking.
Then I got lucky, again. The fabrication shop we were working with happened to have an employee coming down from San Diego with some supplies for the shop and the owner was able to catch him before he crossed the border. My window material was on its way.
With the frames still a week away from being finished, and the window material somewhere between Cetus and the Mexican border, there wasn’t much to do but wait. That’s when it began to rain — hard, for a week! I couldn’t put the old windows back in because I’d been careless and dropped and broken one, but our neighbors happened to have two new shower curtains they donated to our cause. Taped over the openings, they did the job, but I don’t think the marina manager appreciated the new look; he visibly cringed at our boat as he walked the docks.
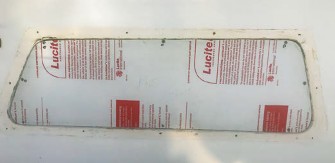
Then the rain stopped, the Lucite (another brand of plexiglass) showed up, and we were back in business. I cut the windows from the Lucite using a jigsaw with a very fine blade, and then sanded the edges smooth. I cut the glass just a wee bit smaller than the original all around to allow for any expansion caused by the summer heat.
Next, I carefully drilled eight 3⁄16-inch holes in the windows, three across the top and bottom and one on each side. These holes are slightly larger than the screws to again allow for expansion. Though the butyl tape has strong adhesive properties, I felt more comfortable adding the mechanical fastening screws. Before inserting the screws, to seal the holes, I wrapped each one with some of the tape.
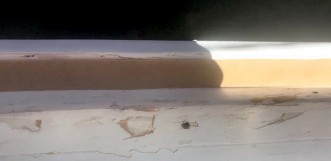
The window opening on the cabin side has a 1⁄2-inch recessed lip that the window sits against. After a thorough washing with alcohol, I placed the sticky tape around this lip taking great care in making sure the ends of each individual strip of tape made solid contact with the adjoining strips to avoid any leaks. A razor blade worked well in cutting and fitting the corners. With the window recess lined with the tape, it was time to remove its paper backing.
I carefully placed the first window in its opening, lining up the screw holes using a couple of toothpicks stuck in two of the holes. It was clear to me that removing a misaligned window would not be fun, so we took our time. I inserted and hand-tightened each screw, then tightened them with a screwdriver until we could see there was full contact between the tape and the window, all the way around. We now had no need for our very attractive shower curtains.
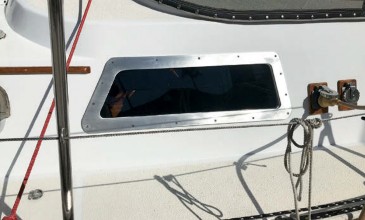
A couple days later, the window frames were finished. The teak frames we’d installed almost 25 years ago were 1 ¾-inch wide. For these new frames, and we again used toothpicks to help with alignment and again wrapped the screws with the butyl tape and drove the screws home so that the butyl just started to squeeze out the edge of the frame.
As the frames are attached to the cabin side, and because the recess the Lucite is bedded in is deeper than the Lucite is thick, there is a slim gap between the window and frame that I filled with silicone. One benefit of this deep recess is that it allowed me to use pan-head screws on the Lucite window. Had I countersunk the holes for these screws, I’d have increased the chances of cracks forming around those holes over time.
I didn’t countersink the six holes I drilled for the window because doing so could lead to cracks from either over tightening or expansion and contrac- tion. The pan-head screws holding the window just barely touched the back of the frame, creating a narrow gap between frame and the window. This I filled using silicone.
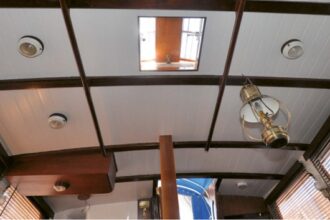
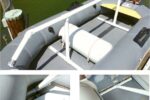
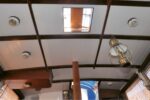
Then we were finally able to remove the protective cover from the Lucite and we were both amazed at how clear the view had become.
“Not bad for a couple of weeks work,” I said out loud.
“It’s been a month,” said Heidi.
Lessons Learned
As with all DIY projects, there is a learning curve. As we complete projects, we realize which techniques and materials worked better and made the project easier or improved our outcome. In the hope that they help someone tack- ling something similar, following are a few of the conclusions we drew from this project:
-
Gather all parts and materials before starting, especially if you are in an area where things aren’t readily available.
-
In purchasing the window mate- rial, we would next time do more research on the types of mate- rials available. Some materials are very restrictive regarding what can be used to clean them, which could be a problem.
-
It’s possible that the reflective sunshade material that we (and others) use to cover the plastic windows from the inside, may heat them up to the point that it accelerates the crazing. We now use a white closed-cell foam sun shield that doesn’t radiate heat.
Terry Kotas and his wife, Heidi, have lived and traveled aboard sailboats for most of the past 30 years. They are currently enjoying Mexico’s Sea of Cortez while planning and readying their Fantasia 35, Cetus, for their next South Pacific adventure.
Thank you to Sailrite Enterprises, Inc., for providing free access to back issues of Good Old Boat through intellectual property rights. Sailrite.com