A classy English lady gets a facelift
Issue 44: Sept/Oct 2005
ONCE EMBARKED ON A LIMITED REFIT project on your classic cruiser, you will surely be tempted to carry on until she is transformed into the boat you dreamed she could be. Somewhere along that path you come to comprehend that on an old boat, each seemingly simple job begun inevitably leads to three more complex jobs.
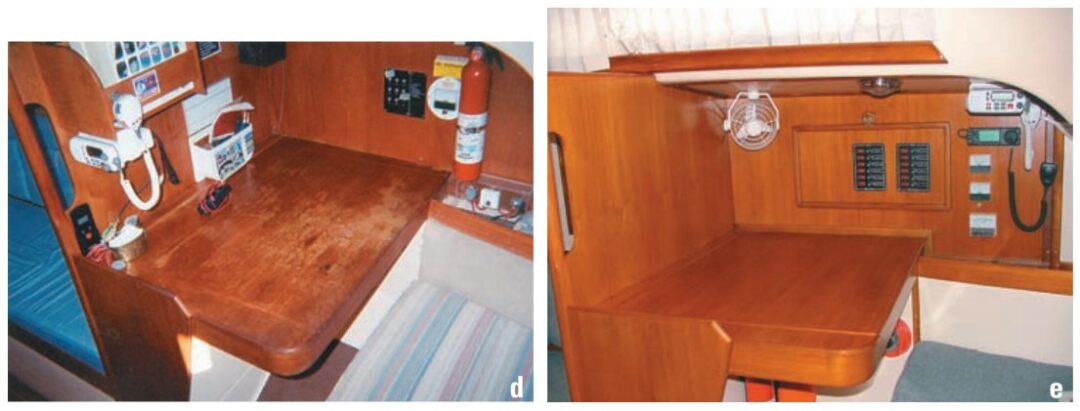
An example of this effect is when we pulled down saloon headliners to reach the fasteners to rebed leaking deck fittings. With the headliners down, it was a good opportunity to install added overhead lighting and enlarged Dorade vents. Then it seemed a shame to reinstall those old sagging, discolored, vinyl-covered headliners. Better to replace them while they’re down and the tools are out. If going for new deckhouse headliners, we might as well replace the other headliners under the decks and in the forward cabin to match. If we’re going that far, now’s the time to add some storage lockers in place of that unwanted pilot berth, since the new headliners under the sidedeck can easily be shaped to fit around the new locker cabinets.
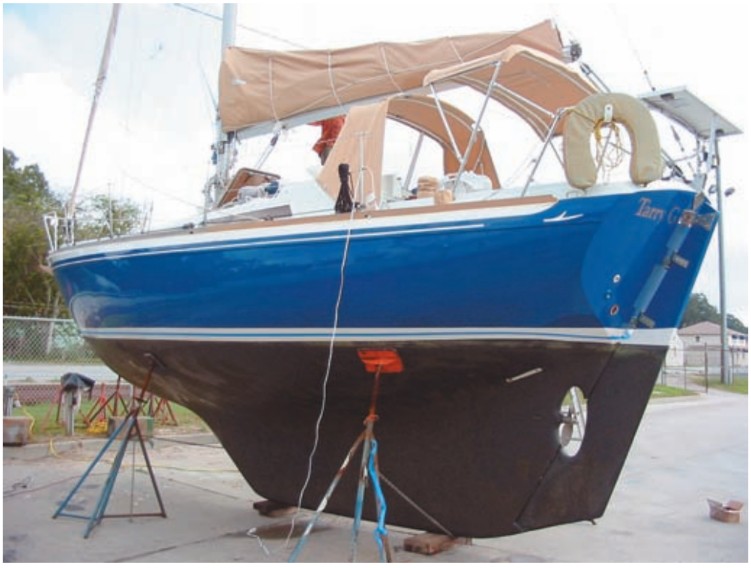
Thus began, step by step, the interior overhaul project on a 1982 Nicholson 31 located in Brunswick, Georgia. Her owner, Jeff Fletcher, works full-time running his mortgage company in Atlanta. For this reason, he asked me, along with my wife, Mei, to upgrade the boat’s essential systems and get her ready for extended cruising vacations. As individual jobs were completed, Jeff found this was his best opportunity to customize Echo with features unavailable in the one-style-for-all reality of a production boat.
With the maintenance and upgrade work nearly complete on the rigging, sails, deck hardware, plumbing, electrics, and other mechanical systems, we moved on to some more creative work, refinishing and customizing the boat’s interior.
Jeff originally thought the teak-faced plywood bulkheads and cabinetry were in such a damaged state with cracked varnish, holes, scratches, and discoloration that we should cover them with Formica. However, closer inspection after stripping and revarnishing some sample areas showed most of the teak veneer could be saved. Besides, covering all these teak surfaces in laminate would subtract from the interior’s rich, natural look. It was problematic as well. The fine cabinetmakers at the legendary Camper & Nicholsons yard made skillful use of what they had. But their economy in using thin strips of teak trim glued onto edges of panels and doors meant that the trim would be broken in the process.
We worked out a scheme whereby we stripped and revarnished the navigation table and most bulkheads. Then we replaced the teak plywood locker doors in the main cabin with solid teak louvered doors backed by Formica-covered panels surrounded with generously thick teak trim.
Added locker cabinets
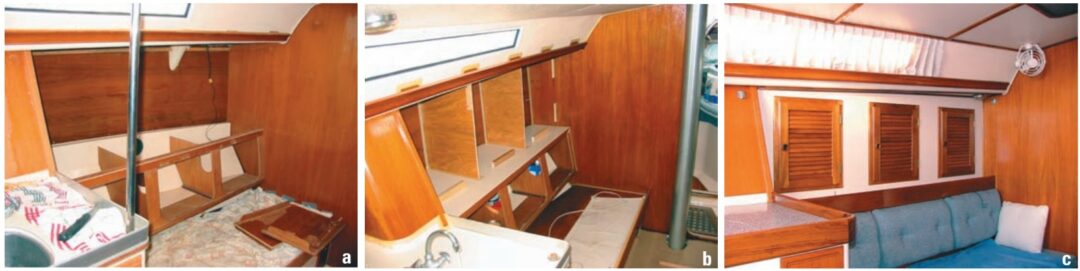
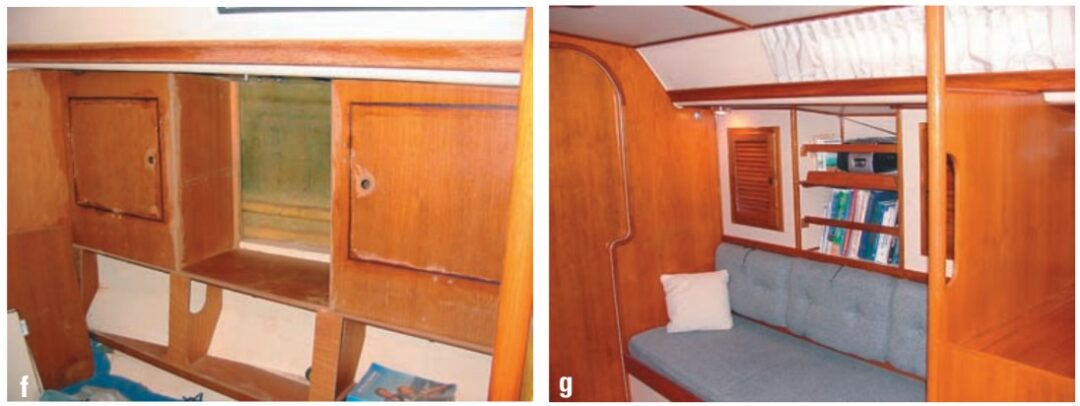
Since Jeff had no plans for bunking six people at a time (six people living on a 31-foot boat?), the pilot berth above and outboard of the port saloon settee was an obvious place to convert to storage lockers. Unfortunately, the converging lines of the settee backrest, the cabinhouse sides and sidedeck, and the adjoining curved galley layout meant there were few right angles to work with. Using a cardboard mockup, we worked out a simple cabinet layout consisting of three lockers behind a single vertical panel with a narrow shelf between it and the settee backrest.
To begin, we removed the pilot berth cushion, its plywood face board, and the berth’s canvas bottom, replacing it all with a bottom of 3⁄8-inch-thick cabinet-grade plywood covered on top with Formica. Similar plywood composed the new front panel cut to fit from the cardboard template. We ordered five sets of teak louvered doors and frames, sized 20 inches high by 15 inches wide — along with separate offset hinges, elbow latches, and finger holes — and assembled them ourselves. We set three of the door frames in position on the front panel, traced them, and cut out their mounting holes. Then we set the front panel in place and marked it for the position of the locker shelves and dividers. One locker was left without a shelf for stowing bulky items or for use as a video locker.
We installed the locker dividers and shelves with 1-inch x 2-inch oak framing. We screwed short pieces of oak framing onto the back of the front panel where needed for mounting support and then laid the panel face down on the back of a sheet of Formica. As with the locker bottom panel, we traced the Formica roughly 1⁄4-inch oversize all around and cut it out with a fine-toothed blade on a jigsaw. Laminates are prone to chipping or cracking when cut like this unless they are well supported under the cutting edge. We set up a makeshift cutting table on the dock using a half sheet of plywood supported by boxes. Cutting the laminate oversize makes alignment easier during cementing and reduces the chance of chipped edges intruding on the finished panel. In any case, teak trim over all edges covers any corner chips or joints with less-than-perfect fit. When it was important that the edges of the laminate be smooth and straight, we clamped the laminate to a piece of plywood that acted as a cutting guide for a small router with a straight-collared bit.
Contact cement
We cleaned the face of the plywood panel and back of the laminate with acetone and coated them with contact cement. When dry to the touch, which took about 10 minutes under the Georgia sun, we laid plastic Venetian blind slats on the dry glue of the laminate and set the panel in position on top of the slats. Then we pulled the slats out one by one, beginning in the center and working out toward the edges. Don’t try cementing laminates without slats or dowel rods; the tenacious grip of contact cement gives you only one chance to position it correctly. Once glued, the panel was turned over and the laminate locked in place by hammering a cloth-covered block of wood slid slowly over the entire surface. Following this, we cut out the locker door frame holes and trimmed the laminate flush to the panel edges with the straight-collared router bit. With care, a belt sander or medium-grit sanding disc on an angle grinder can also be used for this work.
All the interior locker plywood was given three coats of varnish, and a 1 1⁄2-inch-high teak fiddle was glued to the front edge of the locker shelves. Then we screwed the front panel into place from the back to its frames. The exterior edges were trimmed in teak quarter-round molding. The long narrow shelf between the settee backrest and the new cabinets received a 1⁄2-inch-thick by 4-inch-high teak fiddle rising 2 1⁄2 inches above the shelf counter. We varnished all doors and teak trim after the other projects were completed.
We installed the other two teak louvered door sets on the existing starboard locker cabinets at each end of the central bookshelves. The old cabinet’s plywood doors were lower but slightly wider than the new doors, so we removed the hinges and latches, epoxy-glued the doors in place, ground the thin teak trim flush, and cut out the correct hole size for the new doors. We made paper templates for the exterior surfaces of the cabinet/bookshelf panels, then traced them onto the Formica, which was cut and glued to the old plywood panels as we had done on the port locker face using plastic slats as separators during fitting. All five cabinet door frames were later secured from the inside with aluminum brackets so they could be easily removed for varnishing. The teak corner moldings were fit and tacked in place with brass finishing nails. The double bookshelf was given removable teak retainers as well as hooked elastic straps needed to keep books from sliding about in a seaway.
Working around the liner
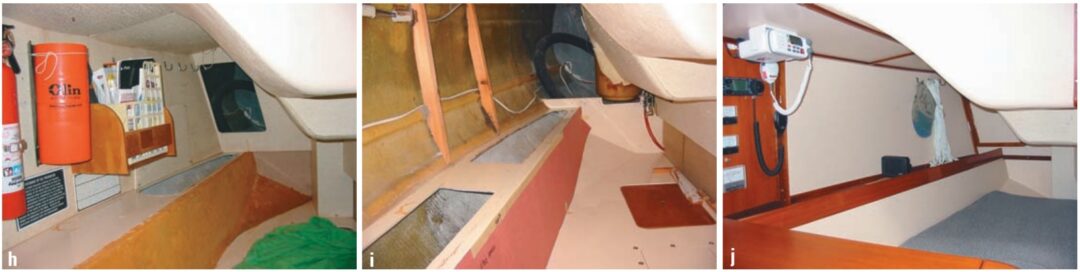
Parts of the interior hull liner, such as the sides of the V-berth and quarter berth, were covered in a fabric resembling outdoor carpeting. In cold climates it offers some insulation. People seem to like its appearance and sound-deadening qualities, and it is cheap and easy to install. It’s also difficult to clean or dry and a terrific home for dust and mold. I avoid using it and was relieved when Jeff agreed to have it replaced with Formica. Once we removed the old carpeting and its disintegrating foam backing, we washed the fiberglass liner surface with acetone and abraded it with a coarse sanding disc. We made paper templates and cemented the Formica in place. Bending the standard counter-grade laminate to conform to the slight curves on these surfaces presented no problem. We trimmed the edges with teak quarter-round molding.
I have a special loathing for those prefabricated fiberglass hull liners that save on production costs but block access to vital areas of the hull. The way most liners are installed, it’s impossible to reach many parts of the hull and extremely difficult to later add collision bulkheads within the hull’s lower lockers where they are most needed. If boats were constructed with a combination of fully accessible lockers, collision bulkheads, and areas of rigid foam flotation between the liner and hull, hull liners would be an asset to sailors and not just the builder.
The hull liner in this Nicholson 31 formed a shelf outboard of the quarter berth. Under the shelf was a 6 1⁄2-foot void with a small access hole and a narrow slot open to another inaccessible area behind the battery box liner. We converted this into a storage locker by cutting two large access holes in the top of the shelf, fitting them with removable latching doors, and installing a plywood locker bottom. Inside this locker was an ideal location to install the new amateur radio. The radio’s low-profile, detachable control panel was mounted nearby on the instrument panel below the marine VHF.
Part 2 of the story of the Nicholson makeover will follow in the November 2005 issue.
Heroes — Jeff Fletcher
“My heroes have always been sailors.
Still are, it seems.
Gladly in search of and two steps ahead of themselves and their beam-reaching dreams.”
With apologies to Willie Nelson
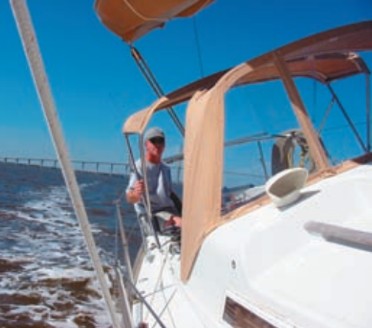
Living in a time when the true heroes of our world are fighting overseas, perhaps it’s too much of an overstatement to call sailors heroes. Words such as “admired” and “respected” are just as suited. I have had the good fortune of having my sailboat refitted by a hero of mine. When I needed help, James Baldwin, as luck would have it, was on the East Coast not far from where my boat was berthed.
When I purchased a 1982 Nicholson 31, the boat itself — other than a few cosmetics and cruising items — was exactly the boat I had yearned to own for many years. I think all boatowners have an image of how our ideal boat should look and what equipment we long for. The mere thought of transforming a 20-year-old boat into my vision was a daunting task. Law school and a career in the mortgage business did not equip me with the skills necessary. Enter James Baldwin and his wife, Mei.
Take an engineer’s attention to detail, a craftsman’s skill, and a long-distance sailor’s experience, then finally blend them all together with a romantic’s love of the sea and an unselfish willingness to share all he knows … and you have James Baldwin. When you add the sharp mind, easy laugh, and loving touch of Mei to the mix, the team emerges, able to jump a boat refit (or anything else they choose to tackle) in a single bound.
I am in awe of their refit and transformation of my boat into one that I am proud to own. Thank you, James and Mei.
When he learned that James Baldwin’s article about the refit of the Echo would be published, Jeff Fletcher wrote this note to the editors. James was not aware of this small addition.
Thank you to Sailrite Enterprises, Inc., for providing free access to back issues of Good Old Boat through intellectual property rights. Sailrite.com