New non-skid restores good looks and safe footing
Issue 67: July/Aug 2009
Anyone who owns an older boat, or is considering the purchase of one that’s in need of some renovations, has wrestled with the problem of worn or faded non-skid surfaces on the decks. The options for repair include artificial materials glued to the deck, paints, and coatings.
Our Mariner 40 ketch, Sea Trek, recently passed the 30th anniversary of the laying of her keel. We had lived aboard and cruised her extensively since we purchased her more than 17 years ago and the repairs and renovations were ongoing from the beginning. While she had not been abused, simple cosmetic repairs — like redoing the teak trim — were time-consuming.
Our plans were twofold: bring her back to like-new condition, and make her as safe and comfortable as possible for offshore and coastal cruising. One of our goals was to do the repairs or renovations ourselves. That way, we would save money and improve our skills and knowledge at the same time. We would also know the work was done to our expectations.
After a few short cruises on Chesapeake Bay, we came to the conclusion that Sea Trek’s non-skid was non-skid no longer. The finish was badly faded and worn. We began to explore how we might rectify this in an affordable way.
We first tried the easiest and most obvious solution; we decided to paint the non-skid surface in a color similar to the original and keep the surface texture. We chose Awlgrip paint for its toughness and ease of application, adding a flattening agent to remove the high gloss and make it less slippery.
This looked great, but the reality was that when we were under way and the deck was wet with rain or breaking seas, we still had to crawl when going forward because we had such a hard time keeping our footing. It was time for plan B. There is always a plan B.
A lucky find online
More research turned up several expensive and labor-intensive options. Going this route would delay our cruising plans, and we’d need a fair amount of free time to complete the project. Almost by accident, we came across a post on a cruisers’ website about a product called Tuff Coat, sold by Ultra Tuff Marine, that could be painted on the deck, came in different colors, and was touted as a true non-skid that would not break the bank.
The manufacturer claims the product is used in industrial applications and by military and commercial shipping. More web research brought very positive feedback. Best yet, it fit into our budget.
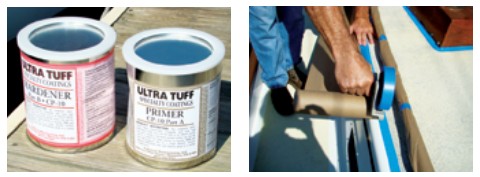
For the square footage we needed to cover, we calculated we’d need three gallons of Tuff Coat. We decided to order four. An epoxy primer recommended by the manufacturer was also needed, so we ordered a gallon, plus the special rollers for applying it.
Prep is everything
The process was a bit more time-consuming than we had anticipated. As with any project of this type, the preparations are important and take up the most time. The first step was to remove hardware from the areas to be painted. Some items, such as handrails, we chose to leave in place because their removal would mean taking down interior headliners and panels.
Once we’d removed the deck hardware, the next requirement was to thoroughly sand the surface to be covered with 40- to 60-grit sandpaper. Needless to say, this did a number on our painted surface and almost completely smoothed out the texture on the non-skid areas. We had to be very careful not to sand into the adjoining painted surfaces. Did I mention that we had Awlgripped the entire boat from the waterline to the masthead?
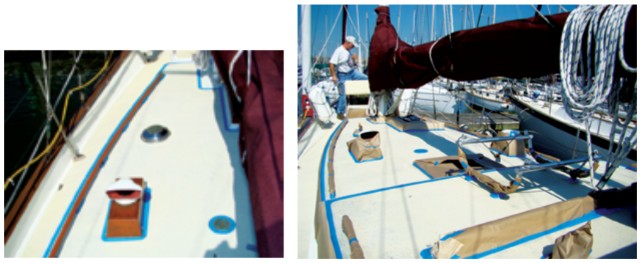
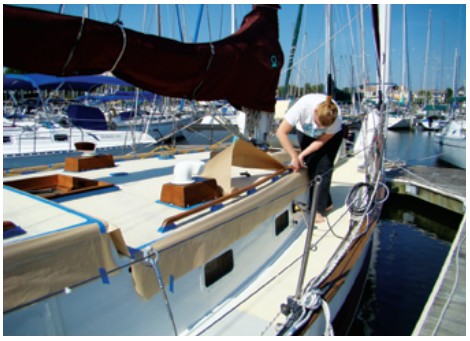
After we’d completed the sanding, we cleaned all surfaces with soap and water, then taped securely around the painted areas and whatever fittings were left behind. Making rounded corners and odd shapes required some effort. Following that, we added a strip of 9-inch masking paper to the taped strips to protect surrounding areas from splatter. Getting all of this ready took much longer than actually painting on the coating.
Once all of the taping was finished, we laid on the first coat of primer. This was delivered in two parts that must be mixed in the correct proportions. The primer must be used as soon as it is mixed; it cannot be kept very long, even in a closed container. We were able to mix enough to cover all of the decks on the first pass. The primer has a consistency a little thicker than milk, and only a light coat was needed. We applied it easily using a small paint tray and a 4-inch foam brush. The primer needs a 24-hour drying period, but there is no need to sand the primed surface prior to applying the top coat.
Uniform texture
The final finish is applied in two coats using a special foam roller that gives the surface a uniform textured look. In areas the roller can’t reach, the coating can be dabbed on with an ordinary brush. The coating contains suspended particles and requires thorough mixing throughout the process. We used an electric drill with a mixer attachment to get a good mix in the can. We laid the first coat down in strips of about 3 feet rolled on alongside each other but not overlapping.
Complete coverage is not important at this point; keeping the roller moving in the same direction is. Once an area of about 9 square feet has been covered, it’s important to roll the coating at a 90-degree angle to the first application and to work this in until uniform coverage is achieved. Total cover is still not important yet, but a uniform texture is. We got the technique down in a short time. We continued with this process until we’d covered all the non-skid areas.
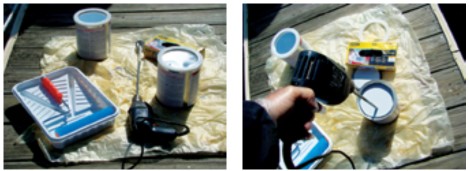
Once the first coat is dry to the touch, it’s time to apply the second coat. It’s important that this be done quickly and that the previously applied coating not be left until the next day.
By the time we were finished with the first coat, it was dry enough we could turn around and begin the second. The process for this coat is the same as the first, except now it is important to get complete coverage. It took us a total of three hours to cover Sea Trek’s decks with two coats.
As soon as we’d completed the second coat, we removed the paper and tape. Leaving the tape in place too long can make it possible for the tape to pull the coating off at the edges when it’s removed. We had to be a bit acrobatic for this part of the project because we were trying not to walk on or lean into any coated areas.
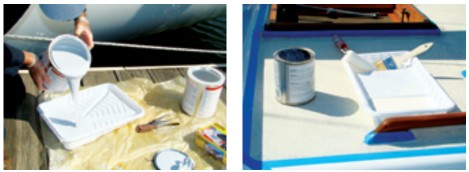
Time to cure
Once all of the tape and paper was removed, we had to stay off the decks for several hours. After that, we could walk carefully on the surface in socks or on bare feet. Ideally, we wanted to stay off for 48 hours to give the entire surface plenty of time to cure.
The final step was to re-install and re-bed the hardware that we had removed. Any time we remove and re-install hardware on the decks, we soak the fastener holes with thinned epoxy to completely seal the deck core so it can’t leak or absorb water if the bedding fails.
One of the big challenges in this project is protecting the decks from water for 48 hours. Besides planning carefully around the weather, you have to persuade your dock neighbor to not hose his own deck and create accidental overspray. One of our concerns was the possibility of dew forming on the surface. We waited until there was no rain in the forecast and the relative humidity was projected to be low. This can be difficult with a boat sitting in the water. Perhaps the best approach would be to do this project on the hard or in a shed with a controlled environment. As it turned out, we had no problems.
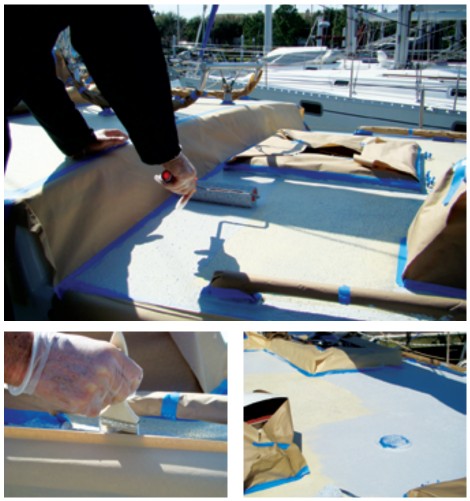
The finished result looked fantastic — better than we expected. By taking our time during the preparation and application process, we were able to get a good-looking uniform texture that rivaled or bettered many factory finishes. Now, the entire surface is indeed a true non-skid that does not seem to be affected either by water or by the kind of footwear worn or lack thereof. It appears to be rugged and has held up to anchoring, piling chain up on the foredeck, and whatever else we have done in the normal process of sailing our boat.
The time we invested from start to completion was about three days. How long the finish will hold up and how long it will continue to look great only time will tell. For now, we are very optimistic and would recommend this option to any boaters contemplating a non-skid project of their own.
Chuck Baier is a licensed USCG Captain and marine service technician. He and his wife, Susan Landry, lived aboard and extensively cruised Sea Trek for 17 years. They recently sold Sea Trek and are now working hard on Beach House, a Marine Trader 34.
Thank you to Sailrite Enterprises, Inc., for providing free access to back issues of Good Old Boat through intellectual property rights. Sailrite.com